How to Save Energy in the Summer

Most people expect higher energy costs in the summer. We crank up the air conditioning to get out of the sun; the kids are home from school and spend all day on their electronics; and, when you finally convince them to play outside, you find yourself washing extra loads of bathing suits, beach towels, and muddy clothes. The warm weather comes with a price. But, with a little preparation, you can manage your energy use wisely and cut down on your bill. We’ve shared 7 tips below that will help you use less energy in the summer and save you valuable money on your utilities.

1. Wash with Cold or Warm Water

 Avoid using hot water whenever possible. Because 90% of the energy used by your washing machine goes toward heating the water, doing your laundry on either the cold or the warm cycle will save you a tremendous amount of electricity. When you’re done, take advantage of the warm weather and dry your clothes outside instead of putting them through the dryer. You’ll both save energy and avoid raising the temperature of your home with heat-generating appliances.

(Hint: the same logic applies to dishes as well. Use cold water and let them air dry instead of running them through the drying cycle.)

2. Be Smart with Your Thermostat

It feels good to blast the AC after getting home from a workout, time spent outside, or just a generally sweltering summer day. But it probably won’t feel so good later when you see that your utility bills have skyrocketed. Keep in mind that for every degree you raise your thermostat above 72º, you save up to 3% of your cooling expenses. Try setting your thermostat to 78º, or as high as your comfort allows.

When you’re away from home, set the temperature even higher or, if it’s not too hot, turn it off altogether so you don’t waste air conditioning on an empty house. If you install a smart or programmable thermostat, you won’t have to go through the trouble of manually changing the temperature each time you leave. These thermostats will automatically adjust your home’s climate control while you’re away.

3. Keep Your Home Easy & Breezy

Another easy way to cut down on cooling costs is by using fans. Ceiling fans are great for cooling an entire room, and many homes already come equipped so there’s no purchase necessary. Even if you don’t have one, portable fans are inexpensive and readily available at any home goods or big-box store. A good fan will allow you to raise your thermostat 4º while maintaining the same level of comfort. If you don’t mind the light breeze, go ahead and lower the temperature on your AC because fans can be very effective.

4. Consider LED Lighting

After you’ve blocked out the sun, you might find yourself turning on more lights than you normally do. Be careful which lights you choose, though, because incandescent bulbs actually turn 90% of the energy they use into heat. Consider replacing your incandescent bulbs with LED bulbs, which operate at a lower wattage and produce only half as much heat. LED bulbs also use 75% less energy and last 50 times longer than traditional bulbs, saving you money on electricity and replacement costs.

5. Use the Barbeque

Trying to cook in a hot, steamy kitchen can be unbearable, especially when it’s hot and steamy outside as well. Kitchens are full of heat-producing appliances: ovens and stoves can raise your kitchen’s temperature up to 10º. To save yourself the sweat (and the higher utility bills), try using the microwave whenever possible since it uses just one-third the energy that an oven does and produces only a fraction of the heat. Another great way to take the heat out of the kitchen is to cook outdoors. Pop some burgers on the grill or invite some friends over for a barbecue. You can enjoy the great weather while you avoid raising the temperature in your home.

6. Keep Track of Your Electronics

When you place heat-generating devices such as lamps or TVs near air-conditioning thermostats, you can trick them into thinking the room is hotter than it really is. Your thermostat will sense the heat from these devices and spend extra energy trying to cool the house down. Be mindful of where your thermostats are and try to keep electronics away from them. Devices like computers, curling irons, hair dryers, stereos, and televisions heat up your house as well, so make sure they’re turned off when they’re not being used.

7. Keep the Sun Out and the Cool Air In 

The summer sun is great for tanning, great for your mood, and great for beaches, picnics, and sunsets. However, it’s not so great if you want to keep your house cool. Sunlight coming through your windows will heat up your home, causing you to spend more on air conditioning. Try drawing the blinds during the hottest parts of the day, especially if your windows are facing south. You can open your windows again at night when it gets cool; this will allow you to turn off your air conditioning. Just don’t forget to close them again in the morning to trap in the cool air.

Also, if you’re planning to invest in landscaping, keep in mind that trees provide great natural shade. Strategically placed shrubs, trees, and vines can block sunlight from your windows, roof, and walls, saving you $100 – $250 per year in cooling costs.

Being a Homeowner: Pros & Cons

Homeownership has always been part of the American Dream. Because of that, many people accept owning a home as the right, even obligatory thing to do without considering the benefits and the risks. If you are contemplating buying a home, you should know and review the pros and cons of the investment you are about to make—as you would any investment decision—before signing on the dotted line.

Pros:

The Tax Cuts and Jobs Act’s Effect

The Tax Cuts and Jobs Act, passed in December 2017, made substantial changes to the parts of the tax code that have to do with homeownership. Unless a future Congress amends the law, all provisions will expire after Dec. 31, 2025. But for now, changes in that law have reduced the value of owning a home.

The law limits mortgage interest deductions to $750,000 of total mortgage debt, including for a first and second home and any home-equity or HELOC loans. The previous limit was $1,000,000 in mortgage debt plus an additional $100,000 in home-equity debt.

There is an exception allowing $1,000,000 in total mortgage debt if you bought your home on or before Dec. 14, 2017. This provision even applies if you refinance that older mortgage. Home equity loan interest is only deductible if the money is used for substantial improvements to the home on which you took out the loan. Previously, interest on up to $100,000 was deductible no matter how the home-equity money was used.

The law also set the SALT deduction limit to $10,000. Previously, all SALT payments were deductible, unless you were subject to the alternative minimum tax.

Other new provisions include restrictions on claiming casualty losses except for federally declared disasters. The moving expenses deduction no longer exist except for the active-duty military moving for reasons of work.

All these changes have lowered the value of owning a home—including the fact that, with the doubling of the standard deduction (another feature of the Act), fewer people will have enough deductions to file Schedule A instead of taking the standard deduction. So the fact that you are eligible for a tax deduction does not mean that it will end up being useful to you. The severe limiting of the SALT deduction will be particularly detrimental in lowering available deductions for people who live in highly taxed states.

Attractive Long-Term Investment

Appreciation represents the increase in home values over time. Real estate prices are cyclical, and homeowners shouldn’t expect the property’s value to increase drastically in the short-term. But if you stay in your home long enough, there’s a very good likelihood you will be able to sell your home for a profit because of appreciation later in the future.

Despite some dramatic dips, such as that in 2008-10, residential real estate tends to rise in value. According to the Federal Reserve Bank of St. Louis, the average price of sold houses in the U.S. rose from $340,400 in Q3 2014 to $380,300 in Q3 2019—a 10% increase in value over five years. Go back a decade, when the average home fetched $274,100 (Q3 2009), and you have a 28% increase. That’s not a bad return on an investment that also provides you with a place to live.

Consider a home that is rundown and dilapidated to the point that it’s uninhabitable. The land underneath the home may still be worth a significant amount of money—more than the residence, in this case,. A seller may consider selling it as is—with the structure still intact—or spending a little extra to demolish the home and sell the land at a higher price on its own.

Capital Gains Exclusion

Eventually, you will sell your home. When you do, the law allows you to keep the profits and pay no capital gains taxes. Well, not necessarily all the profits. There’s a tax-free profit of up to $250,000 for single homeowners and $500,000 for married couples. This is for your main residence only—not for a second home or vacation property.

There are a few requirements you need to meet in order to qualify for this exclusion. You must own the home for at least two years—24 months—within the last five years up to the closing date. The residence requirement dictates that you should have lived in the home for at least 730 days, or two years, during the five-year period leading up to the sale. The final requirement, the look-back requirement, outlines that you didn’t profit from selling another primary residence during the two-year period leading up to the most recent sale.

Tax Deductions

After appreciation, the benefit of homeownership that is cited most often is tax deductions or savings. When you buy a home, you can deduct some of the expenses of owning that home from the taxes you pay to the government. This includes mortgage interest on both your principal residence and a second home, which can amount to thousands of dollars per year.

Interest on home-equity loans or home-equity lines of credit (HELOCs) is also deductible if the funds are used to substantially improve your home.

You can also deduct up to $10,000 in state and local taxes (SALT), including property taxes.

Home equity represents the difference between how much you still owe on your mortgage and the market price or value of your home. Home equity and appreciation may be considered together. As noted above, your home is likely to grow in market value over time. Your equity also grows as you pay down your mortgage, with less of your payment going toward interest and more toward lowering the balance on your loan.

Building equity does take some time because it takes time to lower the principal balance owing on the mortgage loan—unless, of course, you make a large down payment or regular prepayments. One thing to keep in mind, though, is that the length of time you have your home is a big factor in how much equity you build and the appreciation you can realize. The longer you keep it, the more equity you obtain.

As you pay down your mortgage and reduce the amount you owe, without realizing it, you are saving as the value of your home is increasing—just as the value of savings account increases with interest. When you sell, you will likely get back every dollar you paid out and more, assuming you stay in your house long enough. Over time the average 6% return (interest rate) on your savings should more than
cover your outlay.

Another plus: Home equity provides flexibility to get a loan that is tied to the amount of your home equity. Many investors follow their home equity and home appreciation simultaneously. If an investor believes their home value is greatly appreciating they may put off a home equity loan to have a better opportunity to realize seller’s appreciation.


Cons:

Illiquidity

Unlike stock, which can be sold within a matter of days, homes typically take much longer to unload. The fact that you may have access to $500,000 in tax-free capital gains doesn’t mean you have ready access. Meanwhile, you still must make mortgage payments and maintain the house until you sell it.

High Upfront Costs

The cost of investing in a home can be high—there’s more to your expenses than the property’s selling price and the interest rate on your mortgage. For starters, you can expect to pay anywhere from 2% to 5% of the purchase price in closing costs. Some of the most common closing costs include an application fee, appraisal fee, attorney fees, property taxes, mortgage insurance, home inspection, first-year homeowner’s insurance premium, title search, title insurance, points (prepaid interest), origination fee, recording fees, and survey fee.

Experts say you should plan to stay in your house at least five years to recover those costs.

Pride and Financial Responsibilities

One often-cited benefit of homeownership is the knowledge that you own your little corner of the world. You can customize your house, remodel, paint, and decorate without the need to get permission from a landlord.

Ownership comes with responsibilities, however. You must pay your mortgage or risk losing your home and the equity you’ve built. Maintenance and upkeep are your responsibility. You can’t call the landlord at 2 a.m. to have a leaky water pipe repaired. If the roof is damaged, you must repair it—or have it repaired—yourself. Lawn mowing, snow removal, homeowners insurance, and liability insurance all fall on you.

Potential Depreciation

Not all homes grow in value. The housing crisis of 2008 resulted in many homeowners being underwater, which means owing more on your mortgage than your home is worth. It doesn’t take a housing crisis for home prices to stagnate or drop. Regional or local economic conditions can result in home values that don’t keep up with inflation.

Remember, as well, that the actual structure you live in will depreciate over time. This can be due to wear and tear on the property, or a lack of maintenance and repairs.

The Bottom Line

A home is an investment that comes with many investment benefits but also risks, which makes it an investment that is not for everyone. Weighing the investment benefits against the risks is important. A rational comparison of pros and cons can help you decide whether to put your money into a home investment or potentially find better returns elsewhere.

How to Organize Your Home

There’s no right way to organize your home. Whatever strategy you choose just has to work with your lifestyle, habits, and tastes. But there are a few tried-and-true strategies that can enhance the effectiveness of any system. From being aware of clutter hot spots to identifying red flags that your organizing method isn’t working, we learned some smart approaches to getting organized from the pros so you can save the time, money, and stress that come with living in a den of disorder.

1. Take a step back.

Often clutter becomes such a fixture, you look right past it. For a new perspective, imagine you’re a guest in your own home. Take note of things a visitor would notice that you’ve been ignoring, like the paper pile that has claimed the corner of the kitchen counter for months or the blankets strewn all over the couch. Then, refresh the room back to its original state by eliminating what’s making it appear disorganized. Still not seeing the junk? Snapping a picture of the room will force you to view your space through a different lens.

2. Make it easier to put things away.

“It always surprises me how difficult people make organizing for themselves,” says Kate Brown, certified professional organizer and owner of Impact Organizing LLC. Her suggestion: “Make everything a one-handed operation.” For example, don’t hide your laundry basket in the back of the closet. Instead, use an open bin that you can throw your clothes into from across the room. “And avoid lids at almost all costs,” she urges. Using open containers for things you use often like toiletries and cooking supplies makes it easier to put them away. This advice even applies to garbage cans. Brown recommends investing in one with a lever you can step on to pop the lid open. “The fewer steps, the better the organizing system,” she says.

3. Arrange items according to how frequently they’re used

Keep the items you use every day in plain sight—or at least at eye level. “The things you use daily should be the easiest to get to,” says Lowell. “While the things you use once in a while should require a step stool.” This is where high shelving comes in handy. “Things you use only once a year should require a ladder,” he adds. (Think attics or out-of-reach shelving in a garage.) Not only will this storage system make it easier for you to find the things you use often, but the items you don’t use regularly will stay organized until you need them.

4. Don’t buy storage containers until you’ve purged.

“When people want to get organized, the first thing they usually do is run out and buy storage supplies,” says Julie Isaacs, a professional organizer and founder of Uncluttered Home. “But that’s actually backwards.” The point, she explains, is to evaluate why you have so much stuff to begin with—not find new ways to house your junk. “You won’t have any idea of what you really need in terms of containers or shelving until you’ve purged.” While deciding what to keep and what to toss, always remember the “80/20 rule.” “It’s the theory that most of us only use 20 percent of what we have. That’s a good starting point to realizing you are surrounded by a lot of things you probably don’t need,” Isaacs says. Plus, not only will slimming down your stuff save you money on storage supplies, but it’ll save you the headache of going through excess items in an emergency or last-minute situation.

5. Eliminate clutter hot spots

Flat surfaces like your dining room table, entryway table and kitchen counters tend to accumulate piles faster than any other spot in the house, explains Isaacs, who advises clients to make clearing all flat surfaces part of their nightly routine—right along with washing their face and brushing their teeth. But if that doesn’t work, her last-ditch trick is to physically block any surface that has become a clutter haven. “For instance, if you put a flower arrangement in the middle of the dining room table and set it with placemats, you’re sending the message that the space is no longer a dumping zone,” Isaacs says.

6. Don’t treat drawers like catch-alls.

“There isn’t a drawer in your house that should not have container organizers in them,” says interior decorator Christopher Lowell, author of Seven Layers of Organization. They can be any material you want—wood, wire mesh or clear plastic—and are available at most home goods stores. “This allows you to separate the drawers into defined areas for specific things verses throwing everything into one big space,” says Lowell. For the bedroom, store everyday items—like underwear and socks—in top drawers, workout clothes in the second or third drawers and pants in the bottom drawers. In the bathroom, keep cotton swabs and other daily use items on the counter within arm’s reach, and tools you use occasionally under the cabinet. “With the things you only use now and then separated out and away from the things you need every day, those daily essentials will be better organized and easier to get to,” Lowell says.

7. Store a discard bag in the closet.

“I keep a shopping bag with a handle in the front of my closet. Every time I try on a piece of clothing and then take if off again because it’s unflattering, doesn’t fit, is pulled, stained or out of style, I put it in the bag,” Brown says. “If you’ve taken the piece of clothing off for any reason other than that it’s dirty or doesn’t match, that means it’s not right and will probably never be,” she says. When the bag is full, Isaacs explains, donate the clothes or trade them with a friend at a swap party.

8. Be picky about items in your home

Think carefully about what you allow into your home. Consider your needs before accepting hand-me-downs or agreeing to store a friend’s kayak for the off-season. If shoes aren’t your size, skip ’em. If you do have space to hang on to something temporarily, set a pickup date so your basement doesn’t become a free storage unit.

9. Sort smartly

When you’re ready to roll up your sleeves and take on an organizing project, follow these steps to restore (and keep!) order: First, do it in one shot. Set up a staging area, like the dining table, then empty whatever you’re organizing so you can spot doubles, giveaways, and must-saves fast. Then use organizers like clear containers and baskets without lids so you can quickly access what’s left of your pared-down collection. Lastly, label everything—even if you think you’ll remember, mark boxes and bins with easy-to-read descriptions so there’s no second-guessing later on.

10. Set limits for everything.

Assign things like memorabilia and craft supplies to a single shelf or bin, then let the designated area’s size dictate how much you keep.

11. Use your calendar

Give yourself real motivation to finally hang those family photos by planning to host a dinner party. Or try creating a deadline for the DIY project sitting in your basement. If the date comes and goes, donate the piece and any materials and move on.

12. Learn to make quick decisions.

Trying to determine what can stay and what should go? If at least one of the following statements is true about an item, then it’s a keeper:

I’ve used it within the last year. That’s enough time to have gone through all four seasons and special occasions. If you still aren’t sure, put the item in a “Donate Later” box, seal it and mark it with the date of one year from now. If you haven’t opened it by then, drop off the box at Goodwill without peeking inside.

I need it or I love it. If you don’t, there’s no real reason to hang on to it. Resolve to fill your space only with things that really work, give you pleasure or celebrate your family. Remember that you can’t appreciate what you have if it’s hiding in a dark corner of a closet. You should frame or display what you deem worth holding on to.

It fits into the life I want to live. If something supports you and your future goals (think exercise equipment or a book about starting a business), it can stay. If it’s a painful reminder of the past (think clothes that don’t fit anymore or items that belonged to an ex), let it go.

13. Look for signs that tell your system isn’t working.

If a room still somehow looks messy after you’ve cleaned, it’s time to improve your organizational system, which, according to Brown, should allow you to tidy up in 15 minutes or less. Once you’ve pulled out what you don’t need—to either throw away or donate—the next step is to group things together based on use or occasion and store them in open containers

How to Know If You’ve Found the Right House

It’s normal to be cautious when you’re shopping for a home. After all, a house is a huge investment, and you’ll want to be sure that you’re making the best decision possible. How you’ll know that you’ve found the right property can vary by person. Some people have gut instincts. Others may need more convincing. Some indicators can tell you if you’ve found the right property for you.

It can be as simple as a strong tug because the place reminds you of another in your past where you felt happy, and you’ll realize that right off the cuff. But the tell—or tells—could be a bit more subtle.

    1. You feel defensive about the house. Maybe your agent points out a flaw or two or five and says, “There’s a stain in the kitchen sink” or “I’d update this, this, and this.” It could be a sign that you’re falling for the house if you find yourself getting defensive, sort of like the place is already yours. Just try to keep in mind how difficult (or not so difficult) it will be to remedy those flaws if you eventually find that you just can’t live with them.
    2. You want to go inside the house. Part of the excitement of looking at homes is not knowing which could be your new home when you pull up to the curb. Is it the one on the left, or does the place on the right strike your fancy? If it’s the house on the right and you like it better than the home on the left, that could be a sign. Something about this house appeals to you. First impressions are everything.
    3. You can’t wait to brag about it. Did you already snap a few photos and post them on Instagram? Did you text your mom about the house or hop on that group chat to tell your friends? You might have found the one if you’re feeling excitement after your first tour of the place.
    4. The house embraces you the moment you enter. You’ll know within about three seconds of entering whether the feels warm and comforting. Does it seem to speak to you? Does it invite you to explore? Does it feel like home? If so, it probably is.
    5. You don’t feel funny in the bathroom. Sometimes buyers feel so uncomfortable near a bathroom that they won’t walk into the room. They’ll stand outside, grab the door frame, and poke their heads in for a minute. This is your home if you walk into the bathroom and feel compelled to open the shower door or stroke the vanity marble.
    6. You begin to envision the furniture arrangement. This might be your house if you walk into the master bedroom and can immediately envision your bed against a particular wall. You’re already hooked if you find yourself thinking that the living room window is a perfect spot to put a tree come Christmas. Or maybe you can already see yourself driving up the street, heading home after a hard day at work. There’s a neighbor across the street throwing a frisbee to a dog, and it occurs to you that they might be people you’d like to know. Neighborhood counts as much as furniture placement.
    7. You want to stop looking at other homes. All the other homes you’ve been looking at no longer appeal to you. You compare each new property you visit to this one, and they’re not measuring up. The homes you had previously rated a “No. 2” have now fallen to a “No. 8” rating because they just pale in comparison to this one.
    8. You’re already planning to go back. If you got in the car, chatted with your spouse, and immediately planned your next visit to the property before you even left the driveway, you’re a goner. You want to see it at a different time of day or take your mom or best friend with you the next time. Ask your agent to send over the seller’s disclosures to make sure it’s in top condition. You should probably start discussing offers, too, because you’ve probably found your house.
    9. It checks the most important boxes. The property might not have every amenity on your want list, but it meets the basic requirements. It has the number of rooms and space you need. Maybe it doesn’t have a garage, and you realize in a flash of enlightenment that buying a house with a garage is really not that important after all. You realize you could build a garage if it turns out you really do want one. Sudden urges to be flexible are a good sign that you’re in the right place.

Can You Sleep on It?

It’s important to act fast once you’ve found that perfect property. It might still be tempting to “sleep on it,” but that could be a big mistake.

Shuffle your feet, lose your seat, as the saying goes. It’s almost a given that you’re not the only homebuyer looking for a house with your specific criteria. Someone else could buy that home right from under you while you’re in bed counting sheep.

Housing markets are often highly competitive, so time can be of the essence when you find a property you like.

Most of the time, you can trust your instincts. You should probably submit an offer if you like a property and it’s in your price range. Talk to your agent, your spouse, or a trusted loved one and get guidance if you’re not sure, but acting quick is critical.

Don’t Overlook the Basics

Maybe you don’t want to sleep on it. Maybe you want to call the moving company now. Do be realistic in your fervor to have the house.

Don’t be tempted to slide outside your budget and what housing expenses it can reasonably accommodate. Check out the schools if you have children, and consider how long it’s going to take you to commute to work. Will that grow old if the house is some distance from your place of employment?

A home is a long-term decision. Be passionate…but treat it like one.

Survival Guide for New Homeowners

If you’ve recently taken the home-buying plunge, our survival guide is a must-read that will help you avoid common pitfalls, budget your time and money, and glide smoothly into the joys of owning your own home.

We hope you’ll take away two essential things from this guide: an awareness of what you can expect in the first year of living in your new home, and some sound advice on being prepared for the most important aspects of being a new homeowner.

SET UP YOUR UTILITIES
You’ll need to get all utilities into your name, so make a list and work through it. Call the electric, phone, and gas companies. Contact the county for your sewer and water, if it supplies both. Does the town pick up garbage/recycling, or do you need to contract for that yourself? If you want Internet and broader TV service than an antenna will get you, research your options and start calling for the best bargain. With all the digital entertainment options available, you may decide to cut the cord on cable.

Get on Utility Provider Budget Plans
With so many new variables, the first year in a new house is usually challenging financially. Get on budget plans where you can. Many utility providers will estimate your use for the year, and then break your bills into 12 equal payments. This reduces fluctuations in your charges throughout the year, which can be helpful. Money can feel extra tight after the big move.

Triple-Check Your Billing Address
Make extra sure each service provider has your contact information recorded correctly—down to the last digit of your zip code. If you don’t receive bills due to some administrative error, you may come home to find your water turned off.

PREPPING THE HOUSE… OR NOT
Some work is more easily done before you get all your stuff in the house. If timing and budget allow, consider doing painting or floor refinishing before your move-in date. Do you need help with cleaning? If you want professional help with anything, bundle that into your move-in budget.

Don’t fret if there’s no money left for these things right away. Sometimes it’s better to live in a house awhile before deciding on paint colors, carpeting, or a new kitchen backsplash. A home is a work in progress, and it takes time to get the feel for a new place. Doing too much at once can be overwhelming and can kill the joy of the experience. Feel free to take a slow approach and live in your house as is for six months to a year or more. Who knows—you might just grow to love that vintage 1950s tile in the bathroom and use it as the inspiration for your interior design.

MORTGAGE AND INSURANCE LOGISTICS

Homeowner’s Insurance
If you have a mortgage, homeowner’s insurance was probably required for the loan. But it’s smart to reassess your insurance needs within the first six months of owning your home. You may discover you have too much (or too little) coverage. Once the dust has settled, take a critical look at your policy and solicit a second round of quotes from insurers.

Escrow
Most mortgage companies require your taxes and homeowner’s insurance to be escrowed, which means that the mortgage company totals those expenses, then charges you one-twelfth of the sum each month. (Some mortgage companies allow you to opt out of escrow, for a fee.) If you don’t have escrow, remember to budget for your tax and insurance expenses! If you do have escrow, take pains to make sure that the mortgage company is making all payments on your behalf in a timely manner; after all, it’s your house and your credit that are on the line. Also, double-check the accuracy of the estimate made by your lender’s escrow department. If there’s a shortfall, you can expect a bill for the difference at the end of the year. And if that estimate was way off, the bill you receive could be a real whopper.

GET ACQUAINTED WITH YOUR SYSTEMS

Equipment
If you have a lawn, you’ll need to purchase some lawn-care equipment or hire a landscaping service. Start researching lawn mowers and learn how to use a string trimmer. If you don’t have them already, acquire a rake, shovel, and some pruning tools, at the very least. If you decide to fertilize your lawn, you’ll want to purchase a spreader or hire someone for the job. Your new neighbors should have good references.

Service Checks
Plan to have a service check on your HVAC, hot water heater, fireplace, and/or chimney, and any major appliances that require it. Check any filters, and replace if necessary. In short, evaluate all of your home systems.

Labeling
Go through all the breakers in your electrical box and label them. Label the incoming and outgoing pipes, as well as the shut-off valves, for your water and sewer service. Taking a little bit of time now will make it much easier to diagnose and fix any problems that may arise in the future.

Utility Location
Before you start any new landscaping, call a utility location service to come mark where all your services are in the yard. You do NOT want to break a water main or cut off your electricity while you’re planting a tree or installing a fence. It’s worth making yourself a map to keep on file for reference in the future.

Yes, moving into your first home is a lot of work. But you’ll reap so many rewards—you’re building equity, lightening your tax load, and establishing roots in a community. With any luck, some of those new neighbors will become lifelong friends. Congrats, again, on your new home!

MOVING IN!

Pack
If you’re packing your own boxes, pack them room by room, and label them very clearly, so they can be taken immediately to the right place after being unloaded. Make some quick signs for each room that correspond to the box labels. If you organize your move effectively, with any luck, you’ll be able to park in the garage by the end of the week.

Unpack
Set manageable goals for yourself. You probably have several wonderful years, if not decades, to enjoy your new home, so you don’t need to finish unpacking in one day. Decide how many boxes you’ll unpack each day—one or two is completely acceptable—and stick to that number. If you’ve unpacked them and still have energy, turn your focus to another task, like hanging window treatments or shopping for drawer organizers.

Change the Locks
You can throw out the keys got at the closing—right after you change the locks! You have no idea who has copies of those keys, and it’s better to be safe than sorry. So, before you do anything else, call a locksmith or do it yourself—just do it.

Set Up the Move
Will you hire someone or do it yourself? If you’re hiring movers, get as many references as you can and at least three quotes. Make sure anyone you consider has insurance. If you’re doing it yourself, reserve your truck. Get one that’s slightly bigger—and reserve it for slightly longer—than you think you’ll need. That’s one place you can reduce stress.

Our Most Essential Homeowner Tips

Congratulations! You’ve just purchased your first home. Buying a home is a smart investment and offers a lot of benefits for you and your family. But owning a home also comes with a few disadvantages, like not being able to call your landlord when something goes awry.

But don’t worry. We have some homeowner tips and tricks that will help you prepare for those surprises and maybe even save you a few dollars down the road.

Use these new homeowner tips to make your transition to property owner a little smoother.

1. Invest in New Tools

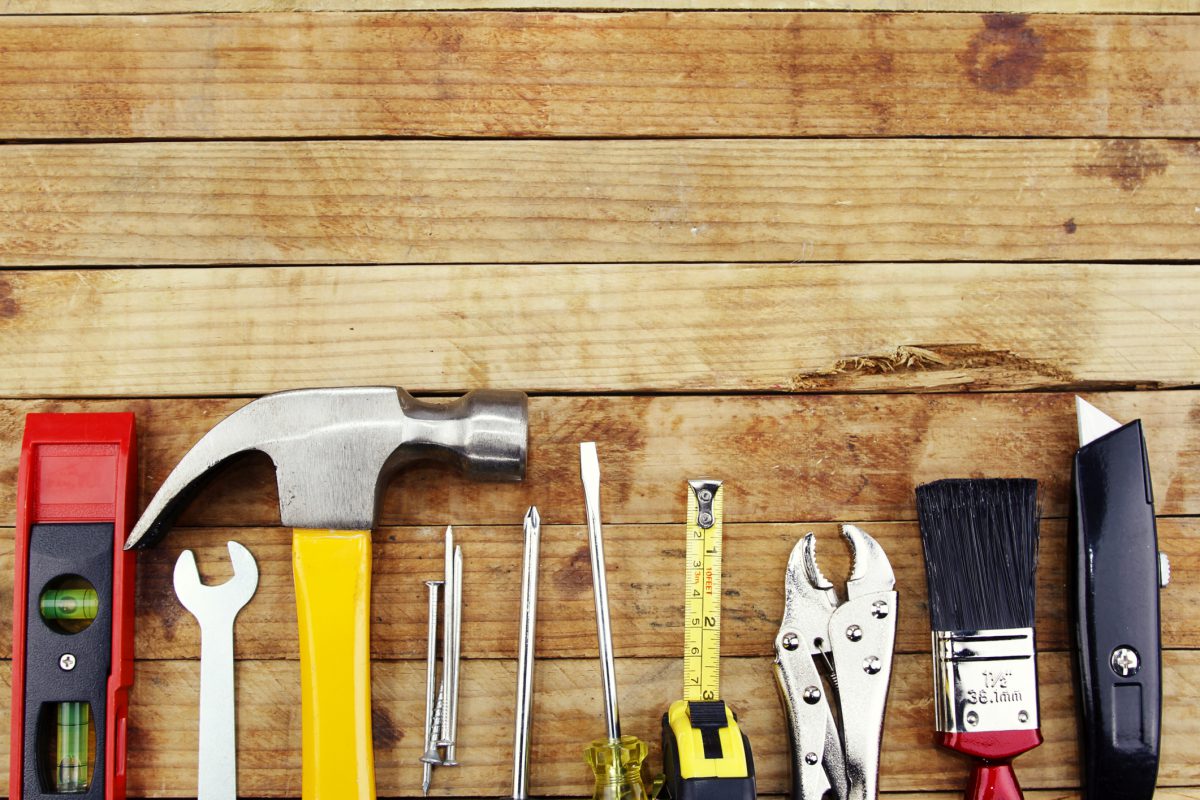
Now that you’re a homeowner, it’s time to get yourself a toolbox. From measuring for a new couch to hanging curtains and photographs, you’re going to need tools even if you’re not planning any big DIY projects.

Best tools for new homeowners:

  • Ladder
  • Measuring tape
  • Hammer
  • Stud finder
  • Electric drill

Owning these tools will make following the rest of these new homeowner maintenance tips easier.

2. Create a Homeowner’s Binder

You may have noticed during the purchasing process that there is a lot of paperwork involved in owning a home. Before you move into your new home, create a binder for important documents, such as mortgage and home insurance paperwork.

After your move in, use the same binder to store all of the guides and warranties for your new appliances. Store receipts for any home improvement and moving expenses here as well. You’ll want to hang on to these for your taxes. You can also start collecting contact information for reliable contractors in this binder.

3. Wait to Start Any Large Projects

One thing every homeowner should know: home improvement projects are expensive. Avoid completing unnecessary projects. Unless your new home is not livable, hold off on any major construction projects until you’ve lived in the home for at least six months.

Waiting a few months to make any huge changes will allow you to get a feel for your home and put your priorities in order. After a few months, you may learn that the floor plan doesn’t bother you as much as expected, but you’ve discovered you can’t live with the current bathroom configuration. Waiting will also give you time to save for the cost of any upcoming projects.

It is a good idea to complete small projects such as painting or removing carpet before moving into your new home.

4. Pay Attention to Your Energy Usage

Owning a home means paying your own utility bills. Pay attention to how your home is using energy and use the information to reduce your carbon footprint and save money. You’ll be surprised how small changes can affect your electric bill.

Homeowner tips and tricks for reducing your energy costs:

  • Move your refrigerator away from your oven.
  • Schedule a home energy audit.
  • Lower your water heater’s thermostat to 120 degrees.
  • Switch out lightbulbs for energy-efficient LED lightbulbs.

5. Learn How to Identify Potential Issues in Your New Home

One of the best homeowner maintenance tips is to detect minor problems before they become huge issues. After purchasing your home, take some time to learn about some of the common issues homes face, especially if you’ve purchased an older home or one that was unoccupied for a period of time. Being able to identify a potential problem early on could save you money later.

Learn to recognize:

  • Basement leaks and flooding.
  • Signs of a roof leak.
  • Foundation issues.

If you can catch these issues early, you can prevent further damage to your home and save yourself a lot of headaches.

6. Start an Emergency House Fund

You never know when something is going to go wrong, or how much it is going to cost. A great homeowner tip is to start an emergency savings account as soon as possible.

The longer you live in your home, the more likely you are to experience a surprise plumbing, heating or roofing issue. Start saving early to take a little stress out of this typical homeowner experience.

7. Make Friends With Your Neighbors

As many homeowners know, having bad neighbors can make your living situation less than pleasant. Work to be a good neighbor right away by introducing yourself and making friends as soon as you move in. Building a relationship with your neighbors will help you learn about your neighborhood, find reliable contractors and maybe even allow you to borrow tools when you need them.

Knowing your neighbors will also make it easier to address any issues that arise later, such as property line or noise concerns.

8. Change Your Air Filter Regularly

This probably sounds obvious, but it is an often overlooked homeowner maintenance tip. When you move into your home, change your air filter right away. Mark the date on your calendar and change it every 90 days moving forward. Consider changing it every 60 days if you have pets or if you suffer from allergies.

Changing your air filter not only helps keep your air clean, but it also reduces dust in your home and extends the life of your furnace.

9. Know How to Turn Off Your Water Valve

Picture this: You wake up in the middle of the night to find a busted pipe filling your basement with water. It takes you five minutes to locate your main water valve and two more minutes to turn it off. That’s seven additional minutes of water flowing into your basement.

It’s a good idea to locate this valve when you move in and learn how it works to save yourself time during an emergency. Learn how to shut off your power and gas lines while you’re at it.

Another homeowner tip is to turn off your main water valve whenever you leave on vacation. This will prevent flooding if something should go wrong when you are out of town.

10. Complete One Project at a Time

Don’t work on multiple home projects at once. You may want to get all your improvements finished as soon as possible, but this isn’t the answer. Not only will you exhaust your finances, but you will also make your new home unlivable and add unnecessary stress to your everyday life.

Instead of starting all your projects at once, learn how to plan a home remodel that won’t make you miserable.

25 Tips Every Homeowner Needs to Know

There’s a lot of work involved in moving into your new house and getting settled. It would be nice if your house came with a homeowner’s manual explaining all this. But that won’t happen unless you buy a new house from a very responsible builder. So our new homeowner tips is meant to guide you through your first year in a new house.

Here are recommendations on what you’ll want to do once you’re in your new home. Even if you’ve been in your house for several years, you may find things you missed. Some tasks only need to be done once. Other homeowner tasks should be reviewed every one to two years.

  1. Start building your home maintenance team (listed above). You’ll want to arrange for services like house cleaning, lawn care, pool cleaning and pest control right away. Then you should make needed repairs, starting with …
  2. File a change of address with the post office. Ask about a new resident packet which frequently contains discount coupons to local stores like Lowe’s.
  3. Paint the ceilings while the coast is clear, as they’re the toughest to reach with furniture in the way. This will give you time to pick your wall colors and paint rooms as you decide how you want to decorate.
  4. Review your home inspection report and create a punch list of needed repairs. These should be done before you start home improvements and other decorating. Here are priorities to guide your timeline:
    • Repairs to keep your family and guests safe.
    • Problems that involve water. This includes water penetrating your home from outside and interior leaks.
    • Updates that will reduce your energy bills and extend the life of major home systems.
  5. Research discount programs offered by local utility companies.
  6. Review your homeowner insurance policy with your agent to make sure you have the correct coverage. Don’t be surprised if you’re missing something … or you have more coverage than you need.
  7. Add contact information to your smart phone for your insurance company, utilities and home maintenance team.
  8. Change your driver’s license and car registration. Check state requirements as you may only have 10 days.
  9. Confirm your deed has been officially recorded about two weeks after closing.
  10. Check to see if you’re eligible for any property tax discounts. Often known as homesteading, you may find them for primary residence, seniors or even retired military.
  11. Setup a homeowner budget. Make sure you’re saving enough for property taxes and insurance if your bank didn’t require them to be put into escrow. You should also set aside money for preventive maintenance and repairs.
  12. Change your locks. If you’re considering smart locks, take time to think through your choices. Consider the multiple devices you want to control remotely, and you’ll save money with one shared controller.
  13. Ask your utilities to mark where their lines are, a free service so you don’t accidentally sever a line when installing a mailbox, fence, etc. Make a map with the lines for future reference.
  14. Don’t put your name outside the mailbox. Put it inside for the mailman.
  15. Buy gardening equipment needed to maintain your yard. It’s easier to start right away versus catching up after ignoring shrubs and flower beds for six months.
  16. Find your main water shutoff and learn how to turn your water off.
  17. Check the temperature on your hot water heater. Turn it down to 120º to avoid burns and save money. Your HVAC and/or plumber can help with this.
  18. Review you main electrical panel to make sure it’s properly labeled. Practice shutting off power and buy circuit breakers if needed.
  19. Schedule an HVAC maintenance tune-up to insure your system is running efficiently.
  20. Have your home cleaned before moving furniture into the house. It’s also the perfect time to get your carpeting cleaned or floors refinished.
  21. Meet the president of your condo/homeowners association. Learn about local customs, like getting exterior paint colors approved.
  22. Make a copy of your closing papers and store outside your home. Use an old fashion safe deposit box or scan and store documentation online, in case of a fire.
  23. Make a photo or video record of your home and personal possessions.
  24. Identify high value items and make sure they’re covered by your homeowners insurance. Review your policy now, as you probably didn’t have time before the closing.
  25. Meet your neighbors. Introduce yourself and learn what hobbies and interests you have in common. Share contact information with immediate neighbors (8 recommended).

How to Easily Maintain Your Home

Whether you are going to be selling your home shortly or years down the road, making sure you keep up with the maintenance of your property is important. A home that does not have proper maintenance will undoubtedly suffer when it does become time to sell.

When you talk to people that are successful in the sale of their homes both quickly and for a good price, you will usually discover that their success was a result of forethought.

They may have been lucky to make as good of a deal as they did, but they likely spent a significant amount of time preparing for that lucky moment as well. Making a home appealing to buyers takes work – much of which occurs before the house ever goes on the market.

There are some home maintenance items that most people do not always think about. Many of the things that make a house stand out are the result of regular maintenance, tasks that may seem a little mundane, but that do a lot to keep up the functioning and appearance of a home.

These little jobs, when performed on a periodic basis, can help you avoid paying costly replacement or repair fees in the months leading up to putting your home on the market. Unless you are planning on selling your home for a bargain to shoppers searching for a fixer-upper, keeping up with the little things is worth the effort.

These home maintenance tips can go a long way in helping that your sale goes smoothly and does not end up going south due to a failing home inspection. Keep in mind that a skilled home inspector can tell when a homeowner has not been keeping up with regular home maintenance items.

You can bet your bottom dollar that while the home inspection is taking place, they will be pointing this out to the buyer. Whether you are selling now or not, use these nine maintenance tips to keep your home running like a well-oiled machine! If you are going to be selling by following this advice, you will keep your negotiating after the home inspection to a minimum.

Vacuum Refrigerator Condenser Coils

Most people do not think of inspecting their refrigerators. They seem like self-contained units, and there is not a lot the average person can do to maintenance them. However, the condenser coils on the back of your fridge will collect dust, and this dust can inhibit its operation.

Pulling the fridge out and cleaning off the dust can help your fridge work more efficiently, and will give you the opportunity to clean behind and underneath it as well.

More than likely if you clean your coils the refrigerator will work noticeably better. Refrigerators are expensive to replace so this is an important maintenance tip for homeowners not to forget.

Change Batteries For Smoke/Carbon Monoxide Detectors

While changing the batteries is a small maintenance item. making sure that you smoke and carbon monoxide detectors are working is not. In fact, your families safety depends on it!

The last thing you ever want to go through is having your home destroyed by fire when it could have easily been avoided. Having working smoke and carbon monoxide detectors is critical.

In some states including mine (Massachusetts), they are a requirement for sale. This is a great law that is designed to reduce casualties from two potentially hazardous situations.

You don’t need to be selling your home to realize that keeping up with your local smoke and carbon monoxide detector regulations can be the difference in saving lives!

Inspect and Clean Your Furnace or Boiler

Heating and cooling systems push a lot of dust along with temperature controlled air, and this dust and possibly condensation can lead to degradation of your unit and the ducts it uses. An annual inspection by a certified service professional is always a good idea.

The service person can clean up any accumulated debris, and can verify that your system is functioning as it should. When you have a forced hot water heating system that is serviced by oil, the maintenance requirements are little more stringent.

Oil, unfortunately, does not burn as clean as gas and therefore can cause a system to be cleaned on a more regular basis. Most heating companies recommend an Oil fired heating system be tuned up once a year where gas can typically be done every two years.

Keep in mind that staying up with maintenance on your heating system can extend the lifespan by years. Also, consider that if a buyer sees you have not been maintaining the system, they may take into account offering less for your home thinking they may need to replace it sooner than expected.

Keeping up with your heating system is a maintenance tip you should never neglect as it is one of the most costly items in your home to replace.

Check Your Water Heater

Your water heater may heat thousands of gallons of water a year, and like every appliance, it can only perform well for so long.

A yearly maintenance check is recommended for any water heater, even one you just purchased.

Seals have a way of failing, and drains can clog – especially if you have hard water. If you notice even minor leaks or severe scale build up, consider contacting a plumber or water heater installation company to take a look.

It is far better to catch a failing water heater before it goes out completely than to come home to a flooded room or basement. Water heaters are an area that home inspectors will pay particular attention to. Making sure that you do not have any pipe fittings that are leaking or corroded is important.

At home inspections leaking fittings are quite common because most homeowners do not pay attention to a maintenance item like this until it becomes a bigger problem.

Maintain Your Filters

One of the more important maintenance tips for homeowners is making sure you keep up with changing your heating and cooling filters. Your central heating and air conditioning unit work hard to push air throughout your house. By changing your filters on a regular basis, you help the unit operate efficiently and effectively.

It already requires a significant amount of energy to run air through the various vents – failing to install a clean filter makes this process much more challenging, and can put unnecessary strain on your central air unit. Make sure you pay particular attention to the rating of the filter you are using.

Some filters need to be changed monthly while others are “rated” to last much longer. A quality filter can usually be bought for your system that is designed to be modified far less frequently.

Check Your Toilets and Faucets

Home inspectors and appraisers notice everything, and they are sure to see if you have any problems with your toilets or your sinks. Take a moment every six months or so to inspect your basic plumbing fixtures. Water will find any available avenue to escape, especially when under pressure, and you can guarantee that sooner or later one of these fixtures will begin leaking.

If you are handy, replace the faulty seal. If not, bring in a plumber to tackle the problem before it becomes much bigger.

An Ounce Of Prevention

Taking the time to do these things now, before you ever put your home up for sale, will make the whole selling process easier when you finally begin it in earnest. You and your family will also enjoy the benefits of a cleaner, more livable home right now.

While the above-mentioned home maintenance items are mostly considered small potatoes, there are always other common home selling issues that could derail your sale far more quickly. Things like a failed septic system, not taking out required permits for work, and appraisal issues are potential road blocks.

When selling a home, it is important to stay out ahead of the curve and pay particular attention to all the potential issues that could get in the way. A prepared home seller enjoys the benefit of not having to face those unfortunate things that can surface in a Real Estate transaction!

Spruce Up Your Front Door

It may seem trivial, but your front door is usually the first close look anyone gets at your home and is worth sprucing up on a yearly basis because of this. If you have a hardwood door with a natural look, take the time to clean and polish it. If it is painted, consider touching it up or repainting it as necessary.

Buyers like a welcoming, well-maintained front door. Have an old door handle that is very weathered? Consider upgrading to something that will be visually appealing while also offering good home security.

Keep in mind that maintaining the curb appeal of your home will pay you back when it comes time to sell.

Clean Your Exhaust Hood

Cooks working in professional kitchens are required to clean vent hoods on a regular basis. It is a dirty job, typically involving caked on grease and dust. Your kitchen vent may not be as dirty as one used in a professional setting, but it still poses a fire hazard and is unsightly when not cleaned regularly.

Take a few minutes to wash off any accumulated grime and to replace the filter if there is one. Exhaust hoods are a simple maintenance item that will stick out like a sore thumb if you do not deal with it.

Maintain Your Garage Door

Your garage door and opener also require regular maintenance to operate as intended. The chain on your opener must be lubricated, along with any exposed metal joints, and you should check to make certain the door runs smoothly in its tracks.

Most inspectors will pay close attention to a garage door because of the potential for significant injury to a child or pet. Most newer garage door systems have electronic eyes at the bottom that sense movement. These need to be checked regularly to make sure they are functioning as intended.

Easy & Cheap Ways to Improve Your Home

Home improvement can be a great way to feel more comfortable and happier in your home, or to be more comfortable having guests pop by. Home improvement can also help if you have been trying to sell your house, but you still haven’t been able to sell. While some home improvements require a lot of saving up (such as a complete bathroom or kitchen remodel), there are many more affordable ways to improve your home without spending a lot of money.

It’s also true that some home improvements also give homeowners a better return than others, but in the end unless you are trying to sell your home, you also need to factor in what changes will make you the happiest while you live in your house. Of course, you also need to consider the time frame that you have to make changes. Here are five cheap improvements to consider.

1. Improve curb appeal

Improving your outdoor space takes time, but you can do it for very little money (or even for free) if you are willing to put the hours in. Giving your home better curb appeal will make your home look better overall, and impress potential buyers. According to the DIY Network, painting the front door, trim, or shutters is a great way to up your curb appeal. Upgrading your mailbox, improving your lighting, and adding flower boxes can also help. It’s also a good idea to trim shrubs and unruly trees and regularly mow your grass.

Once you have your curb appeal up to par, then you can focus on your backyard. Mowing and trimming is still important, but you also need to consider the placement of flower and vegetable gardens; your best bet will be to keep both yards looking well manicured.

There are so many ways you can improve your home without spending a lot of money. In addition to painting your kitchen cabinets, if you have the time to paint other rooms in the house, this is a great way to give your home a facelift. Decorating your home in a coordinated or clear style can also quickly make your home more presentable and comfortable. You just have to choose which direction you want to go in, and you need to determine how much time you have.

2. Organize as much as you can

Some people don’t consider organization to be a home improvement, but appropriately organizing your space can make a huge difference to potential buyers, and can also make you more comfortable in your own home. Organizing your home can be affordable, and it can also be a quick job (unless your home looks like a house from the television show Hoarders). Start by organizing the space you spend the most time in, and you can move on to the rest of your home when you have time. You can purchase shelves or organizing buckets if you want, but start by completing free organizing tasks first.

Find a permanent home for things that are on several different surfaces (for example, end tables and counters). Organizing your shoes, clothes, and even your refrigerator and pantry can help. Organizing is a lot like cleaning: It’s hard to start, but when you finish you will be surprised by how much better you feel.

3. Coordinate and update your kitchen

If you can’t afford new appliances, flooring, or cabinets, there are several less expensive kitchen improvements you can complete to make your space look better. You can paint cabinet doors to give them a fresh look, and you can also replace old hardware. Be sure to properly prepare if you are going to paint: It’s important to consider the scope of the job, to remember to remove hardware and doors, clean the surfaces, sand, and apply primer-sealer before painting.

Improving your kitchen lighting will also make your kitchen feel and look more comfortable (and more efficient lighting will save you money). Although replacing kitchen floors can be expensive, a deep cleaning or refinishing can help tremendously and cost less if you do it yourself.

4. Attic insulation

According to Remodeling magazine’s “key trends” in the 2016 Cost vs. Value Report, a fiberglass attic insulation project gives homeowners a large return on their investment (100% return in 60% of markets). Although this particular renovation isn’t as glamorous as some other possible renovations, it can help you whether you are planning to stay in your home or sell it because you can cut bills. According to Realtor.com, it will cost you about $1,268, and the resale value could be $1,482 (116.9 percent cost recouped). A manufactured stone veneer, garage door replacement, steel entry door replacement, and a minor kitchen remodel are some of the other improvements with high recoup rates.

5. Update your bedroom

Your bedroom should be a sanctuary: If you plan to live in your home for a while, it is imperative that your bedroom be a place that you enjoy being in. If you’re planning to sell your home, then you will want to wow potential buyers when they walk into the master bedroom. If your bedroom is small, then proper decorating is key: It’s important to consider the size and placement of your furniture, and to have the proper flooring (wood floors can be ideal, and radiant floor heating can be a plus); decorative mirrors can also make the room look bigger, and wall cabinets can save space.

Regardless of the size of your room, it’s important that it feels inviting. Also be sure to choose paint colors that will make you feel comfortable (or appeal to buyers), try to have a cohesive theme or color, and be sure to keep your room clean.

How to Easily Maintain Your Home

Buying a home is exciting and scary. Home maintenance doesn’t have to be hard. Learn what tools you need, how to find the circuit breaker or to shut off the water.

Maintenance Tips for First Time Homeowners

Owning your first house is exciting! You can build a killer deck or paint the walls purple on a whim. When it comes to renovations and personalizing your new home, however, you may find yourself stuck trying to figure out where to begin. The solution to this quandary is quite simple. Before you fire up the cordless drill or contemplate knocking down walls, you’ll want to take care of a few preventative home maintenance tasks first. Home maintenance can be daunting for new homeowners if you’re used to calling a landlord to come fix your problems. But stick to this list of maintenance tips for new homeowners to make sure your bases are covered.

Call 811 Before You Dig

Whether you’re planting shrubs or building a new fence, you need to be sure you won’t hit any utilities when you break ground. Call 811, the national dig-safely hotline. They’ll send the utility companies out to mark the locations of underground pipes, wires and cables. Not only will you avoid expensive repairs and neighborhood-wide cable outages with 811’s help, but you’ll also ensure that any work you do on your property will be conducted under much safer conditions.

Hire A Professional To Trim Your Trees

Remove dead branches or limbs that could fall on your roof or overhead power lines. This is also a great opportunity to check the integrity of your gutters, soffits, eaves and roof vents. Because huge limbs can break and fall unpredictably, leave tree trimming to the pros.

Find Your Circuit Breaker Box

While you’re searching your closets, basement, garage and front and back yards for your main water shut off valve, be on the lookout for your circuit breaker box. Once you’ve identified it, determine which fuses control the electricity in various areas of your house and label them accordingly.

Check Your Attic Insulation

If your attic inspection reveals that the tops of your floor joists are visible, then your home is insufficiently insulated. The recommended amount of insulation for most attics is about 10 to 14 inches of material, depending on the type of insulation used. The attic is the easiest place to add insulation to improve your home’s energy efficiency. A well-insulated house can save you up to 30 percent on your energy bills, increase your property value and keep your family a lot more comfortable.

Locate Your Main Water Shut Off Valve

Gallons of water rushing out of a burst pipe can wreak havoc on your drywall, flooring and belongings. In fact, non-weather-related water damage is the second most common homeowner’s insurance claim, according to one company’s claims history. So you need to be able to cut off the flow of water into your home quickly in case of an emergency.

Find your water shut off valve. This is where the water main enters your house. It’s often — but not always — located near a street or alleyway. Next, be sure you know how to close it. You may need to purchase a special tool, such as a crescent wrench or “curb stop key”, both to access and actually turn the valve.

Check Your Foundation

If rain and melting snow drench the soil around the base of your home, pressure can build up and inflict structural damage on your foundation. Worse, if a leak springs and water comes into direct contact with your home’s foundation, it can expand any existing cracks and cause expensive problems. To prevent the weakening of your foundation, be sure the ground around your foundation slopes away from your house at least 6 inches over 10 feet. Be sure your gutters are clean and draining properly. Finally, caulk any small cracks in your foundation walls before they have a chance to becomes big deals.

Proceed Cautiously When Drilling Into Walls

Plumbing pipes, ductwork, wires and cables are hidden in most homes. Before you power up your drill, use a battery-operated stud sensor to detect studs, cables, ducts and the other vital veins and arteries running just beneath the surface of your walls. Since stud sensors aren’t always 100% accurate, avoid damage by drilling only 1 and one-fourth inches deep – just enough to clear the drywall and plaster but miss most wiring and pipes.


By following these first-time homeowner tips, you can protect your investment. You can increase that level of protection, and help reduce major costs associated with repairs and replacements in your home.