Home Ownership: Why it’s Good for Everyone

It’s no wonder that owning a home is often referred to as the American Dream. While statistics show that homeownership is down from historical levels, it is still an aspiration for 61% of Americans. That number is likely to rise as the housing industry continues to recover. That is good news not only for potential first-time homebuyers, but also for the overall economy.

The Importance of Homeownership

For many people, owning a home represents the stability, independence and freedom of reaching adulthood. While that perception may be changing to some degree as more people wait longer to buy homes, it is still a major milestone. Real estate is considered by many to be a sound investment that offers unique wealth-building opportunities.

Buying a home expands options for the future, whether you plan to sell and make a profit or leverage the equity in your home to pay for other major expenses.

Benefitting a Community

Homeownership also helps to improve the areas surrounding individual homes. The housing industry is closely tied to the economy—when home sales are up, so are jobs. Together, these complementary forces create a more stable local, state and national economy. This is why many economic analysts wait for the latest housing numbers to be released before announcing their forecasts, as these numbers help indicate where the overall economy is headed.

The community also benefits from the real estate taxes paid by the property owner. These funds are used for infrastructure services and projects including:

  • government social services
  • road repair
  • library operations
  • police and fire protection
  • snow removal
  • parks and greenways
  • other enriching infrastructure projects
  • construction of schools

The impact goes beyond the financial aspect. In fact, some of the greatest community benefits are intangible. Homeowners in a city or town are often very invested in the area. They get involved in activities, volunteer for charity organizations and help out with special events. They feel a sense of belonging that is often greater than someone who is renting for a short term.

Homeowners often get involved in the politics of the community, attending city council meetings and volunteering for groups and organizations, such as neighborhood watches and school boards. In addition, they work hard to keep their properties looking nice. This sense of responsibility carries over into other areas of the community as well. That is not to say that renters don’t have the same intentions, but they often cannot stay in the same place long enough to develop roots and a sense of belonging.

Homeownership has far-reaching effects, financial and otherwise, starting with the buyer and continuing throughout the community.


Being a Firts-Time Home Buyer: Tips & Tricks

Buying a home can be nerve-racking, especially if you’re a first-time home buyer.

These tips will help you navigate the process, save money and avoid common mistakes. We organized them into four categories:

  • Mortgage down payment tips.

  • Mortgage application tips.

  • House shopping tips.

  • First-time home buyer mistakes to avoid.

    Mortgage down payment tips

    1. Start saving for a down payment early

    It’s common to put 20% down, but many lenders now permit much less, and first-time home buyer programs allow as little as 3% down. But putting down less than 20% may mean higher costs and paying for mortgage insurance, and even a small down payment can still be hefty. For example, a 5% down payment on a $200,000 home is $10,000.

    Play around with this down payment calculator to help you land on a goal amount. Some tips for saving for a down payment include setting aside tax refunds and work bonuses, setting up an automatic savings plan and using an app to track your progress.

    2. Explore your down payment and mortgage options

    There are lots of mortgage options out there, each with its own combination of pros and cons. If you’re struggling to come up with a down payment, check out these loans:

    • Conventional mortgages They conform to standards set by the government-sponsored entities Fannie Mae and Freddie Mac, and require as little as 3% down.

    • FHA loans Loans insured by the Federal Housing Administration permit down payments as low as 3.5%.

    • VA loans Loans guaranteed by the Department of Veterans Affairs sometimes require no down payment at all.

    Making a higher down payment will mean having a lower monthly mortgage payment.

    If you want the smallest mortgage payment possible, opt for a 30-year fixed mortgage. But if you can afford larger monthly payments, you can get a lower interest rate with a 20-year or 15-year fixed loan. Use our calculator to determine whether a 15-year or 30-year fixed mortgage is a better fit for you. Or you may prefer an adjustable-rate mortgage, which is riskier but guarantees a low interest rate for the first few years of your mortgage.

    3. Research state and local assistance programs

    In addition to federal programs, many states offer assistance programs for first-time home buyers with perks such as down payment assistance, closing cost assistance, tax credits and discounted interest rates. Your county or municipality may also have first-time home buyer programs.

    Mortgage application tips

    4. Determine how much home you can afford

    Before you start looking for your dream home, you need to know what’s actually within your price range. Use this home affordability calculator to determine how much you can safely afford to spend.

    5. Check your credit and pause any new activity

    When applying for a mortgage loan, your credit will be one of the key factors in whether you’re approved, and it will help determine your interest rate and possibly the loan terms.

    So check your credit before you begin the homebuying process. Dispute any errors that could be dragging down your credit score and look for opportunities to improve your credit, such as making a dent in any outstanding debts.

    To keep your score from dipping after you apply for a mortgage, avoid opening any new credit accounts, like a credit card or auto loan, until your home loan closes.

    6. Compare mortgage rates

    Many home buyers get a rate quote from only one lender, but this often leaves money on the table. Comparing mortgage rates from at least three lenders can save you more than $3,500 over the first five years of your loan, according to the Consumer Financial Protection Bureau. Get at least three quotes and compare both rates and fees.

    As you’re comparing quotes, ask whether any of the lenders would allow you to buy discount points, which means you’d prepay interest up front to secure a lower interest rate on your loan. How long you plan to stay in the home and whether you have money on-hand to purchase the points are two key factors in determining whether buying points makes sense. You can use this calculator to decide whether it makes sense to buy points.

    7. Get a preapproval letter

    You can get pre-qualified for a mortgage, which simply gives you an estimate of how much a lender may be willing to lend based on your income and debts. But as you get closer to buying a home, it’s smart to get a preapproval, where the lender thoroughly examines your finances and confirms in writing how much it’s willing to lend you, and under what terms. Having a preapproval letter in hand makes you look much more serious to a seller and can give you an upper hand over buyers who haven’t taken this step.

    House shopping tips

    8. Hire the right buyer’s agent

    You’ll be working closely with your real estate agent, so it’s essential that you find someone you get along with well. The right buyer’s agent should be highly skilled, motivated and knowledgeable about the area.

    9. Pick the right type of house and neighborhood

    You may assume you’ll buy a single-family home, and that could be ideal if you want a big yard or a lot of room. But if you’re willing to sacrifice space for less maintenance and extra amenities, and you don’t mind paying a homeowners association fee, a condo or townhouse could be a better fit.

    But even if the home is right, the neighborhood could be all wrong. So be sure to:

    • Research nearby schools, even if you don’t have kids, since they affect home value.

    • Look at local safety and crime statistics.

    • Map the nearest hospital, pharmacy, grocery store and other amenities you’ll use.

    • Drive through the neighborhood on various days and at different times to check out traffic, noise and activity levels.

    10. Stick to your budget

    Look at properties that cost less than the amount you were approved for. Although you can technically afford your preapproval amount, it’s the ceiling — and it doesn’t account for other monthly expenses or problems like a broken dishwasher that arise during homeownership, especially right after you buy. Shopping with a firm budget in mind will also help when it comes time to make an offer.

    In a competitive real estate market with limited inventory, it’s likely you’ll bid on houses that get multiple offers. When you find a home you love, it’s tempting to make a high-priced offer that’s sure to win. But don’t let your emotions take over. Shopping below your preapproval amount creates some wiggle room for bidding. Stick to your budget to avoid a mortgage payment you can’t afford.

    11. Make the most of open houses

    When you’re touring homes during open houses, pay close attention to the home’s overall condition, and be aware of any smells, stains or items in disrepair. Ask a lot of questions about the home, such as when it was built, when items were last replaced and how old key systems like the air conditioning and the heating are.

    If other potential buyers are viewing the home at the same time as you, don’t hesitate to schedule a second or third visit to get a closer look and ask questions privately.

    First-time home buyer mistakes to avoid

    With so much to think about, it’s unsurprising that some first-time home buyers make mistakes they later regret. Here are a few of the most common pitfalls, along with tips to help you avoid a similar fate.

    12. Not budgeting for closing costs

    In addition to saving for a down payment, you’ll need to budget for the money required to close your mortgage, which can be significant. Closing costs generally run between 2% and 5% of your loan amount. You can shop around and compare prices for certain closing expenses, such as homeowners insurance, home inspections and title searches. You can also defray costs by asking the seller to pay for a portion of your closing costs or negotiating your real estate agent’s commission. Calculate your expected closing costs to help you set your budget.

    13. Not saving enough for after move-in expenses

    Once you’ve saved for your down payment and budgeted for closing costs, you should also set aside a buffer to pay for what will go inside the house. This includes furnishings, appliances, rugs, updated fixtures, new paint and any improvements you may want to make after moving in.

    14. Buying a home for today instead of tomorrow

    It’s easy to look at properties that meet your current needs. But if you plan to start or expand your family, it may be preferable to buy a larger home now that you can grow into. Consider your future needs and wants and whether the home you’re considering will suit them.

    15. Passing up the chance to negotiate

    A lot can be up for negotiation in the homebuying process, which can result in major savings. Are there any major repairs you can get the seller to cover, either by fully handling them or by giving you a credit adjustment at closing? Is the seller willing to pay for any of the closing costs? If you’re in a buyer’s market, you may find the seller will bargain with you to get the house off the market.

    16. Not knowing the limits of a home inspection

    After your offer is accepted, you’ll pay for a home inspection to examine the property’s condition inside and out, but the results will only tell you so much.

    • Not all inspections test for things like radon, mold or pests, so be sure you know what’s included.

    • Make sure the inspector can access every part of the home, such as the roof and any crawl spaces.

    • Attend the inspection and pay close attention.

    • Don’t be afraid to ask your inspector to take a look — or a closer look — at something. And ask questions. No inspector will answer the question, “Should I buy this house?” so you’ll have to make this decision after reviewing the reports and seeing what the seller is willing to fix.

    17. Not buying adequate homeowners insurance

    Before you close on your new house, your lender will require you to buy homeowners insurance. Shop around and compare insurance rates to find the best price. Look closely at what’s covered in the policies; going with a less-expensive policy usually means fewer protections and more out-of-pocket expenses if you file a claim. Also, flood damage isn’t covered by homeowners insurance, so if your new home is in a flood-prone area, you may need to buy separate flood insurance.

Being a Homeowner: Common Problems

Congrats, you own a home! Your dream of being a homeowner is finally a reality. But lurking just beneath the euphoria is the realization that you’re on your own now. No building superintendent to fix a leak. No landlord to repair the air conditioner. Home maintenance and repairs are now your responsibility.

Maybe you have a homeowner’s warranty that protects you from major problems — but it’s not going to replace light bulbs or clean your gutters.

Here are five common problems new homeowners have (and how to solve them):

1. Alone in the Dark

If your entire home goes dark during a storm, you’ll have to wait it out until the power company does its thing. But if the power goes out in just part of the home, a circuit breaker has tripped. This may be because you plugged too many things into a single circuit or because you have a power fluctuation or short circuit in your system. Every home has an electrical panel containing fuses or circuit breakers. Know where yours is located and which fuses or switches control each circuit. If your problem is a simple overload, the fuse has burned out or the switch for that circuit will have flipped itself to the off position. Unplug some appliances from the circuit and replace the fuse or flip the switch on again. If it goes out again, you may have a bigger problem. Call an electrician. Caution: You do not want to attempt any electrical work without killing the circuit.

2.  It’s Alive!

Your home might be made up of wood, metal, and fabric, but your yard is a living thing that requires your attention. If you’re starting from bare ground, you have to consider seeding or sodding and what grass and plants work best for your location. If your lawn is established, you have to think about watering (how often and how much?). Then there’s fertilizing (what kind and when?), spraying herbicide, (pre-emergent, post-emergent — what does that mean?), and mowing (how short, how tall?) Your first decision is whether to hire a lawn care professional or take on the work yourself. If you choose the latter, you’re in for a crash course on lawn care — and a trip to the store for a lawnmower, edger, fertilizer spreader, and weed whacker.

3. Water, Water Everywhere!

Water overflow occurs when your drain or toilet gets clogged. Whether the drain was clogged by hair or an entire roll of paper your 4-year-old flushed down the toilet, the first priority should be to stop the water immediately. Most sinks, lavatories, and toilets have a water cut-off valve on the wall where the water lines come in. If cutting that off doesn’t work, you will have to shut off the water at the meter in the yard. This involves a special key, available at home centers. While you’re there, arm yourself with a plunger, a can of drain cleaner, and a snake (a flexible rod that clears minor obstructions that you will eventually need). If you are not able to fix the problem, call a plumbing company and let the pros take care of it.

4. It’s Always Something!

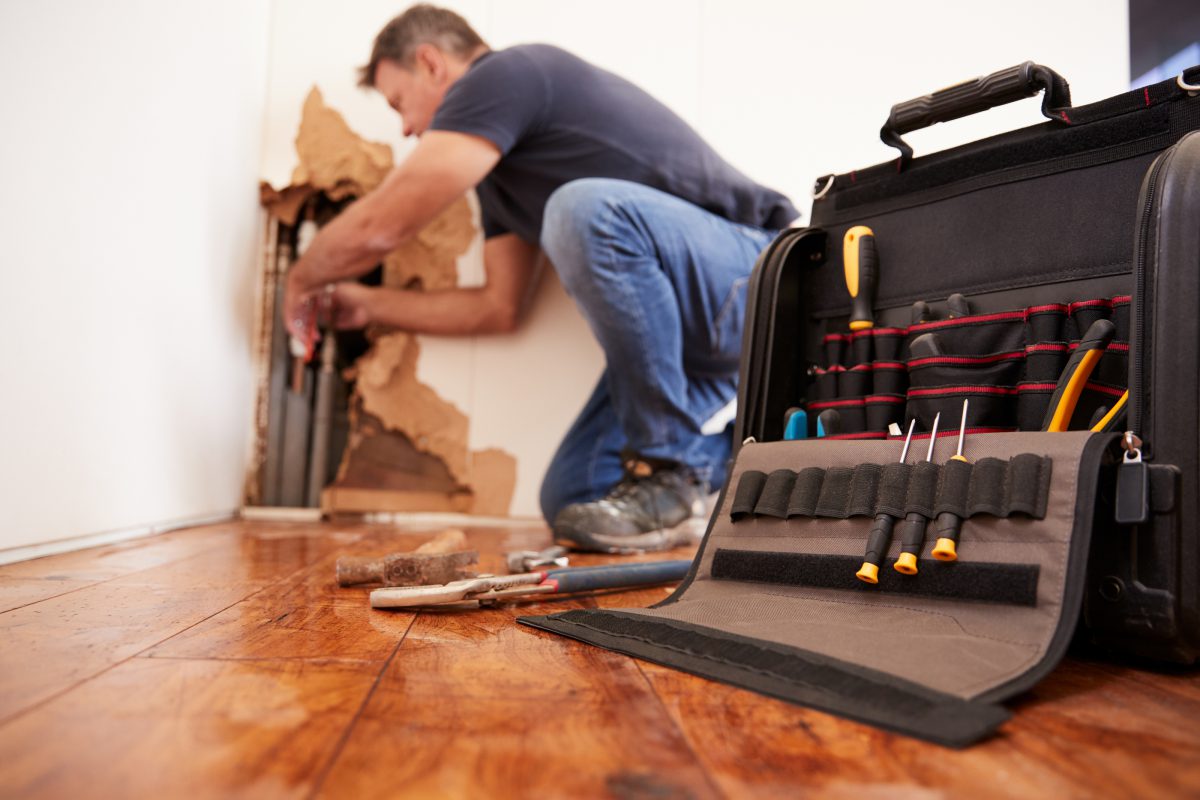
Even if your home is brand new, you’ll face handyman chores from hanging pictures to tightening knobs on kitchen cabinets. Start building your toolbox with the essentials right away.

Your starter toolbox should contain:

  • A hammer.
  • Screwdrivers (both flathead and Phillips).
  • Tape measure.
  • Pliers.
  • Adjustable wrench.
  • Utility knife.
  • Putty knife.
  • Flashlight.

Most tools can be purchased online, and whether you need a common torque wrench or a specific type of drill press, there are plenty of buying guides on the internet to help you get the best tool. Your toolbox will get bigger as new needs come along.

5.  Sweating It Out

One of the obligations of homeownership is changing the filter on your HVAC system. Although your air conditioner compressor is outside, your main unit is in a utility closet, basement, or attic and that’s where the filter is. The filter keeps dust and other gunk from being sucked into your blower fan, and if it’s not changed regularly, you’ll develop HVAC problems. Different units need different sized filters, and you’ll find them at home improvement centers. Follow the manufacturer’s recommendations on how often to change the filter — usually monthly or quarterly.

Homeownership comes with challenges, but you’ll get the hang of it. Besides, investing a little elbow grease and sweat will put your personal stamp on your home.

Being a Homeowner: Mistakes Everyone Makes in the Summer

Dreams of the summer season tend to focus on long, lazy days spent reading the latest bestsellers, napping in the rope hammock, or watching white clouds drift across a blue sky. But if you’re a homeowner, you know that summer isn’t always a day at the beach.

Forgetting the HVAC Filter

Your air conditioner works hard over the summer. Don’t make it work any harder than necessary. Keep the unit running smoothly—and keep cooling costs low—by checking the HVAC filter on a regular basis (as often as once per month if you own pets or live with a smoker). While slightly more expensive washable filters can be reused, cheaper fiberglass filters, once dirty, must be replaced. Consult the manual to learn the recommended filter type for your unit.

Letting the Siding Slide

Exterior siding: So highly visible to neighbors and passersby, its condition says a lot about your priorities as a homeowner. But while curb appeal may be one motivation for performing exterior maintenance, there’s a practical and even more compelling reason to do so. Over the summer months, dirt, mold, pollen and tree sap steadily accumulate. Unchecked, such surface imperfections could ultimately shorten the lifespan of your siding material.

Paying Pavement No Mind

It’s not impossible to repair concrete driveways, walkways, and patios in fall and winter, but cold weather makes it a lot more difficult to ensure a satisfying result. For that reason, there’s no better time than now to repair cracked, crumbling, or chipping concrete before it inevitably worsens, sometimes irretrievably. Use latex or epoxy patching compound, and if you wish to disguise the repair or give the paved area a smooth new look, applying a resurfacer.

Passing Over Pests

Insects are an unavoidable fact of life, particularly in the summer. Unpleasant though they may be, household pests are usually benign. However, it would be a mistake to forget that some critters pose a genuine threat—termites most of all. Do due diligence to prevent an infestation. Indoors, keep the basement and attic dry and well-ventilated. Outdoors, maintain a one-inch gap between soil and wood portions of the home, and tightly seal foundation cracks.

Overlooking the Roof

There are summer winds that blow in from the sea, bringing welcome relief on the hottest days of the year. And then there are tenacious gales that, on their own or in the course of a summer thunderstorm, put your home at risk of considerable damage. If and when especially rough weather visits your town, don’t forget to assess your roof in the aftermath. Upset shingles—whether loose, torn, or warped—are an open invitation to roof leaks and water damage.

Neglecting the Gutters

When’s the last time you inspected the gutters? Even beyond the fall season, leaves and debris can accumulate enough to form clogs. Combine heavy summer downpours with obstructed gutters, and your home becomes vulnerable to extensive, expensive damage. Now, for your gutters to drain away stormwater with persistent reliability, experts recommend twice-annual cleaning. If you’re tired of the hassle and hazards of climbing up a ladder to remove gutter gunk year after year, you wouldn’t be the only one! Perhaps it’s finally time to consider the alternative—a storm drainage system that requires zero maintenance. Guaranteed not to clog, seamless one-piece LeafGuard Brand Gutters eliminate the need for homeowners to clean—or even think about—their gutters. It’s a get-it-and-forget-it solution.

Home Maintenance: Summer Checklist

Everything you need to do to keep your home and yard in tip-top shape this summer.

With the change of each season comes a new set of maintenance tasks for your home. Now that summer’s here, you’ll want to prepare your home and yard for the onslaught of summer heat. From air-conditioner upkeep to hanging a clothesline, these simple chores will help keep your home happy and healthy.

Check detectors. Check your home’s smoke and carbon monoxide detectors to make sure they’re working properly.

Inspect air-conditioners. If you haven’t already, prep air conditioners and fans for their busiest season:

  • Clean all ceiling fans and other fans with a damp rag. If you have high ceilings, a ceiling-fan duster can help you de-grime hard-to-reach blades.
  • With the help of your spouse, install window air-conditioning units. Remove and clean the filters before firing up the AC. If you have central air-conditioning, consider a professional servicing.

Enjoy a dry spell. Install an outdoor clothesline to dry your laundry in the summer sun; you’ll save money and energy by skipping the dryer. Plus, who doesn’t love the smell of air-dried sheets?

Clean your outdoor cooker. Give your grill a deep cleaning with these simple steps:

  • For gas grills, turn the heat up to high and let the grill cook with the lid closed for about half an hour. Allow the grill to cool and then brush it off with a grill brush. Wipe down the exterior with a damp sponge and a gentle cleanser. Clean the grill’s drip pans.
  • For charcoal grills, completely empty the grill and wipe out any ashy residue. Then clean it inside and out with hot water, a scrubby sponge and some liquid dishwashing soap. Let the grill dry completely before using it again.

Polish your porch. Thoroughly sweep painted porch floors; then mop them with an all-purpose cleaner. If there’s a lot of built-up dirt on the floorboards, you may need to scrub them with a brush.

Wash your windows. If you didn’t tackle exterior window washing in the spring, now’s the time to get your glass clean.

Make much ado about mulch. Add a layer of mulch to keep weeds down and help the ground retain its moisture in the heat. It’ll give your plants a chance to grow.

Be a leak detective. Check your hoses and exterior faucets for leaks — even a tiny drip can add up to a big waste of water. Pinhole leaks in hoses can be covered up by winding regular electrical tape around the (dry) hose in overlapping layers.

Primp your plants. Deadhead both perennials and annuals to keep them productive. If you have visible dead foliage from spring bulbs, pull it out to maintain a tidy look, but if the daffodil or tulip leaves are still green, leave them alone; they’re busy nourishing the bulb to bloom again next year.

Plan your watering schedule. Train your garden to endure dry days by watering deeply a couple times a week, instead of watering lightly daily. This style of watering will promote the growth of deep, strong roots.

Stop dirt at the door. Keep summer’s mud and muck outside with not one, but two doormats at your main entry door. Place a coarse mat at the exterior and a softer, cloth one on the interior to catch the most dirt. Better still, instruct family members to remove their shoes upon entering. If you live near a beach, a tub of water for sandy feet placed by the door works wonders for keeping sand outside where it belongs.

Analyze your deck. Look over your deck for signs of rotting and hammer in any nails that are poking up. Then, determine if your deck needs sealing. Sprinkle water on the deck’s boards. If the water beads up, you’re in good shape; but if it soaks right in, it’s time to reseal that sucker.

Being a Homeowner: Responsibilities

A recent survey showed that 64% of U.S. adults indicated that they believe home prices will continue to raise over the next year. This marks the highest percentage since before the market crash over 10 years ago. If you are in the market for a house, know what responsibilities come with a property owner.

Do I need to maintain the property?

Slip and falls are the sixth most serious cause of death. Over eight million people each year have to visit the hospital for this personal injury. One of the leading causes of slip and falls is from a homeowner’s failure to maintain his or her property. A homeowner cannot neglect or abandon their property without facing legal liability.

The law states that an owner has a duty to keep the property reasonable safe and make adequate repairs for anyone entering the property (except for unknown trespassers). These responsibilities do vary state to state. For example, in Florida a property owner can be responsible even if they did not have knowledge of the dangerous condition.

This responsibility extends to inspecting the property on a regular basis to discover any dangerous conditions and either repair them or provide notice (with a sign) to anyone who enters the property. The result for failure to maintain your property is that you can be sued for the personal injuries that are caused by your neglect.

Am I responsible for property insurance?

Property insurance substantially serves the interests of the insured. These insurances provide financial compensation after a natural disaster or similar loss. In fact, one in 15 homeowners have a property insurance claim each year. Legally, you can own a home without property insurance; however, many lenders require that borrowers have property insurance on the home.

One consequence for failure to pay homeowners insurance and/or a cancellation of a homeowner’s insurance policy is foreclosure. It’s important to check the language of your mortgage for the following language: “Failure to pay insurance is a default.” If this is present in your mortgage, it this signifies that the lender has the right to foreclose the property against you for failure to pay property insurance.

What happens if I neglect to pay my mortgage payments?

In 2016, new first lien mortgages surpassed the $2 trillion mark for the first time since the end of the housing bubble nearly eight years prior. As the data indicates, more individuals are obtaining loans; however, it’s important to know what happens as a result for failure to pay those loans.

Mortgage payments are monthly payments to the lending institution from the borrower for principal interest on the home loan. Within as little of 90 days after a borrower fails to make a mortgage payment, the lender can initiate a foreclosure proceeding against the borrower. This means the lender can sell the house and collect the proceeds to apply towards the borrowed amount of the home.

Do I have to pay property taxes on my home?  

The U.S. Census Bureau conducted a recent survey on the average American household. They found that the average family pays $2,127 per year on property taxes. These property taxes aren’t optional either, and they continue to rise. Between 2000 and 2010, property taxes rose to $476 billion from from $247 billion.

Failure to pay property taxes can lead to a forced sale of your home through a foreclosure proceeding. Additionally, the taxing authority may impose a tax lien and sell that tax lien. Ultimately, this could lead to the purchaser initiating foreclosure proceedings.

Being a Homeowner: Responsibilities

When a person goes from renting an apartment to owning a home, it is one of the greatest accomplishments of their lives. It takes many people several years to build their credit and to become financially ready to purchase their own home. While home ownership is a huge accomplishment, it also involves a great deal of work. When you were renting, your landlord was responsible for everything. Your only responsibility was to keep your unit clean and pay your rent on time. This is not the case when you own a home. There are several responsibilities that you would need to learn to embrace now that you are a homeowner.

We want to set you up for success on your journey to home ownership, so here are 10 tips:

1. Schedule trash pick-up.

When you were living in an apartment, you took your rubbish to the curb once a week and it was picked up. This was likely set up by your landlord. When you buy your home, you are responsible for setting up your rubbish collection.

2. Make your mortgage payments.

One of the biggest responsibilities that you have when you purchase your home is making your monthly mortgage payments. It is important that you make these payments on time every month. When you were renting, if you were short on cash one month, you could sometimes get away with an apology and a promise to be on time next month. This is not the case when you are paying a mortgage. If you are late, the late payments would have a negative effect on your credit report. If you cannot make your mortgage payments, you risk having your home go into foreclosure.

3. Pay your property taxes.

Now that you are a property owner, you need to start paying property taxes. This is something that you never had to worry about when you were renting. If you stop making your property tax payments, interest would be added to the amount of money that you owe. Also, over time, the government can put a lien on your house. Paying property tax is a very important responsibility.

4. Pay your water bill.

When you are renting, often, the only payment you are responsible for is your rent, electricity, and heat. Most landlords pay for the building’s water bills. When you own a home, you will need to start paying your own water bill. Your bill would depend on how much water you use. If you have a large family who takes long showers, if you do laundry in the home often, or if you use your water to fill a pool, your bill would be higher than the average.

5. Landscaping duties.

When you were living in an apartment, it was the responsibility of the property owner to take care of the landscaping duties. When you own your home, you would need to do all of the landscaping yourself. This would include mowing and watering the lawn, trimming the bushes and hedges, and planting any plants or flowers that you want to have in your yard. If curb appeal is important to you, you should start to assume landscaping responsibilities right away.

6. Schedule snow removal.

After a snow storm, your landlord was responsible for plowing the driveway and clearing the stairs and walkways of snow and ice, to make getting in and out of your home safe. When you purchase your home, you would be responsible for the snow removal yourself. Some homeowners shovel and treat their driveways, walkways, and stairs, while others hire a professional to do the job. Either way, you can no longer rely on a landlord to handle the snow removal duties for you.

7. Pest control.

There is nothing worse than a pest infestation. Whether it is ants, spiders, bed bugs, termites, mice, or any other pest, you need to get the pests out of your home as soon as possible. When you lived in your apartment, you did not need to worry about pest control. It was the responsibility of your landlord. When you own your home and you have a pest problem, you would need to hire and pay for an exterminator yourself.

8. Clean the gutters.

The gutters on the home are designed to drain all of the water from the roof down to the ground. Over time, leaves and other debris can clog up the gutters, which can result in standing water. During the summer, this standing water can result in a mosquito problem. During the winter, the water can freeze, creating ice dams. These can be very damaging to the roof. As a homeowner, it would be your responsibility to clean your gutters regularly.

9. Regular maintenance of the furnace and water heater.

To be sure that a furnace and water heater are running as efficiently as possible, they need to be maintained every year. If they aren’t, it can be a waste of money and it can result in an expensive breakdown. As a homeowner, it would be your responsibility to make the appointments for regular maintenance.

10. Home repairs.

When you were living in your apartment and something needed repaired, you would call your landlord and they would have it fixed as soon as possible. When you own your home, any necessary home repairs would be your responsibility. This is one of the most expensive responsibilities of being a homeowner. There are certain home repairs that can be very costly. If you are handy, you can handle the job on your own. If not, you would need to hire someone to make the necessary repairs for you.


Becoming a homeowner is one of the most fulfilling and exciting times of your life. There are, however, several new responsibilities that you need to start taking on yourself to make sure home ownership is a positive experience!

Essential Items You Need for a New House

Whether it’s the need to hang a clock just a few feet higher or the realization that you really can’t hold a flashlight and get that nut loosened under the sink, there’s always something catching you by surprise as a homeowner.

With the right items on hand, however, you can be prepared for every scenario — just like Hunter was, thanks to that ladder.

Here’s things you should buy for a new house:

#1 Tool Kit

You’ll need something to carry all those tools around from project to project. Create a tool carrier using a tool bucket liner and an old 5-gallon bucket. Or invest in a handyman belt filled with the basics to keep on hand in the kitchen.

#2 Wet-Dry Vacuum

You’re gonna be spilling stuff. Look for a wet-dry vacuum that can handle everything from paint to nails and small stones. “We inherited one of those with our first house, and it was an awesome thing to have for vacuuming the car and cleaning the garage,” Hunter says. Unlike the ladder, “we kept that Shop-Vac when we moved.”

#3 (The Right) Fire Extinguisher

“Whenever anyone I know moves, I give them a fire extinguisher as a housewarming gift,” says Nina Patel, a Silver Spring, Md., homeowner who, years ago, accidentally set her apartment on fire with a homemade candle. “I was able to put out the fire with a pan of water, but it was a panicked moment. I’ve had my own fire extinguisher ever since.”

But before going out and buying the first extinguisher you see, check out the U.S. Fire Administration’s guide. There are five different types of fire extinguishers with different uses, from extinguishing cooking oils to wood and paper. Choose the best type or types for your home.

#4 Extension Cord Organizer

Home ownership seems to breed extension cords that grow into a tangled nest. Save yourself time and hassle, and splurge on one of several cord management devices. Or make your own with a pegboard, hooks, and velcro straps to keep each cord loop secure. Either way, your cords will be knot-free and easy to find. And be sure to include a heavy-duty extension cord in your organizer that’s outdoor-worthy. You don’t want to really have to use that fire extinguisher.

#5 Big-Kid Tools

Odds are you already own a bunch of the basics: drill, screwdriver, hammer, level, tape measure, wrench, pliers, staple gun, utility knife, etc. But home ownership may require a few new ones you might not have needed before, including a:

  • Pry bar. Get one with a clawed end to pull nails and a flat end to separate drywall, remove trim or molding, and separate tile.
  • Stud finder. You can make as many holes in the walls as you want now. Use the stud finder to figure out where to hang those heavy shelves so they’re safely anchored.
  • Hand saw. Much easier (and cheaper!) than a power saw, you can get a good cross-cut saw for smooth edges on small DIY projects.
  • Ratchet set. Every bolt in your new house belongs to you, so you’d better be able to loosen and tighten them when needed. Crank that ratchet to get to spots where you can’t turn a wrench all the way around. Great for when you’re stuck in a corner.

#6 Confidence

“Especially for first-time home buyers. You’re inheriting the responsibilities a landlord would have if you were renting,” says Hunter. “Mowing isn’t a big deal, but maybe fixing a shingle or changing a faucet is.” But with a little self-confidence — and some YouTube tutorials — there’s (almost) no DIY project you can’t master.

#7 Headlamp

Take that flashlight out of your mouth and work hands-free. From switching out a faucet to figuring out what’s making that clicking noise behind the washer, there are plenty of homeowner tasks that require both hands and a little artificial light.

#8 Emergency Preparedness Kit

FEMA has a great list of supplies you should have in your kit, including cash, food, water, infant formula and diapers, medications, a flashlight, batteries, first aid kit, matches, sleeping bags, and a change of clothing. The agency recommends you stock enough for every member of your household, including pets, for at least 72 hours.

#9 Ladder(s!)

But not just any old ladder. Consider:

  • How high you need to go. If you use an extension ladder for a sky-high job, school yourself on safety tips, such as not standing above the support point.
  • Where you’ll use it. Make sure all four legs on a stepladder rest safely on a flat area. A straight ladder must be set up at a safe angle, so if a ceiling is too low, it might be too long for the room.
  • How heavy-duty it is. Check the ladder’s duty rating so you know how much weight (you, your tools, paint cans, etc.) it’ll support.

And don’t forget about the all-important escape ladder. The Red Cross recommends them for sleeping areas in multistory homes.

New Homeowner Checklist

The weeks leading up to a home purchase are super stressful. Between the home inspection and finalizing your financing, you also have to start packing up your entire life and maybe arranging for movers — or even selling your old house under a tight timeline. Then there’s the actual closing, when you sign your life away on about 500 different forms.

But after closing, the real fun begins. Now you’ve got this house to deal withAnd if your home, like ours, is full of fixer-upper flaws charm… it can be very overwhelming.

Seven years ago this month, we bought our house — our first home. It was exhilarating, but also terrifying. We found that focusing on a few small, manageable-but-productive tasks during our first week of home ownership made us feel way more in control of things during a period that could have easily spiraled into existential despair.

In that vein, here’s a checklist of simple things you can and should take care of when you first move into your new house. (Also, I forgot to say: Congratulations!)

1. Clean (or book a cleaning).

Before you unpack, and ideally before the furniture arrives, clean like mad, or hire a house cleaner to do a one-time deep clean (check for deals on Handy, Groupon, or Angie’s List — you shouldn’t have to pay more than $100-$150). You don’t have to be a clean freak to appreciate that living in your own mess is very different from living in someone else’s.

Vacuum and wash carpets (rent a carpet cleaner if you need one), sweep and mop the floors, bleach the entire bathroom, clean the fridge and the oven and all the sinks, and wipe down all your cabinets, drawers, shelves, and closets.

2. Take a few days off.

The first week or two in your new home will be an adrenaline-fueled flurry of phone calls, fixing stuff, unpacking, and waiting — for deliveries, contractors, and Internet installers. Trying to squeeze all that in around your job will only make it more stressful.

You just bought a house — it’s a big deal, and something you’ll probably only do a few times in a lifetime. Allow yourself to take some vacation or personal days.

3. Do any improvements or repairs you can before moving in.

Whether you do it yourself or hire a pro, it’s infinitely easier to do work on a house when no one is living there. This is especially true for those projects best done without furniture in the way, such as interior painting, plastering, or sanding and refinishing hardwood floors.

And if your home needs some work behind the walls — such as updating knob-and-tube wiring or replacing rusted-out pipes — do it now, before you get settled in, if at all possible. You’ll be glad you did.

4. Change your address and set up utilities.

For starters, alert the post office that you’ve changed your address, so they can forward mail to your new home. However, that service only lasts for a few months, so you should also start changing your address on all of your important accounts, such as your workplace benefits, bank accounts, credit cards, car and health insurance, magazine subscriptions, and memberships.

Likewise, call up the gas and electric companies and tell them you’ve moved. In most cases they’ll just transfer your account to your new address. You can often do the same with your cable or Internet provider, too, if you’re moving within the same service area. Otherwise, investigate your local options and call to set up service while you’re home getting settled.

5. Change the locks.

Even if you like and trust the previous owner, there’s no way of knowing how many copies of your house key are floating around – or who has them. (That reminds me: Our electrician still has a key to our basement. Um, I should probably get that back.) A new door hardware set will only run you about $50, and it’s well worth the peace of mind.

While you’re at the hardware store, get a few extra copies of your new key made, and give one to a trusted friend, neighbor, or relative for emergencies.

6. Plan now for emergencies.

The time to be researching plumbers in your area is not when the toilet is broken and spewing funky sewage onto the bathroom floor. (Gross — see “Find your shut-off valves” above!)

Ask your new neighbors for the names of any tradespeople they’d recommend, including plumbers, electricians, and handymen, or get an Angie’s List membership and start researching highly rated contractors in your area. (You can also sign up and introduce yourself on NextDoor, a neighborhood social media site, and ask for recommendations.)

Also, look up the numbers for poison control and local emergency services (if it’s not just 911) and put them on the fridge. Check all your smoke detectors and replace the batteries if you need to — you can also ask the fire department to come by and inspect them. Finally, find all of your emergency exits, and make a family fire plan that also designates a meeting point outside.

7. Use your home inspection report to plan future upgrades.

Your home inspector should give you a comprehensive report indicating the condition of all the major systems and structural parts of your home. Ours probably had like 50 items that “needed attention,” and this originally formed the basis of our long-term home improvement game plan.

From there, we made some lists: The stuff that was fairly easy to accomplish — or simply critical — went on the short-term, right-away list. Make sure there are some gimmes on there to help you build momentum! The stuff that can wait may have to wait.

8. Get a small safe or filing cabinet.

Even if you’ve never had one before, you’re probably going to need a filing cabinet or small safe now. File your closing statement and all the paperwork from your home purchase — that’s important stuff, and you’ll need it come tax time at the very least.

And that’s just the beginning of a lot of paperwork you’ll be filing from here on out. Keep receipts and instruction manuals for any new appliances you buy, your insurance and property tax bills, and any estimates or receipts from contractors as you make improvements.

9. Find out where your shut-off valves are.

One of your first lines of defense when it comes to common homeowner emergencies — burst water pipes, for instance — are shut-off valves. Turning off the water (or gas, or electricity) is like being able to slam on the brakes when you’re driving.

First, there are shut-off valves for small, localized problems: If the toilet is overflowing, look for the valve coming out of the floor or the wall behind the toilet and turn that to the right to stop the water flow. If your sink or faucet is leaking uncontrollably, the shut-offs will usually be under the sink (one for cold and one for hot).

Likewise, there should be a gas shut-off valve near your stove or dryer if either one uses natural gas. Find and familiarize yourself with all of these local shut-offs.

Then — and most importantly — find your main shut-offs, which control the gas and water coming into your house from the street. They’re usually found in the basement, toward the front of your house, but not always. Learn where these are ahead of time so you’re not clumsily searching for them in a panic as a geyser of a busted pipe is gushing water all over your kitchen.

Your circuit breaker acts as a shut-off for your home’s electricity. Individual circuits will control the electric flow to certain rooms or appliances — one breaker switch might shut off all the overhead lights, while another might control the refrigerator and the microwave outlets. Get familiar with the circuit breaker, and note where the main shut-off switch is to turn off all power in an emergency (if water is leaking into a live light fixture, for instance).

10. Create a seasonal home maintenance checklist, and start using it.

There are some maintenance tasks you’ll have to do to your home annually or semi-annually to keep it in good shape. And depending on the season you move in, it’s probably time to get started on some of them.

It’s really more of a two-season checklist than a four-season one; nobody wants to do stuff like this in the scorching summer heat or from underneath a foot of snow, so I tend to break down the tasks into spring and fall:

Spring/early summer home maintenance checklist

  • Install window A/C units (or check central air units): Trust me, the time to lug these things down from the attic and wrestle them into place is before the first scorching hot day, not right in the middle of it. Clean the filters before firing them up for the season.
  • Test your smoke detectors: Fire safety folks recommend doing this whenever the clocks spring ahead or fall back. Change any dead batteries.
  • Clean your gutters: Leaves and other debris from fall and winter may have choked up the works, and you want them free and clear before April’s heavy rains. If you have a one-story house, this is easy to do yourself; if your home is two or more stories or you’re afraid of heights, it should only cost about $60-$100 to have a pro come and do it.
  • Fertilize or plant new grass: The time to plant and fertilize grass is early spring: With the nights still cold, grass grows but weeds don’t. If you get a nice thick lawn growing by May, it can naturally crowd out the more unsavory stuff like crabgrass and dandelions. (If you don’t mind some chemicals, you can use crabgrass preventer or weed-blocking fertilizer — but usually not with new grass seed.)
  • Clean out your dryer vent: Your lint screen may be full of fuzzies each cycle, but a lot of it is still getting into that space-age silver tube. Clean it out with a vacuum or a long, bendy brush once a year to improve your dryer’s efficiency (and so it doesn’t catch fire).
  • Clean ceiling fans: They can get pretty dusty up there sitting idle all winter long.
  • Stain or paint the deck: Every other year or so, you’ll need to add another coat of stain to your deck’s floorboards (the railings and spindles can usually go five years or more). On a dry spring day, give it a good cleaning, and then strap a roller brush to a broom handle and slap another coat on there to protect the wood.

Fall/early winter home maintenance checklist:

  • Store hoses and turn off the water to outside spigots: You don’t want water freezing in your garden hose or faucet and breaking the pipes. In the basement, just follow the pipe from the faucet to the nearest shut-off valve, and turn it clockwise or so it’s perpendicular to the pipe.
  • Chimney sweep: You should get your main boiler or furnace chimney swept every couple of years — buildup in there can cause a chimney fire. And if you have a wood-burning fireplace or wood stove, get that cleaned out every couple of years or every time you go through a cord of wood, whichever comes first.
  • Boiler/furnace clean-out: Before heating season begins, you should get an inspection and the recommended annual maintenance on your boiler or furnace. If you get oil delivery, your oil company should take care of this for you. With gas, you’ll need to call your own plumber or heating technician. Since we have a pretty new gas steam boiler, our plumber told us we could do it ourselves: Just flush out all the water that’s in there (draining into a bucket and dumping it outside or down a drain), and then fill it back up. Repeat that a couple of times and you’re good to go.
  • Batten down the hatches: Move patio furniture into the garage (or at least take the cushions inside), cover up the grill, and remove and store your window A/C units (or cover up your central air unit). Move snow shovels, deicer, and other snow gear to an accessible spot in the garage or shed.
  • Tune up your snowblower: Snowblowers take a beating each winter — the metal parts get soaked, they get road salt inside them… it’s easy for them to get rusty and crap out on you. But you want yours ready to perform well when that first foot of snow falls. This year I plan on taking mine for a tune-up in the fall so it’s all set to go — you can often find a deal on Angie’s List, and you shouldn’t have to pay more than $100 for this type of service.

11. Throw a housewarming party.

Your first few weeks in a new house are going to be filled with the adrenaline and excitement that comes with such a big life change. Now, trust me on this: You need to tap that energy and get everything done that you can before the adrenaline wears off.

Don’t lose steam. For most people, whatever isn’t unpacked after about two months just stays in boxes and gets shoved in a closet. If you haven’t put pictures up on the wall after a couple of months, you’re going to be looking at empty walls for a long time.

Once you stop going all-out in move-in mode, it becomes really, really hard to get going again. After all, it’s exhausting, and you deserve the rest!

That’s why throwing a housewarming party is a great idea after you move in. It gives you a defined deadline to get the place in order, and puts just the right amount of motivational pressure on you to keep at it.

It’ll force you to confront those stray boxes and make tough decisions about what to do with them. It’ll push you to get the walls painted and decorated and to assemble that IKEA desk that’s been sitting in a box for two weeks. If you don’t do it now, there’s honestly a good chance you’ll be using that box as your desk six months from now.

It will allow you to share your excitement and hard work with the people you care about – not to mention, you might get a nice gift or two. (Tools make great house-warming gifts.)

And finally, accept that once the party arrives, you’re allowed to relax. You’re done. This is your home now, and this is what home looks like. You’ll make many more improvements to it, but for now, enjoy it.

12. Go to IKEA.

Let’s face it: Unless you’re downsizing, you might need some new home furnishings to fill out your new place. And for most of us 99 percenters, that means an IKEA run.

Maybe you’re moving from a small galley kitchenette to a large eat-in kitchen, or your old couch was too big or too ratty to move. Whatever the case, if you need to fill some empty rooms, the Swedish home goods superstore is a good starting point.

What do I mean by a starting point? You’ll have made a LOT of big decisions in the past few months, and you may not be ready to commit to an $1,800 living room set the same week you move in. You may do better living in the house for awhile before you make those kinds of design choices.

Meanwhile, IKEA furniture is cheap, functional, and attractively designed, so you usually can’t go wrong getting basic items here. What’s more, IKEA items hold their value surprisingly well — at least in a college town like Boston — so you can start with stuff that’s fairly cheap and functional and upgrade at your own pace.

Pick up a basic Ecktorp sofa to buy yourself some time — a steal at $450 — and then, when you do find that perfect living room set, sell the sofa for $300. (Or head straight to Craigslist or other places you can find used furniture and home goods.)

Finally, do not go to IKEA on a weekend if at all possible! Browse the catalog first to research the stuff you want to see in person, and then make a targeted trip around 7pm-8pm on a weeknight. You can zip through in under an hour without the mobs of people in your way, saving you time and certain rage.

And make sure to go with an empty trunk! When we went to buy our sofa, we brought the kiddo. Despite the flat-pack design, the sofa wouldn’t fit with her car seat in the back, even with half the back seat folded down (I don’t know why I thought that would work).

So I had to leave my wife and kid at IKEA and race home with the sofa. The worst part was that they were still inside the store and had no idea I was doing this — there’s no cell service in there. So I sped home, dumped the sofa in the driveway, and raced back, anxiously hoping that I got there before a) they went looking for the car or b) a toddler meltdown ensued.

The good news is, it’s IKEA, and it takes anyone a couple of hours to get through the store, much less someone with a dawdling toddler. They didn’t even know I was gone. Whew.

How to Increase Your Home Value

My first year of home ownership looked something like this: three bathroom updates, basement renovation, updated backyard landscaping and a heck of a lot of paint. Although my husband and I intentionally planned on most of those projects, we also started making a wish list of other things we wanted to do, like expand the master bathroom or swap carpet for hardwood floors, which got me thinking—there’s a fine line between making updates that add immediate resale value and investing in choices with zero ROI down the road.

A 2018 Homeowner Protection Survey by Chubb, which queried more than 1,200 U.S. homeowners about their approach to property, found that 58% of homeowners will “definitely” or “probably” undergo a home renovation or improvement project over the next 12 months. Of those who plan to do so, 65% plan to spend at least $10,000, with 20% budgeting between $10,000-40,000 and 15% spending more than that.

But as you make decisions regarding home upgrades, renovation and major projects, it’s vital to pay close attention to the market value of your home and the homes around you. “Pay attention to what homes top out for in your neighborhood,” advises Leneiva Head, real estate broker and founder of Welcome Home Realty in Tennessee. “If they top out at $500,000, and yours is already worth $475,000, you may lose money if your project is more than $25,000. Even that bears consideration because if you spend $25,000, then you only break even. Check the market against your home’s current value, then plan your renovations.”

Unsurprisingly, homeowners are most likely to spend money renovating or improving kitchens and bathrooms, according to the Chubb data. Here’s why, along with two additional smart ways to increase your home value in the first year.

1. Modify the floor plan or add square footage.

“If you’ve purchased a home that’s closed off and choppy at a time when most people prefer a more open design, then removing a wall here or there will increase the value within a year,” says Head. “For example, a couple bought an older home with a wall between the kitchen and the living room. They removed the wall (leaving about two feet on each end), sanded the hardwood floors, and added an island in the kitchen—which created the open look people prefer.”

Or, simply add square footage through a second bathroom, family room or four-season room. Bigger homes usually lead to higher values, and that’s something buyers tend to notice. Meghan Chomut, a certified financial planner who specializes in supporting families and property owners, says adding another decent-sized bedroom alone can broaden your buyer list if you sell, since many people will always consider more bedrooms than their family requires, but rarely consider looking at properties with less. Finally, you can also focus on creating additional living space, such as finishing a basement, building a deck or converting an attic.

If you’re not sure where to start, Remodeling magazine offers a great “Cost versus Value” report, which analyzes what you’ll pay for various upgrades alongside how much you can expect to recoup upon selling. “The doubling of homeowner equity over the past six years has given people the financial wherewithal, and the confidence, to make investments in their homes,” says Hunter. “This is showing up now as homeowners take on projects that they may have previously put off, or as they indulge themselves in discretionary upgrades that they can now afford. People are showing a greater tendency to stay in the home they already have and improve it rather than moving.”

2. Update kitchens and bathrooms for the greatest return on investment.

Brad Hunter, chief economist at HomeAdvisor, notes that millennial homeowners are now twice as likely as baby boomers to tackle kitchen and bathroom remodels. Based on findings from HomeAdvisor’s annual True Cost report, most millennials have compromised on the size and condition of their first homes, and many purchase older homes that need repairs in order to be able to afford home ownership at all. Those stats combined with the fact that most people perceive bathroom and kitchen updates as most impactful on home resale value—and kitchens and bathrooms are high-use, high-traffic rooms—results in a high level of interest for these types of projects. Also, says Indiana mortgage banker Corey Vandenberg, appraisers tend to look for updates in these areas first, due to the appeal for potential buyers.

Kitchens will give you one of the biggest returns on your investment, says Aaron Bowman, a realtor in Connecticut. Start by replacing old appliances with new, and make sure all appliances match if possible. You can reface or replace outdated cabinets, as well as revive old flooring with newer tile or vinyl options. And even very simple updates, like a backsplash or new appliances, can be a valuable place to put your money, adds Des Moines-based realtor Sara Hopkins.

“For example, if you just bought a home with standard cabinets and Formica countertops in the kitchen, then a simple swap out for quartz or granite will benefit you in your efforts to realize a return on your investment,” says Head. “Add gourmet-style cabinets and swap out the fluorescent overhead light for monorail lighting and you’ve got a winner.”

With bathrooms, Bowman says a complete renovation usually isn’t required. You can tackle inexpensive elements like vanities, toilets and fixtures, and still get the look and feel of an update without breaking the bank.

3. Prioritize curb appeal with landscaping.

“Landscaping is probably the best and easiest, most affordable way to increase your home value in the first year,” says Hopkins. It makes sense—healthy trees, blooming flowers or plants and neatly trimmed lawns make a house, well, prettier. Cassy Aoyagi, president of FormLA Landscaping, says some of the most impactful ROI can be earned outside of the home, and shares three easy, low-cost steps homeowners can take to make it happen.

  • Strategically plant native trees, which can reduce energy costs by as much as 50%, plus raise the value of neighboring homes
  • Plant young shrubs and leave space for it to grow to full size, as this will help cool your property
  • Replace annual plants or flowers with perennial foliage to help cut costs

What not to do: Aoyagi warns against installing synthetic turf and gravelscaping, as both can increase energy costs and degrade environmental resilience, as well as removing established trees.