Homeownership Investment

Homeownership has always been part of the American Dream. Because of that, many people accept owning a home as the right, even obligatory thing to do without considering the benefits and the risks. If you are contemplating buying a home, you should know and review the pros and cons of the investment you are about to make—as you would any investment decision—before signing on the dotted line.

Attractive Long-Term Investment

Appreciation represents the increase in home values over time. Real estate prices are cyclical, and homeowners shouldn’t expect the property’s value to increase drastically in the short-term. But if you stay in your home long enough, there’s a very good likelihood you will be able to sell your home for a profit because of appreciation later in the future.

In fact, buying a home is one of the best long-term investments you can make.
Despite some dramatic dips, such as that in 2008-10, residential real estate tends to rise in value. According to the Federal Reserve Bank of St. Louis, the average price of sold houses in the U.S. rose from $340,400 in Q3 2014 to $382,700 in Q3 2019—over 10% increase in value over five years. Go back a decade, when the average home fetched $274,100 (Q3 2009), and you have a 39% increase. That’s not a bad return on an investment that also provides you with a place to live.

Real estate appreciates primarily because of the land on which the home sits, while the actual structure depreciates as time goes by. So the expression “location, location, location” is not just a real estate catch-phrase, but a very important consideration when buying a home. The neighborhood with the amenities it brings—school districts, parks, condition of roads, etc.—and the city where the home is located all factor into the property’s appreciation.

Consider a home that is rundown and dilapidated to the point that it’s uninhabitable. The land underneath the home may still be worth a significant amount of money—more than the residence, in this case,. A seller may consider selling it as is—with the structure still intact—or spending a little extra to demolish the home and sell the land at a higher price on its own.

Illiquidity

Unlike stock, which can be sold within a matter of days, homes typically take much longer to unload. The fact that you may have access to $500,000 in tax-free capital gains doesn’t mean you have ready access. Meanwhile, you still must make mortgage payments and maintain the house until you sell it.

Building Equity

Home equity represents the difference between how much you still owe on your mortgage and the market price or value of your home. Home equity and appreciation may be considered together. As noted above, your home is likely to grow in market value over time. Your equity also grows as you pay down your mortgage, with less of your payment going toward interest and more toward lowering the balance on your loan.

Building equity does take some time because it takes time to lower the principal balance owing on the mortgage loan—unless, of course, you make a large down payment or regular prepayments. One thing to keep in mind, though, is that the length of time you have your home is a big factor in how much equity you build and the appreciation you can realize. The longer you keep it, the more equity you obtain.

As you pay down your mortgage and reduce the amount you owe, without realizing it, you are saving as the value of your home is increasing—just as the value of savings account increases with interest. When you sell, you will likely get back every dollar you paid out and more, assuming you stay in your house long enough. Over time the average 6% return (interest rate) on your savings should more than
cover your outlay.

Another plus: Home equity provides flexibility to get a loan that is tied to the amount of your home equity. Many investors follow their home equity and home appreciation simultaneously. If an investor believes their home value is greatly appreciating they may put off a home equity loan to have a better opportunity to realize seller’s appreciation.

Location, Location, Location

While paying down your mortgage works the same no matter where you live, market-value growth varies with location. According to the Federal Housing Finance Agency (FHFA) House Price Index (HPI), real estate prices rose an average of 32.88% over the five-year period ending Dec. 31, 2019, in the U.S. overall. However, prices in the Middle Atlantic census division rose only by 23.21%, while prices in the Pacific census division climbed by an average of 40.39%

Capital Gains Exclusion

Eventually, you will sell your home. When you do, the law allows you to keep the profits and pay no capital gains taxes. Well, not necessarily all the profits. There’s a tax-free profit of up to $250,000 for single homeowners and $500,000 for married couples. This is for your main residence only—not for a second home or vacation property.

There are a few requirements you need to meet in order to qualify for this exclusion. You must own the home for at least two years—24 months—within the last five years up to the closing date. The residence requirement dictates that you should have lived in the home for at least 730 days, or two years, during the five-year period leading up to the sale. The final requirement, the look-back requirement, outlines that you didn’t profit from selling another primary residence during the two-year period leading up to the most recent sale.

Tax Deductions

After appreciation, the benefit of homeownership that is cited most often is tax deductions or savings. When you buy a home, you can deduct some of the expenses of owning that home from the taxes you pay to the government. This includes mortgage interest on both your principal residence and a second home, which can amount to thousands of dollars per year.

Interest on home-equity loans or home-equity lines of credit (HELOCs) is also deductible if the funds are used to substantially improve your home.

You can also deduct up to $10,000 in state and local taxes (SALT), including property taxes.

Pride and Financial Responsibilities

One often-cited benefit of homeownership is the knowledge that you own your little corner of the world. You can customize your house, remodel, paint, and decorate without the need to get permission from a landlord.

Ownership comes with responsibilities, however. You must pay your mortgage or risk losing your home and the equity you’ve built. Maintenance and upkeep are your responsibility. You can’t call the landlord at 2 a.m. to have a leaky water pipe repaired. If the roof is damaged, you must repair it—or have it repaired—yourself. Lawn mowing, snow removal, homeowners insurance, and liability insurance all fall on you.

The Tax Cuts and Jobs Act’s Effect

The Tax Cuts and Jobs Act, passed in December 2017, made substantial changes to the parts of the tax code that have to do with homeownership. Unless a future Congress amends the law, all provisions will expire after Dec. 31, 2025. But for now, changes in that law have reduced the value of owning a home.

The law limits mortgage interest deductions to $750,000 of total mortgage debt, including for a first and second home and any home-equity or HELOC loans. The previous limit was $1,000,000 in mortgage debt plus an additional $100,000 in home-equity debt.

There is an exception allowing $1,000,000 in total mortgage debt if you bought your home on or before Dec. 14, 2017. This provision even applies if you refinance that older mortgage. Home equity loan interest is only deductible if the money is used for substantial improvements to the home on which you took out the loan. Previously, interest on up to $100,000 was deductible no matter how the home-equity money was used.

The law also set the SALT deduction limit to $10,000. Previously, all SALT payments were deductible, unless you were subject to the alternative minimum tax.

Other new provisions include restrictions on claiming casualty losses except for federally declared disasters. The moving expenses deduction no longer exist except for the active-duty military moving for reasons of work.

All these changes have lowered the value of owning a home—including the fact that, with the doubling of the standard deduction (another feature of the Act), fewer people will have enough deductions to file Schedule A instead of taking the standard deduction. So the fact that you are eligible for a tax deduction does not mean that it will end up being useful to you. The severe limiting of the SALT deduction will be particularly detrimental in lowering available deductions for people who live in highly taxed states.

High Upfront Costs

The cost of investing in a home can be high—there’s more to your expenses than the property’s selling price and the interest rate on your mortgage. For starters, you can expect to pay anywhere from 2% to 5% of the purchase price in closing costs. Some of the most common closing costs include an application fee, appraisal fee, attorney fees, property taxes, mortgage insurance, home inspection, first-year homeowner’s insurance premium, title search, title insurance, points (prepaid interest), origination fee, recording fees, and survey fee.

Experts say you should plan to stay in your house at least five years to recover those costs.

Potential Depreciation

Not all homes grow in value. The housing crisis of 2008 resulted in many homeowners being underwater, which means owing more on your mortgage than your home is worth. It doesn’t take a housing crisis for home prices to stagnate or drop. Regional or local economic conditions can result in home values that don’t keep up with inflation.

Remember, as well, that the actual structure you live in will depreciate over time. This can be due to wear and tear on the property, or a lack of maintenance and repairs.

The Bottom Line

A home is an investment that comes with many investment benefits but also risks, which makes it an investment that is not for everyone. Weighing the investment benefits against the risks is important. A rational comparison of pros and cons can help you decide whether to put your money into a home investment or potentially find better returns elsewhere.

Being a Homeowner: Struggling with Mortgage

If you are now struggling to make your mortgage payments, you’re not alone. According to RealtyTrac, 1 in every 2,253 homes is in foreclosure. In New Jersey, it’s 1 in every 1,043 homes; in Ohio, it’s 1 in every 1,503 homes.1 And with the novel coronavirus pandemic leading to rising levels of unemployment and income loss, you may feel that you’re also on the fast track to becoming another foreclosure statistic. Know that the federal government is suspending all evictions and foreclosures until the end of April. And if your mortgage payment issues are related to COVID-19, both Fannie Mae and Freddie Mac, which together guarantee more than two-thirds of all mortgages, are offering assistance to those financially struggling due to the fallout of the virus.

Whether your trouble meeting your mortgage payments is coronavirus-related or not, the first thing to do is to call your loan provider. If you can, try doing this before missing payments, as this will keep the largest number of options available to you. Here, experts lay out different options for when you’re struggling to pay on time.

Solution #1: Refinance to Change Your Interest Rate Terms

Refinancing to an adjustable rate mortgage (ARM) is a viable option if you’ve almost finished paying off your mortgage. “More and more consumers recognize the financial benefits an adjustable rate mortgage can provide under the right circumstances,” says Hensling. A perfect example is a homeowner who anticipates selling their home in the next three years and currently has a $400,000 fixed rate loan at 4.25% paying $1,976.76 per month.

Hensling says if the homeowner refinanced to a hybrid adjustable rate mortgage fixed for five years at 2.875%, this would reduce the monthly payment to $1,695.57 per month and save $281.19 per month.

Jeremy Brandt, CEO of WeBuyHouses.com, agrees, adding, “If a home is nearly paid off, the vast majority of the monthly payments are going to equity and not interest. Refinancing to an ARM might solve short-term cash flow issues by reducing the monthly payment at the expense of subsequent payments.” That being said, if interest rates start increasing, the monthly payments may increase over a period.

Alternatively, if you have an ARM, switching to a fixed rate mortgage may not lower your current monthly payments, but it can stop your payments from growing. “This makes sense if current fixed rates are lower than the ARM interest rate, or if you expect to move later than the next three years,” says Brandt. However, he warns that if you’ve been in an ARM for a while, the fixed rate you refinance into may be higher than your existing rate and this can cause your monthly payment to go up.

Solution #2: Request Mortgage Forbearance

Both Freddie Mac and Fannie May released guidelines for mortgage forbearance related to COVID-19. Essentially, they each are providing mortgage forbearance to borrowers financially affected by the novel coronavirus for up to 12 months. That means that individuals can reduce or suspend their payments for that time. Additionally, any related mortgage delinquency won’t be reported to the credit bureaus, so missing payments won’t tank your credit score. After the forbearance is over, lenders will work with borrowers to modify loans to lower monthly payments as necessary.2 3

Solution #3: Refinance to a Longer-Term Loan

Spacing your loan out over a longer period is one option that can reduce your monthly payment amount. Refinancing to a longer-term loan is the simplest way to reduce monthly mortgage payments, especially when cash flow is a problem, according to Al Hensling, president of United American Mortgage in Irvine, Calif.

However, it’s important to note that your interest rate will increase. To offset this, Matt Hackett, underwriting and operations manager at New York-based Equity Now, recommends making higher payments to increase the speed at which you pay down the principal. The majority of mortgages have no prepayment penalty (though you should definitely check yours).

Solution #4: Modify the Loan

A loan modification is an alternative for those who cannot refinance their loan but need to lower their monthly house payment. But, unlike a refinance, it requires a hardship. Pierce says borrowers must show the lender that as a result of a financial hardship, they are not able to continue making the regular monthly house payment. “This process involves extensive paperwork that must be completed and sent to the lender for review,” says Pierce.

She recommends that homeowners get counseling through a HUD-certified organization to fully understand their options and get help contacting the lender. “However, not all lenders offer loan modifications or may just offer short term loan modifications,” says Pierce.

As part of their mortgage assistance plans related to COVID-19, Fannie Mae and Freddie Mac are both allowing borrowers to modify their loans after forbearance.32

Solution #5: Get a Home Equity Loan

Getting a home equity loan may provide immediate assistance to struggling homeowners, but this strategy only works if you have a lot of equity in your house, which means that your home is valued at much more than you owe on it. Anthony Pili, director of strategic planning at Greater Hudson Bank in Bardonia, New York, advises struggling homeowners to consider paying off a mortgage with a home equity line. “Banks usually cover all closing costs on home equity lines. The savings in closing costs can be used to pay off the principal balance quicker,” says Pili.

He adds that this strategy is highly effective for borrowers who have the self-discipline to pay more than what is owed each month, since the minimum payment is usually just the interest that has accrued during the month.

Solution #6: Get the Lender to Eliminate Private Mortgage Insurance

Depending on how much equity is in your home, eliminating the private mortgage insurance (PMI) can lower your mortgage payments. “If you have at least 20% equity in the property, I recommend contacting the lender about dropping the mortgage insurance,” says Pierce. She explains that borrowers who usually don’t pay 20% down are required to have PMI for at least two years, but says there may be exceptions to the two-year rule. For example, if the homeowner made improvements to the house that increased the value, the requirement may be waived.

Solution #7: Challenge Property Taxes

If the value of your home has dropped, challenging your property tax may provide some financial relief, says Cara Pierce, a certified housing counselor at Clearpoint Credit Counseling Solutions, a national nonprofit organization. “You’ll need to contact the county tax assessor’s office in the county in which the house is located to see what type of information they will need as proof that the housing values have dropped,” says Pierce.

However, Pierce says this is a short-term strategy. She warns that as property values increase, property taxes will rise. Also, be advised that it may cost several hundred dollars to have your home appraised.

The Bottom Line

If you’re struggling with your mortgage, don’t throw in the towel. There are various solutions that can help you stay in your home and manage your monthly mortgage payments.

Being a Homeowner: Common Problems

Congrats, you own a home! Your dream of being a homeowner is finally a reality. But lurking just beneath the euphoria is the realization that you’re on your own now. No building superintendent to fix a leak. No landlord to repair the air conditioner. Home maintenance and repairs are now your responsibility.

Maybe you have a homeowner’s warranty that protects you from major problems — but it’s not going to replace light bulbs or clean your gutters.

Here are five common problems new homeowners have (and how to solve them):

1. Alone in the Dark

If your entire home goes dark during a storm, you’ll have to wait it out until the power company does its thing. But if the power goes out in just part of the home, a circuit breaker has tripped. This may be because you plugged too many things into a single circuit or because you have a power fluctuation or short circuit in your system. Every home has an electrical panel containing fuses or circuit breakers. Know where yours is located and which fuses or switches control each circuit. If your problem is a simple overload, the fuse has burned out or the switch for that circuit will have flipped itself to the off position. Unplug some appliances from the circuit and replace the fuse or flip the switch on again. If it goes out again, you may have a bigger problem. Call an electrician. Caution: You do not want to attempt any electrical work without killing the circuit.

2.  It’s Alive!

Your home might be made up of wood, metal, and fabric, but your yard is a living thing that requires your attention. If you’re starting from bare ground, you have to consider seeding or sodding and what grass and plants work best for your location. If your lawn is established, you have to think about watering (how often and how much?). Then there’s fertilizing (what kind and when?), spraying herbicide, (pre-emergent, post-emergent — what does that mean?), and mowing (how short, how tall?) Your first decision is whether to hire a lawn care professional or take on the work yourself. If you choose the latter, you’re in for a crash course on lawn care — and a trip to the store for a lawnmower, edger, fertilizer spreader, and weed whacker.

3. Water, Water Everywhere!

Water overflow occurs when your drain or toilet gets clogged. Whether the drain was clogged by hair or an entire roll of paper your 4-year-old flushed down the toilet, the first priority should be to stop the water immediately. Most sinks, lavatories, and toilets have a water cut-off valve on the wall where the water lines come in. If cutting that off doesn’t work, you will have to shut off the water at the meter in the yard. This involves a special key, available at home centers. While you’re there, arm yourself with a plunger, a can of drain cleaner, and a snake (a flexible rod that clears minor obstructions that you will eventually need). If you are not able to fix the problem, call a plumbing company and let the pros take care of it.

4. It’s Always Something!

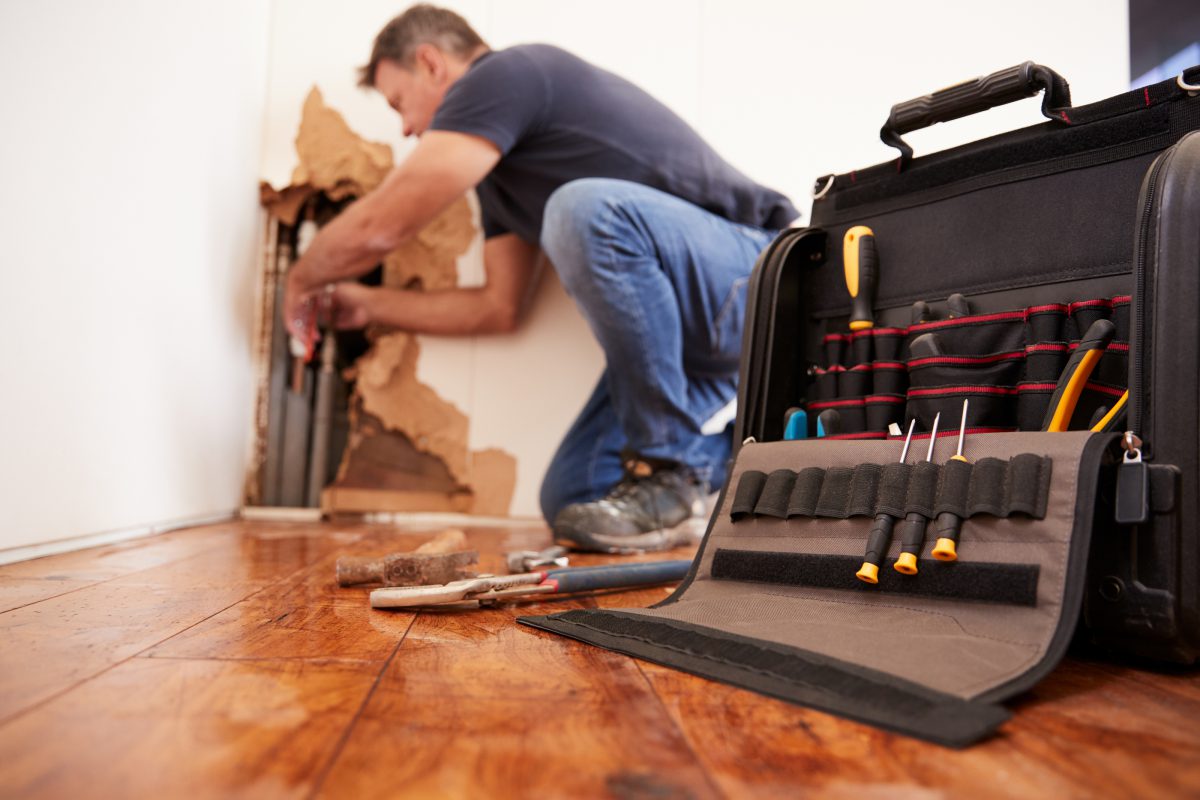
Even if your home is brand new, you’ll face handyman chores from hanging pictures to tightening knobs on kitchen cabinets. Start building your toolbox with the essentials right away.

Your starter toolbox should contain:

  • A hammer.
  • Screwdrivers (both flathead and Phillips).
  • Tape measure.
  • Pliers.
  • Adjustable wrench.
  • Utility knife.
  • Putty knife.
  • Flashlight.

Most tools can be purchased online, and whether you need a common torque wrench or a specific type of drill press, there are plenty of buying guides on the internet to help you get the best tool. Your toolbox will get bigger as new needs come along.

5.  Sweating It Out

One of the obligations of homeownership is changing the filter on your HVAC system. Although your air conditioner compressor is outside, your main unit is in a utility closet, basement, or attic and that’s where the filter is. The filter keeps dust and other gunk from being sucked into your blower fan, and if it’s not changed regularly, you’ll develop HVAC problems. Different units need different sized filters, and you’ll find them at home improvement centers. Follow the manufacturer’s recommendations on how often to change the filter — usually monthly or quarterly.

Homeownership comes with challenges, but you’ll get the hang of it. Besides, investing a little elbow grease and sweat will put your personal stamp on your home.

Being a Homeowner: Mistakes Everyone Makes in the Summer

Dreams of the summer season tend to focus on long, lazy days spent reading the latest bestsellers, napping in the rope hammock, or watching white clouds drift across a blue sky. But if you’re a homeowner, you know that summer isn’t always a day at the beach.

Forgetting the HVAC Filter

Your air conditioner works hard over the summer. Don’t make it work any harder than necessary. Keep the unit running smoothly—and keep cooling costs low—by checking the HVAC filter on a regular basis (as often as once per month if you own pets or live with a smoker). While slightly more expensive washable filters can be reused, cheaper fiberglass filters, once dirty, must be replaced. Consult the manual to learn the recommended filter type for your unit.

Letting the Siding Slide

Exterior siding: So highly visible to neighbors and passersby, its condition says a lot about your priorities as a homeowner. But while curb appeal may be one motivation for performing exterior maintenance, there’s a practical and even more compelling reason to do so. Over the summer months, dirt, mold, pollen and tree sap steadily accumulate. Unchecked, such surface imperfections could ultimately shorten the lifespan of your siding material.

Paying Pavement No Mind

It’s not impossible to repair concrete driveways, walkways, and patios in fall and winter, but cold weather makes it a lot more difficult to ensure a satisfying result. For that reason, there’s no better time than now to repair cracked, crumbling, or chipping concrete before it inevitably worsens, sometimes irretrievably. Use latex or epoxy patching compound, and if you wish to disguise the repair or give the paved area a smooth new look, applying a resurfacer.

Passing Over Pests

Insects are an unavoidable fact of life, particularly in the summer. Unpleasant though they may be, household pests are usually benign. However, it would be a mistake to forget that some critters pose a genuine threat—termites most of all. Do due diligence to prevent an infestation. Indoors, keep the basement and attic dry and well-ventilated. Outdoors, maintain a one-inch gap between soil and wood portions of the home, and tightly seal foundation cracks.

Overlooking the Roof

There are summer winds that blow in from the sea, bringing welcome relief on the hottest days of the year. And then there are tenacious gales that, on their own or in the course of a summer thunderstorm, put your home at risk of considerable damage. If and when especially rough weather visits your town, don’t forget to assess your roof in the aftermath. Upset shingles—whether loose, torn, or warped—are an open invitation to roof leaks and water damage.

Neglecting the Gutters

When’s the last time you inspected the gutters? Even beyond the fall season, leaves and debris can accumulate enough to form clogs. Combine heavy summer downpours with obstructed gutters, and your home becomes vulnerable to extensive, expensive damage. Now, for your gutters to drain away stormwater with persistent reliability, experts recommend twice-annual cleaning. If you’re tired of the hassle and hazards of climbing up a ladder to remove gutter gunk year after year, you wouldn’t be the only one! Perhaps it’s finally time to consider the alternative—a storm drainage system that requires zero maintenance. Guaranteed not to clog, seamless one-piece LeafGuard Brand Gutters eliminate the need for homeowners to clean—or even think about—their gutters. It’s a get-it-and-forget-it solution.

Being a Homeowner: Responsibilities

A recent survey showed that 64% of U.S. adults indicated that they believe home prices will continue to raise over the next year. This marks the highest percentage since before the market crash over 10 years ago. If you are in the market for a house, know what responsibilities come with a property owner.

Do I need to maintain the property?

Slip and falls are the sixth most serious cause of death. Over eight million people each year have to visit the hospital for this personal injury. One of the leading causes of slip and falls is from a homeowner’s failure to maintain his or her property. A homeowner cannot neglect or abandon their property without facing legal liability.

The law states that an owner has a duty to keep the property reasonable safe and make adequate repairs for anyone entering the property (except for unknown trespassers). These responsibilities do vary state to state. For example, in Florida a property owner can be responsible even if they did not have knowledge of the dangerous condition.

This responsibility extends to inspecting the property on a regular basis to discover any dangerous conditions and either repair them or provide notice (with a sign) to anyone who enters the property. The result for failure to maintain your property is that you can be sued for the personal injuries that are caused by your neglect.

Am I responsible for property insurance?

Property insurance substantially serves the interests of the insured. These insurances provide financial compensation after a natural disaster or similar loss. In fact, one in 15 homeowners have a property insurance claim each year. Legally, you can own a home without property insurance; however, many lenders require that borrowers have property insurance on the home.

One consequence for failure to pay homeowners insurance and/or a cancellation of a homeowner’s insurance policy is foreclosure. It’s important to check the language of your mortgage for the following language: “Failure to pay insurance is a default.” If this is present in your mortgage, it this signifies that the lender has the right to foreclose the property against you for failure to pay property insurance.

What happens if I neglect to pay my mortgage payments?

In 2016, new first lien mortgages surpassed the $2 trillion mark for the first time since the end of the housing bubble nearly eight years prior. As the data indicates, more individuals are obtaining loans; however, it’s important to know what happens as a result for failure to pay those loans.

Mortgage payments are monthly payments to the lending institution from the borrower for principal interest on the home loan. Within as little of 90 days after a borrower fails to make a mortgage payment, the lender can initiate a foreclosure proceeding against the borrower. This means the lender can sell the house and collect the proceeds to apply towards the borrowed amount of the home.

Do I have to pay property taxes on my home?  

The U.S. Census Bureau conducted a recent survey on the average American household. They found that the average family pays $2,127 per year on property taxes. These property taxes aren’t optional either, and they continue to rise. Between 2000 and 2010, property taxes rose to $476 billion from from $247 billion.

Failure to pay property taxes can lead to a forced sale of your home through a foreclosure proceeding. Additionally, the taxing authority may impose a tax lien and sell that tax lien. Ultimately, this could lead to the purchaser initiating foreclosure proceedings.

Being a Homeowner: Responsibilities

When a person goes from renting an apartment to owning a home, it is one of the greatest accomplishments of their lives. It takes many people several years to build their credit and to become financially ready to purchase their own home. While home ownership is a huge accomplishment, it also involves a great deal of work. When you were renting, your landlord was responsible for everything. Your only responsibility was to keep your unit clean and pay your rent on time. This is not the case when you own a home. There are several responsibilities that you would need to learn to embrace now that you are a homeowner.

We want to set you up for success on your journey to home ownership, so here are 10 tips:

1. Schedule trash pick-up.

When you were living in an apartment, you took your rubbish to the curb once a week and it was picked up. This was likely set up by your landlord. When you buy your home, you are responsible for setting up your rubbish collection.

2. Make your mortgage payments.

One of the biggest responsibilities that you have when you purchase your home is making your monthly mortgage payments. It is important that you make these payments on time every month. When you were renting, if you were short on cash one month, you could sometimes get away with an apology and a promise to be on time next month. This is not the case when you are paying a mortgage. If you are late, the late payments would have a negative effect on your credit report. If you cannot make your mortgage payments, you risk having your home go into foreclosure.

3. Pay your property taxes.

Now that you are a property owner, you need to start paying property taxes. This is something that you never had to worry about when you were renting. If you stop making your property tax payments, interest would be added to the amount of money that you owe. Also, over time, the government can put a lien on your house. Paying property tax is a very important responsibility.

4. Pay your water bill.

When you are renting, often, the only payment you are responsible for is your rent, electricity, and heat. Most landlords pay for the building’s water bills. When you own a home, you will need to start paying your own water bill. Your bill would depend on how much water you use. If you have a large family who takes long showers, if you do laundry in the home often, or if you use your water to fill a pool, your bill would be higher than the average.

5. Landscaping duties.

When you were living in an apartment, it was the responsibility of the property owner to take care of the landscaping duties. When you own your home, you would need to do all of the landscaping yourself. This would include mowing and watering the lawn, trimming the bushes and hedges, and planting any plants or flowers that you want to have in your yard. If curb appeal is important to you, you should start to assume landscaping responsibilities right away.

6. Schedule snow removal.

After a snow storm, your landlord was responsible for plowing the driveway and clearing the stairs and walkways of snow and ice, to make getting in and out of your home safe. When you purchase your home, you would be responsible for the snow removal yourself. Some homeowners shovel and treat their driveways, walkways, and stairs, while others hire a professional to do the job. Either way, you can no longer rely on a landlord to handle the snow removal duties for you.

7. Pest control.

There is nothing worse than a pest infestation. Whether it is ants, spiders, bed bugs, termites, mice, or any other pest, you need to get the pests out of your home as soon as possible. When you lived in your apartment, you did not need to worry about pest control. It was the responsibility of your landlord. When you own your home and you have a pest problem, you would need to hire and pay for an exterminator yourself.

8. Clean the gutters.

The gutters on the home are designed to drain all of the water from the roof down to the ground. Over time, leaves and other debris can clog up the gutters, which can result in standing water. During the summer, this standing water can result in a mosquito problem. During the winter, the water can freeze, creating ice dams. These can be very damaging to the roof. As a homeowner, it would be your responsibility to clean your gutters regularly.

9. Regular maintenance of the furnace and water heater.

To be sure that a furnace and water heater are running as efficiently as possible, they need to be maintained every year. If they aren’t, it can be a waste of money and it can result in an expensive breakdown. As a homeowner, it would be your responsibility to make the appointments for regular maintenance.

10. Home repairs.

When you were living in your apartment and something needed repaired, you would call your landlord and they would have it fixed as soon as possible. When you own your home, any necessary home repairs would be your responsibility. This is one of the most expensive responsibilities of being a homeowner. There are certain home repairs that can be very costly. If you are handy, you can handle the job on your own. If not, you would need to hire someone to make the necessary repairs for you.


Becoming a homeowner is one of the most fulfilling and exciting times of your life. There are, however, several new responsibilities that you need to start taking on yourself to make sure home ownership is a positive experience!

Essential Items You Need for a New House

Whether it’s the need to hang a clock just a few feet higher or the realization that you really can’t hold a flashlight and get that nut loosened under the sink, there’s always something catching you by surprise as a homeowner.

With the right items on hand, however, you can be prepared for every scenario — just like Hunter was, thanks to that ladder.

Here’s things you should buy for a new house:

#1 Tool Kit

You’ll need something to carry all those tools around from project to project. Create a tool carrier using a tool bucket liner and an old 5-gallon bucket. Or invest in a handyman belt filled with the basics to keep on hand in the kitchen.

#2 Wet-Dry Vacuum

You’re gonna be spilling stuff. Look for a wet-dry vacuum that can handle everything from paint to nails and small stones. “We inherited one of those with our first house, and it was an awesome thing to have for vacuuming the car and cleaning the garage,” Hunter says. Unlike the ladder, “we kept that Shop-Vac when we moved.”

#3 (The Right) Fire Extinguisher

“Whenever anyone I know moves, I give them a fire extinguisher as a housewarming gift,” says Nina Patel, a Silver Spring, Md., homeowner who, years ago, accidentally set her apartment on fire with a homemade candle. “I was able to put out the fire with a pan of water, but it was a panicked moment. I’ve had my own fire extinguisher ever since.”

But before going out and buying the first extinguisher you see, check out the U.S. Fire Administration’s guide. There are five different types of fire extinguishers with different uses, from extinguishing cooking oils to wood and paper. Choose the best type or types for your home.

#4 Extension Cord Organizer

Home ownership seems to breed extension cords that grow into a tangled nest. Save yourself time and hassle, and splurge on one of several cord management devices. Or make your own with a pegboard, hooks, and velcro straps to keep each cord loop secure. Either way, your cords will be knot-free and easy to find. And be sure to include a heavy-duty extension cord in your organizer that’s outdoor-worthy. You don’t want to really have to use that fire extinguisher.

#5 Big-Kid Tools

Odds are you already own a bunch of the basics: drill, screwdriver, hammer, level, tape measure, wrench, pliers, staple gun, utility knife, etc. But home ownership may require a few new ones you might not have needed before, including a:

  • Pry bar. Get one with a clawed end to pull nails and a flat end to separate drywall, remove trim or molding, and separate tile.
  • Stud finder. You can make as many holes in the walls as you want now. Use the stud finder to figure out where to hang those heavy shelves so they’re safely anchored.
  • Hand saw. Much easier (and cheaper!) than a power saw, you can get a good cross-cut saw for smooth edges on small DIY projects.
  • Ratchet set. Every bolt in your new house belongs to you, so you’d better be able to loosen and tighten them when needed. Crank that ratchet to get to spots where you can’t turn a wrench all the way around. Great for when you’re stuck in a corner.

#6 Confidence

“Especially for first-time home buyers. You’re inheriting the responsibilities a landlord would have if you were renting,” says Hunter. “Mowing isn’t a big deal, but maybe fixing a shingle or changing a faucet is.” But with a little self-confidence — and some YouTube tutorials — there’s (almost) no DIY project you can’t master.

#7 Headlamp

Take that flashlight out of your mouth and work hands-free. From switching out a faucet to figuring out what’s making that clicking noise behind the washer, there are plenty of homeowner tasks that require both hands and a little artificial light.

#8 Emergency Preparedness Kit

FEMA has a great list of supplies you should have in your kit, including cash, food, water, infant formula and diapers, medications, a flashlight, batteries, first aid kit, matches, sleeping bags, and a change of clothing. The agency recommends you stock enough for every member of your household, including pets, for at least 72 hours.

#9 Ladder(s!)

But not just any old ladder. Consider:

  • How high you need to go. If you use an extension ladder for a sky-high job, school yourself on safety tips, such as not standing above the support point.
  • Where you’ll use it. Make sure all four legs on a stepladder rest safely on a flat area. A straight ladder must be set up at a safe angle, so if a ceiling is too low, it might be too long for the room.
  • How heavy-duty it is. Check the ladder’s duty rating so you know how much weight (you, your tools, paint cans, etc.) it’ll support.

And don’t forget about the all-important escape ladder. The Red Cross recommends them for sleeping areas in multistory homes.

New Homeowner Checklist

The weeks leading up to a home purchase are super stressful. Between the home inspection and finalizing your financing, you also have to start packing up your entire life and maybe arranging for movers — or even selling your old house under a tight timeline. Then there’s the actual closing, when you sign your life away on about 500 different forms.

But after closing, the real fun begins. Now you’ve got this house to deal withAnd if your home, like ours, is full of fixer-upper flaws charm… it can be very overwhelming.

Seven years ago this month, we bought our house — our first home. It was exhilarating, but also terrifying. We found that focusing on a few small, manageable-but-productive tasks during our first week of home ownership made us feel way more in control of things during a period that could have easily spiraled into existential despair.

In that vein, here’s a checklist of simple things you can and should take care of when you first move into your new house. (Also, I forgot to say: Congratulations!)

1. Clean (or book a cleaning).

Before you unpack, and ideally before the furniture arrives, clean like mad, or hire a house cleaner to do a one-time deep clean (check for deals on Handy, Groupon, or Angie’s List — you shouldn’t have to pay more than $100-$150). You don’t have to be a clean freak to appreciate that living in your own mess is very different from living in someone else’s.

Vacuum and wash carpets (rent a carpet cleaner if you need one), sweep and mop the floors, bleach the entire bathroom, clean the fridge and the oven and all the sinks, and wipe down all your cabinets, drawers, shelves, and closets.

2. Take a few days off.

The first week or two in your new home will be an adrenaline-fueled flurry of phone calls, fixing stuff, unpacking, and waiting — for deliveries, contractors, and Internet installers. Trying to squeeze all that in around your job will only make it more stressful.

You just bought a house — it’s a big deal, and something you’ll probably only do a few times in a lifetime. Allow yourself to take some vacation or personal days.

3. Do any improvements or repairs you can before moving in.

Whether you do it yourself or hire a pro, it’s infinitely easier to do work on a house when no one is living there. This is especially true for those projects best done without furniture in the way, such as interior painting, plastering, or sanding and refinishing hardwood floors.

And if your home needs some work behind the walls — such as updating knob-and-tube wiring or replacing rusted-out pipes — do it now, before you get settled in, if at all possible. You’ll be glad you did.

4. Change your address and set up utilities.

For starters, alert the post office that you’ve changed your address, so they can forward mail to your new home. However, that service only lasts for a few months, so you should also start changing your address on all of your important accounts, such as your workplace benefits, bank accounts, credit cards, car and health insurance, magazine subscriptions, and memberships.

Likewise, call up the gas and electric companies and tell them you’ve moved. In most cases they’ll just transfer your account to your new address. You can often do the same with your cable or Internet provider, too, if you’re moving within the same service area. Otherwise, investigate your local options and call to set up service while you’re home getting settled.

5. Change the locks.

Even if you like and trust the previous owner, there’s no way of knowing how many copies of your house key are floating around – or who has them. (That reminds me: Our electrician still has a key to our basement. Um, I should probably get that back.) A new door hardware set will only run you about $50, and it’s well worth the peace of mind.

While you’re at the hardware store, get a few extra copies of your new key made, and give one to a trusted friend, neighbor, or relative for emergencies.

6. Plan now for emergencies.

The time to be researching plumbers in your area is not when the toilet is broken and spewing funky sewage onto the bathroom floor. (Gross — see “Find your shut-off valves” above!)

Ask your new neighbors for the names of any tradespeople they’d recommend, including plumbers, electricians, and handymen, or get an Angie’s List membership and start researching highly rated contractors in your area. (You can also sign up and introduce yourself on NextDoor, a neighborhood social media site, and ask for recommendations.)

Also, look up the numbers for poison control and local emergency services (if it’s not just 911) and put them on the fridge. Check all your smoke detectors and replace the batteries if you need to — you can also ask the fire department to come by and inspect them. Finally, find all of your emergency exits, and make a family fire plan that also designates a meeting point outside.

7. Use your home inspection report to plan future upgrades.

Your home inspector should give you a comprehensive report indicating the condition of all the major systems and structural parts of your home. Ours probably had like 50 items that “needed attention,” and this originally formed the basis of our long-term home improvement game plan.

From there, we made some lists: The stuff that was fairly easy to accomplish — or simply critical — went on the short-term, right-away list. Make sure there are some gimmes on there to help you build momentum! The stuff that can wait may have to wait.

8. Get a small safe or filing cabinet.

Even if you’ve never had one before, you’re probably going to need a filing cabinet or small safe now. File your closing statement and all the paperwork from your home purchase — that’s important stuff, and you’ll need it come tax time at the very least.

And that’s just the beginning of a lot of paperwork you’ll be filing from here on out. Keep receipts and instruction manuals for any new appliances you buy, your insurance and property tax bills, and any estimates or receipts from contractors as you make improvements.

9. Find out where your shut-off valves are.

One of your first lines of defense when it comes to common homeowner emergencies — burst water pipes, for instance — are shut-off valves. Turning off the water (or gas, or electricity) is like being able to slam on the brakes when you’re driving.

First, there are shut-off valves for small, localized problems: If the toilet is overflowing, look for the valve coming out of the floor or the wall behind the toilet and turn that to the right to stop the water flow. If your sink or faucet is leaking uncontrollably, the shut-offs will usually be under the sink (one for cold and one for hot).

Likewise, there should be a gas shut-off valve near your stove or dryer if either one uses natural gas. Find and familiarize yourself with all of these local shut-offs.

Then — and most importantly — find your main shut-offs, which control the gas and water coming into your house from the street. They’re usually found in the basement, toward the front of your house, but not always. Learn where these are ahead of time so you’re not clumsily searching for them in a panic as a geyser of a busted pipe is gushing water all over your kitchen.

Your circuit breaker acts as a shut-off for your home’s electricity. Individual circuits will control the electric flow to certain rooms or appliances — one breaker switch might shut off all the overhead lights, while another might control the refrigerator and the microwave outlets. Get familiar with the circuit breaker, and note where the main shut-off switch is to turn off all power in an emergency (if water is leaking into a live light fixture, for instance).

10. Create a seasonal home maintenance checklist, and start using it.

There are some maintenance tasks you’ll have to do to your home annually or semi-annually to keep it in good shape. And depending on the season you move in, it’s probably time to get started on some of them.

It’s really more of a two-season checklist than a four-season one; nobody wants to do stuff like this in the scorching summer heat or from underneath a foot of snow, so I tend to break down the tasks into spring and fall:

Spring/early summer home maintenance checklist

  • Install window A/C units (or check central air units): Trust me, the time to lug these things down from the attic and wrestle them into place is before the first scorching hot day, not right in the middle of it. Clean the filters before firing them up for the season.
  • Test your smoke detectors: Fire safety folks recommend doing this whenever the clocks spring ahead or fall back. Change any dead batteries.
  • Clean your gutters: Leaves and other debris from fall and winter may have choked up the works, and you want them free and clear before April’s heavy rains. If you have a one-story house, this is easy to do yourself; if your home is two or more stories or you’re afraid of heights, it should only cost about $60-$100 to have a pro come and do it.
  • Fertilize or plant new grass: The time to plant and fertilize grass is early spring: With the nights still cold, grass grows but weeds don’t. If you get a nice thick lawn growing by May, it can naturally crowd out the more unsavory stuff like crabgrass and dandelions. (If you don’t mind some chemicals, you can use crabgrass preventer or weed-blocking fertilizer — but usually not with new grass seed.)
  • Clean out your dryer vent: Your lint screen may be full of fuzzies each cycle, but a lot of it is still getting into that space-age silver tube. Clean it out with a vacuum or a long, bendy brush once a year to improve your dryer’s efficiency (and so it doesn’t catch fire).
  • Clean ceiling fans: They can get pretty dusty up there sitting idle all winter long.
  • Stain or paint the deck: Every other year or so, you’ll need to add another coat of stain to your deck’s floorboards (the railings and spindles can usually go five years or more). On a dry spring day, give it a good cleaning, and then strap a roller brush to a broom handle and slap another coat on there to protect the wood.

Fall/early winter home maintenance checklist:

  • Store hoses and turn off the water to outside spigots: You don’t want water freezing in your garden hose or faucet and breaking the pipes. In the basement, just follow the pipe from the faucet to the nearest shut-off valve, and turn it clockwise or so it’s perpendicular to the pipe.
  • Chimney sweep: You should get your main boiler or furnace chimney swept every couple of years — buildup in there can cause a chimney fire. And if you have a wood-burning fireplace or wood stove, get that cleaned out every couple of years or every time you go through a cord of wood, whichever comes first.
  • Boiler/furnace clean-out: Before heating season begins, you should get an inspection and the recommended annual maintenance on your boiler or furnace. If you get oil delivery, your oil company should take care of this for you. With gas, you’ll need to call your own plumber or heating technician. Since we have a pretty new gas steam boiler, our plumber told us we could do it ourselves: Just flush out all the water that’s in there (draining into a bucket and dumping it outside or down a drain), and then fill it back up. Repeat that a couple of times and you’re good to go.
  • Batten down the hatches: Move patio furniture into the garage (or at least take the cushions inside), cover up the grill, and remove and store your window A/C units (or cover up your central air unit). Move snow shovels, deicer, and other snow gear to an accessible spot in the garage or shed.
  • Tune up your snowblower: Snowblowers take a beating each winter — the metal parts get soaked, they get road salt inside them… it’s easy for them to get rusty and crap out on you. But you want yours ready to perform well when that first foot of snow falls. This year I plan on taking mine for a tune-up in the fall so it’s all set to go — you can often find a deal on Angie’s List, and you shouldn’t have to pay more than $100 for this type of service.

11. Throw a housewarming party.

Your first few weeks in a new house are going to be filled with the adrenaline and excitement that comes with such a big life change. Now, trust me on this: You need to tap that energy and get everything done that you can before the adrenaline wears off.

Don’t lose steam. For most people, whatever isn’t unpacked after about two months just stays in boxes and gets shoved in a closet. If you haven’t put pictures up on the wall after a couple of months, you’re going to be looking at empty walls for a long time.

Once you stop going all-out in move-in mode, it becomes really, really hard to get going again. After all, it’s exhausting, and you deserve the rest!

That’s why throwing a housewarming party is a great idea after you move in. It gives you a defined deadline to get the place in order, and puts just the right amount of motivational pressure on you to keep at it.

It’ll force you to confront those stray boxes and make tough decisions about what to do with them. It’ll push you to get the walls painted and decorated and to assemble that IKEA desk that’s been sitting in a box for two weeks. If you don’t do it now, there’s honestly a good chance you’ll be using that box as your desk six months from now.

It will allow you to share your excitement and hard work with the people you care about – not to mention, you might get a nice gift or two. (Tools make great house-warming gifts.)

And finally, accept that once the party arrives, you’re allowed to relax. You’re done. This is your home now, and this is what home looks like. You’ll make many more improvements to it, but for now, enjoy it.

12. Go to IKEA.

Let’s face it: Unless you’re downsizing, you might need some new home furnishings to fill out your new place. And for most of us 99 percenters, that means an IKEA run.

Maybe you’re moving from a small galley kitchenette to a large eat-in kitchen, or your old couch was too big or too ratty to move. Whatever the case, if you need to fill some empty rooms, the Swedish home goods superstore is a good starting point.

What do I mean by a starting point? You’ll have made a LOT of big decisions in the past few months, and you may not be ready to commit to an $1,800 living room set the same week you move in. You may do better living in the house for awhile before you make those kinds of design choices.

Meanwhile, IKEA furniture is cheap, functional, and attractively designed, so you usually can’t go wrong getting basic items here. What’s more, IKEA items hold their value surprisingly well — at least in a college town like Boston — so you can start with stuff that’s fairly cheap and functional and upgrade at your own pace.

Pick up a basic Ecktorp sofa to buy yourself some time — a steal at $450 — and then, when you do find that perfect living room set, sell the sofa for $300. (Or head straight to Craigslist or other places you can find used furniture and home goods.)

Finally, do not go to IKEA on a weekend if at all possible! Browse the catalog first to research the stuff you want to see in person, and then make a targeted trip around 7pm-8pm on a weeknight. You can zip through in under an hour without the mobs of people in your way, saving you time and certain rage.

And make sure to go with an empty trunk! When we went to buy our sofa, we brought the kiddo. Despite the flat-pack design, the sofa wouldn’t fit with her car seat in the back, even with half the back seat folded down (I don’t know why I thought that would work).

So I had to leave my wife and kid at IKEA and race home with the sofa. The worst part was that they were still inside the store and had no idea I was doing this — there’s no cell service in there. So I sped home, dumped the sofa in the driveway, and raced back, anxiously hoping that I got there before a) they went looking for the car or b) a toddler meltdown ensued.

The good news is, it’s IKEA, and it takes anyone a couple of hours to get through the store, much less someone with a dawdling toddler. They didn’t even know I was gone. Whew.

How to Organize Your Home

There’s no right way to organize your home. Whatever strategy you choose just has to work with your lifestyle, habits, and tastes. But there are a few tried-and-true strategies that can enhance the effectiveness of any system. From being aware of clutter hot spots to identifying red flags that your organizing method isn’t working, we learned some smart approaches to getting organized from the pros so you can save the time, money, and stress that come with living in a den of disorder.

1. Take a step back.

Often clutter becomes such a fixture, you look right past it. For a new perspective, imagine you’re a guest in your own home. Take note of things a visitor would notice that you’ve been ignoring, like the paper pile that has claimed the corner of the kitchen counter for months or the blankets strewn all over the couch. Then, refresh the room back to its original state by eliminating what’s making it appear disorganized. Still not seeing the junk? Snapping a picture of the room will force you to view your space through a different lens.

2. Make it easier to put things away.

“It always surprises me how difficult people make organizing for themselves,” says Kate Brown, certified professional organizer and owner of Impact Organizing LLC. Her suggestion: “Make everything a one-handed operation.” For example, don’t hide your laundry basket in the back of the closet. Instead, use an open bin that you can throw your clothes into from across the room. “And avoid lids at almost all costs,” she urges. Using open containers for things you use often like toiletries and cooking supplies makes it easier to put them away. This advice even applies to garbage cans. Brown recommends investing in one with a lever you can step on to pop the lid open. “The fewer steps, the better the organizing system,” she says.

3. Arrange items according to how frequently they’re used

Keep the items you use every day in plain sight—or at least at eye level. “The things you use daily should be the easiest to get to,” says Lowell. “While the things you use once in a while should require a step stool.” This is where high shelving comes in handy. “Things you use only once a year should require a ladder,” he adds. (Think attics or out-of-reach shelving in a garage.) Not only will this storage system make it easier for you to find the things you use often, but the items you don’t use regularly will stay organized until you need them.

4. Don’t buy storage containers until you’ve purged.

“When people want to get organized, the first thing they usually do is run out and buy storage supplies,” says Julie Isaacs, a professional organizer and founder of Uncluttered Home. “But that’s actually backwards.” The point, she explains, is to evaluate why you have so much stuff to begin with—not find new ways to house your junk. “You won’t have any idea of what you really need in terms of containers or shelving until you’ve purged.” While deciding what to keep and what to toss, always remember the “80/20 rule.” “It’s the theory that most of us only use 20 percent of what we have. That’s a good starting point to realizing you are surrounded by a lot of things you probably don’t need,” Isaacs says. Plus, not only will slimming down your stuff save you money on storage supplies, but it’ll save you the headache of going through excess items in an emergency or last-minute situation.

5. Eliminate clutter hot spots

Flat surfaces like your dining room table, entryway table and kitchen counters tend to accumulate piles faster than any other spot in the house, explains Isaacs, who advises clients to make clearing all flat surfaces part of their nightly routine—right along with washing their face and brushing their teeth. But if that doesn’t work, her last-ditch trick is to physically block any surface that has become a clutter haven. “For instance, if you put a flower arrangement in the middle of the dining room table and set it with placemats, you’re sending the message that the space is no longer a dumping zone,” Isaacs says.

6. Don’t treat drawers like catch-alls.

“There isn’t a drawer in your house that should not have container organizers in them,” says interior decorator Christopher Lowell, author of Seven Layers of Organization. They can be any material you want—wood, wire mesh or clear plastic—and are available at most home goods stores. “This allows you to separate the drawers into defined areas for specific things verses throwing everything into one big space,” says Lowell. For the bedroom, store everyday items—like underwear and socks—in top drawers, workout clothes in the second or third drawers and pants in the bottom drawers. In the bathroom, keep cotton swabs and other daily use items on the counter within arm’s reach, and tools you use occasionally under the cabinet. “With the things you only use now and then separated out and away from the things you need every day, those daily essentials will be better organized and easier to get to,” Lowell says.

7. Store a discard bag in the closet.

“I keep a shopping bag with a handle in the front of my closet. Every time I try on a piece of clothing and then take if off again because it’s unflattering, doesn’t fit, is pulled, stained or out of style, I put it in the bag,” Brown says. “If you’ve taken the piece of clothing off for any reason other than that it’s dirty or doesn’t match, that means it’s not right and will probably never be,” she says. When the bag is full, Isaacs explains, donate the clothes or trade them with a friend at a swap party.

8. Be picky about items in your home

Think carefully about what you allow into your home. Consider your needs before accepting hand-me-downs or agreeing to store a friend’s kayak for the off-season. If shoes aren’t your size, skip ’em. If you do have space to hang on to something temporarily, set a pickup date so your basement doesn’t become a free storage unit.

9. Sort smartly

When you’re ready to roll up your sleeves and take on an organizing project, follow these steps to restore (and keep!) order: First, do it in one shot. Set up a staging area, like the dining table, then empty whatever you’re organizing so you can spot doubles, giveaways, and must-saves fast. Then use organizers like clear containers and baskets without lids so you can quickly access what’s left of your pared-down collection. Lastly, label everything—even if you think you’ll remember, mark boxes and bins with easy-to-read descriptions so there’s no second-guessing later on.

10. Set limits for everything.

Assign things like memorabilia and craft supplies to a single shelf or bin, then let the designated area’s size dictate how much you keep.

11. Use your calendar

Give yourself real motivation to finally hang those family photos by planning to host a dinner party. Or try creating a deadline for the DIY project sitting in your basement. If the date comes and goes, donate the piece and any materials and move on.

12. Learn to make quick decisions.

Trying to determine what can stay and what should go? If at least one of the following statements is true about an item, then it’s a keeper:

I’ve used it within the last year. That’s enough time to have gone through all four seasons and special occasions. If you still aren’t sure, put the item in a “Donate Later” box, seal it and mark it with the date of one year from now. If you haven’t opened it by then, drop off the box at Goodwill without peeking inside.

I need it or I love it. If you don’t, there’s no real reason to hang on to it. Resolve to fill your space only with things that really work, give you pleasure or celebrate your family. Remember that you can’t appreciate what you have if it’s hiding in a dark corner of a closet. You should frame or display what you deem worth holding on to.

It fits into the life I want to live. If something supports you and your future goals (think exercise equipment or a book about starting a business), it can stay. If it’s a painful reminder of the past (think clothes that don’t fit anymore or items that belonged to an ex), let it go.

13. Look for signs that tell your system isn’t working.

If a room still somehow looks messy after you’ve cleaned, it’s time to improve your organizational system, which, according to Brown, should allow you to tidy up in 15 minutes or less. Once you’ve pulled out what you don’t need—to either throw away or donate—the next step is to group things together based on use or occasion and store them in open containers

Buying a House: Working with Real Estate Agents

Real estate agents love working with people, but there are always clients who may unintentionally cross the line. Here are a few simple protocols you can use while shopping for a home that will keep you out of hot water and on good terms with real estate agents—especially your own agent.

Choose a Real Estate Agent

  • If you are interviewing agents, let each agent know you are in the interview stage.
  • Decide whether you want to work without representation, dealing directly with listing agents, or if you want to hire your own agent.
  • If you decide to hire your own agent, interview agents to find an agent with whom you are comfortable.
  • Never, never, never interview two different agents from the same company.

Understand Agents Work on Commission

  • Most real estate agents are paid a commission. If an agent does not close a transaction, they do not get paid. Agents are highly motivated to do a good job for you.
  • Agents are not public servants and do not work for free. Do not ask an agent to work for you if you intend to cut the agent out of your deal.
  • Very few real estate agents work on salary and if they do, you probably don’t want them.

Keep Appointments and Be on Time

  • If you are running late, call and let your agent know when you expect to arrive. Just show respect.
  • Be respectful, use common courtesy, and don’t expect an agent to drop what they are doing to run out and show you a home. You are probably not that agent’s only prospect or client. And if you are, it’s not a good sign.
  • Do not make an appointment with an agent and then forget to show up.

Do Not Call the Listing Agent If You Are Working With a Buying Agent

  • Listing agents do not want to do the buying agent’s job. Let your buyer’s agent do their job.
  • Listing agents work for the seller, not the buyer. If you hire the listing agent to represent you, that agent will now be working under dual agency. Conflicts of interest may occur.
  • If a listing agent shows you the property, the listing agent will expect to represent you. Ethics prevent a listing agent from showing preferential treatment. If you ask a listing agent to do you a favor and try to discount the price, it’s compromising integrity, and most won’t do it.

Sign a Buyer’s Broker Agreement With a Buying Agent

  • Ask about the difference between an Exclusive and Non-Exclusive Buyer’s Broker Agreement.
  • If you’re not ready to sign with a buyer’s broker, do not ask that agent to show you homes. Otherwise, a procuring clause may pop up.
  • Ask your agent if they will release you from the contract if you become dissatisfied. If they refuse, hire somebody else. Your agent should also be respectful of your goals.
  • Expect to sign a buyer’s broker agreement. It creates a relationship between you and the agent and explains the agent’s duties to you, and vice versa.

Always Ask for and Sign an Agency Agreement

  • The best and most practiced type of agency is the single agency. This means you are represented by your own agent, who owes you a fiduciary responsibility.
  • By law, agents are required to give buyers an agency disclosure. This document varies across state lines.
  • Signing an agency disclosure is your proof of receipt. It is solely a disclosure. It is not an agreement to agency. Read it thoroughly.

Make Your Expectations Known

  • Set realistic goals and a time frame to find your home. Ask your agent how you can help by supplying feedback.
  • If you expect your agent to pick you up at your front door and drive you home after showing homes, tell them. Many will provide that service. If not, they will ask you to meet at the office.
  • Let your agent know how you want them to communicate with you and how often. Do you want phone calls, emails, text messages, IMs, or all of the above?
  • If you are displeased, say so. Agents want to make you happy. Don’t be afraid to speak up.

Do Not Sign Forms You Do Not Understand

  • Realize agents are not lawyers and cannot interpret law. Don’t ask agents to give a legal opinion, prefaced by the statement you are not asking for a legal opinion.
  • Do not feel silly for asking your agent to explain a form to you. It’s their job. Many forms are second nature to agents but not to you, so ask for explanations until you are satisfied you understand.
  • Try not to sign forms titled “Consent to Represent More Than One Buyer.” This is never in your best interest. But sometimes you can’t help it because your agent could work for a large brokerage. That brokerage could represent more than one buyer, not your agent.

Be Ready to Buy

  • Bring your checkbook. You’ll need it to write an offer because an​ earnest money deposit may be required to accompany your purchase offer. And please, be preapproved.
  • If you aren’t ready to buy, you don’t need a real estate agent. You can go to open houses by yourself and call listing agents for showings—but be honest. Say you are “only shopping.” Look at homes online, but don’t waste an agent’s time if you aren’t ready to act.
  • If possible, hire a babysitter to care for children who are too young to stay out all morning or afternoon touring homes.

Practice Open House Protocol

  • Do not ask the open house host questions about the seller or the seller’s motivation. Let your agent ask those questions for you. Your agent will probably use a different approach that works.
  • Ask your agent if it’s considered proper for you to attend open houses alone. In some areas, it’s frowned upon to go to open houses unescorted.
  • Hand your agent’s business card to the agent hosting the open house. Sometimes this agent will be the listing agent, but often it is a buyer’s agent also looking for unrepresented buyers. Announcing you are represented protects you.

With a little respect and courtesy on both sides, you and your agent can have a successful relationship and smoothly navigate the process of buying a home.