Being a Homeowner: Responsibilities

When a person goes from renting an apartment to owning a home, it is one of the greatest accomplishments of their lives. It takes many people several years to build their credit and to become financially ready to purchase their own home. While home ownership is a huge accomplishment, it also involves a great deal of work. When you were renting, your landlord was responsible for everything. Your only responsibility was to keep your unit clean and pay your rent on time. This is not the case when you own a home. There are several responsibilities that you would need to learn to embrace now that you are a homeowner.

We want to set you up for success on your journey to home ownership, so here are 10 tips:

1. Schedule trash pick-up.

When you were living in an apartment, you took your rubbish to the curb once a week and it was picked up. This was likely set up by your landlord. When you buy your home, you are responsible for setting up your rubbish collection.

2. Make your mortgage payments.

One of the biggest responsibilities that you have when you purchase your home is making your monthly mortgage payments. It is important that you make these payments on time every month. When you were renting, if you were short on cash one month, you could sometimes get away with an apology and a promise to be on time next month. This is not the case when you are paying a mortgage. If you are late, the late payments would have a negative effect on your credit report. If you cannot make your mortgage payments, you risk having your home go into foreclosure.

3. Pay your property taxes.

Now that you are a property owner, you need to start paying property taxes. This is something that you never had to worry about when you were renting. If you stop making your property tax payments, interest would be added to the amount of money that you owe. Also, over time, the government can put a lien on your house. Paying property tax is a very important responsibility.

4. Pay your water bill.

When you are renting, often, the only payment you are responsible for is your rent, electricity, and heat. Most landlords pay for the building’s water bills. When you own a home, you will need to start paying your own water bill. Your bill would depend on how much water you use. If you have a large family who takes long showers, if you do laundry in the home often, or if you use your water to fill a pool, your bill would be higher than the average.

5. Landscaping duties.

When you were living in an apartment, it was the responsibility of the property owner to take care of the landscaping duties. When you own your home, you would need to do all of the landscaping yourself. This would include mowing and watering the lawn, trimming the bushes and hedges, and planting any plants or flowers that you want to have in your yard. If curb appeal is important to you, you should start to assume landscaping responsibilities right away.

6. Schedule snow removal.

After a snow storm, your landlord was responsible for plowing the driveway and clearing the stairs and walkways of snow and ice, to make getting in and out of your home safe. When you purchase your home, you would be responsible for the snow removal yourself. Some homeowners shovel and treat their driveways, walkways, and stairs, while others hire a professional to do the job. Either way, you can no longer rely on a landlord to handle the snow removal duties for you.

7. Pest control.

There is nothing worse than a pest infestation. Whether it is ants, spiders, bed bugs, termites, mice, or any other pest, you need to get the pests out of your home as soon as possible. When you lived in your apartment, you did not need to worry about pest control. It was the responsibility of your landlord. When you own your home and you have a pest problem, you would need to hire and pay for an exterminator yourself.

8. Clean the gutters.

The gutters on the home are designed to drain all of the water from the roof down to the ground. Over time, leaves and other debris can clog up the gutters, which can result in standing water. During the summer, this standing water can result in a mosquito problem. During the winter, the water can freeze, creating ice dams. These can be very damaging to the roof. As a homeowner, it would be your responsibility to clean your gutters regularly.

9. Regular maintenance of the furnace and water heater.

To be sure that a furnace and water heater are running as efficiently as possible, they need to be maintained every year. If they aren’t, it can be a waste of money and it can result in an expensive breakdown. As a homeowner, it would be your responsibility to make the appointments for regular maintenance.

10. Home repairs.

When you were living in your apartment and something needed repaired, you would call your landlord and they would have it fixed as soon as possible. When you own your home, any necessary home repairs would be your responsibility. This is one of the most expensive responsibilities of being a homeowner. There are certain home repairs that can be very costly. If you are handy, you can handle the job on your own. If not, you would need to hire someone to make the necessary repairs for you.


Becoming a homeowner is one of the most fulfilling and exciting times of your life. There are, however, several new responsibilities that you need to start taking on yourself to make sure home ownership is a positive experience!

Mortgage Mistakes You Should Avoid

Bad decisions on a $400,000 home loan can easily cost you $100,000.

If you already have a mortgage, it’s not too late to fix old mistakes (or avoid making them with your next loan).

You should review your mortgage every 2 years anyway.

Why? Because less income needed to payout your mortgage means more money for other areas of your life. Your mortgage is probably the biggest financial commitment you will make in life. It is easy to get right and just as easy to get completely wrong.

Most people are surprised to find out that a low interest rate is not the only factor in reducing mortgage cost and paying out a loan faster.

You won’t see lenders advertising most of the tactics available to you, as it’s not in their best interests – the longer it takes to payout your loan, the more money they make. Lenders make money by lending you as much as possible, for as long as possible and with fees as high as they can get away with.

1.  You didn’t set up your loan with the right features

There are loan features that you might need now or down the track, such as an offset account or the ability to top up. These features do not have to make your loan more expensive, regardless of what an individual lender might tell you. It’s important to design a loan based on your needs now and in the future.

This is why independent mortgage advice, combined with the assistance of your financial planner, is so important.


2.  You’re not getting commission refunded

Some mortgage brokers will cap their income and provide a commission refund. Getting commission refunded on an ongoing basis is probably the easiest way to put $10,000’s back in your pocket over the life of your loan.

It’s also the strategy that’s possibly least utilised, as not many people know about it.

The mortgage broker who arranges your loan receives an immediate commission payment. For a $450,000 loan, your broker would receive around $3,000 at settlement.

In addition, that broker will receive a yearly commission payment (called trailing commission). On a $450,000 loan, your broker would receive about $700 every year. Although that commission reduces as your loan size decreases, trailing commission can last up to 30 years. Mortgage brokers build their businesses on this recurring income. And while they should be paid, you may find one that caps the commission they take.

Trailing commission can create a bias towards lenders who pay a higher % to brokers. In other words, your broker might be swayed to recommend the loan that pays them the most. While many brokers put their clients interests first, this ongoing commission can reduce the incentive for your broker to give you advice on how to pay out your loan more quickly. They may be more inclined to recommend a fixed term with a fixed interest rate, when a variable may be more appropriate.

There are only a few mortgage brokers in Australia who will refund any commission.

Getting this money back, and using it as additional repayments, can take years off your loan.

A note: Some mortgage brokers will tell you they don’t receive commission, but their employers do – and those brokers are paid salary and bonuses to recommend particular lenders.

Can you avoid commission by going direct to a lender? 

No – lenders will not bite the hand that feeds them by undercutting every broker in Australia. In addition, they use the commission saved to provide you with loan service otherwise provided by the broker.

How do you get trailing commission refunded if you already have a mortgage?

You can’t get trail commission back on a current mortgage, unless your broker is kind enough to start giving it back to you. However, you can review your current mortgage and work out if it’s worth refinancing.

To summarise, getting a commission refund:

1. Puts money back in your pocket, to help pay out your loan faster

2. Removes the chance your broker will recommend a particular loan because it pays them more.

3.  You fell for cheap tricks with rate comparisons

You should almost never pay the Standard Variable Rate (SVR). Each lender’s SVR will vary with others – it is the basis by which your interest rate is determined but not the final rate you are likely to pay. Some banks have higher SVR and so will discount theirs by more to reach the ultimate rate you will pay. Some have lower SVR and so will only apply a small discount.

Therefore, comparing the SVR across lenders does not help you work out which loan is cheapest.

2 tricks to look out for:

  1. Showing a large discount off their SVR to make you think you are getting a great deal. A big discount off a high price still costs more than a small discount off a lower price.
  2. A lender comparing their lowest interest rate with the SVR of other lenders – rates you would never pay if you used those companies.

4.  You’re sticking with the same mortgage ‘til the end

Home loans can become uncompetitive in only a few years, or less.

For starters, it pays to check your lender hasn’t jacked up the rate of your loan and is no longer competitive.

Competition improves loan features and you might be missing out on benefits if you stick with the same loan to too long.

You should check your loan remains the best option every 2 years. It costs nothing (but some of your time) to check if there is a better deal. And that time can save you thousands of dollars a year.

A tip: When you set up your mortgage, always assume that you will need to repay early or refinance. If suitable given your overall needs, take out a loan that has low or negligible break costs. This is another reason you should get advice from a broker who will consider the costs of exiting your loan early – ideally a fee based broker who takes their payment only from you, and not the lender.

5.  You set your loan term as long as possible

Reducing your loan term just a few years can take $100,000’s off the cost of the average loan.

It’s not always the best strategy to go for the longest loan period possible. Paying a little more off your loan each month can make you significantly more wealthily over the long-term, or at least debt free earlier. You should look at the opportunities presented by a shorter mortgage, such as the ability to focus on your kids’ education once you’re debt free.

Your lender and mortgage broker want you to take out a 25 – 30 year loan as they are being paid interest and trailing commission for the entire time.  The longer the loan the more money your lender and broker make.

And using a mortgage offset is not always the best strategy for some people, as the easy access to funds presents a temptation to spend the cash (a redraw facility adds an additional layer of admin and gives access to funds if needed). Always get financial advice with your mortgage advice.

6.  You relied 100% on rating websites to make your choice

While useful as a tool for adding to a short list, rating websites are incomplete and often contain inaccurate information. The lenders they feature generally pay these sites and most sites will exclude lenders who aren’t willing to pay a fee. Some sites promote a lender’s most profitable (expensive) loans, rather than the cheaper loans also offered by the same lender.

There are often many inconsistencies in the results of top rating sites when compared with independent research.

7.  You focused too much on interest rate

Interest rate is only one factor that influences the total cost of your loan. Going with the lender that offers the best initial interest rate doesn’t mean you have the cheapest loan.

Interest rates can change soon after your loan starts and you can quickly end up with a very uncompetitive and expensive rate. In addition, there are other costs that can make a loan significantly more expensive than it seems, based on the interest rate alone.

Fees might include:

–       Lenders mortgage insurance

–       Application fees

–       Valuation fees

–       Legal and settlement fees

–       Rate lock fees

–       Early payout fees (deferred establishment fees)

–       Discharge fees

–       Establishment fees

8.  You went direct to the lender

Lenders love it when you walk in their doors without being referred by a broker, as they can pocket the commission they would normally have to give the broker. Lenders save by you going direct, not you.

If you deal directly with your bank, you will waste the opportunity to ask a mortgage broker for more broad advice (beyond one lender’s products) and you will never get any commission refunded.

In addition, there are some lenders who do not deal with brokers (or pay commission) and therefore promote cheaper loans. An independent mortgage broker can recommended one of these lenders, as they do not get paid via commission anyway (a traditional commission-based broker will never recommend one of these lenders).

9.  You used personal rather than professional reasons for choosing your mortgage broker

Not all mortgage brokers are the same. I’d say almost 100% of people have no idea if they got the best mortgage available; and yet are happy to recommend their broker to their friends (let’s face it, usually because they ‘like’ them personally).

So don’t decide to use a broker simply because your mate is one, or recommends theirs because they ‘got a good rate’. Unless you happen to know an independent mortgage broker, if you use anyone else, you are using one of the 99.99% of compromised and biased brokers in Australia. And, this means you’re giving away $10,000’s of your hard earned cash in the form of commission over the life of your loan. And you may not get the best loan (and therefore pay more in interest and ongoing costs as well).

Everyone wants to support friends and family – and use people they recommend. Just keep this article in mind when you decide to give your business (and hard earned cash) to someone you know or a broker referred by a friend without a professional basis.

To be fair to many mortgage brokers, most are not aware of the inherent conflicts and costs associated with their profession (although most don’t ask or think about it critically). Brokers are taught by their employers, who make billions out of their associations with a hand full of lenders.

Being a Homeowner: Benefits

With a whopping 64% of Americans owning homes, the United States has the highest percentage rate of home owners than any other nation. Our nation was built upon people working with passion and vigor to pursue anything they wanted. Over the past century, becoming a homeowner has been considered a part of this American Dream. Broker President of Phipps Realty said,”There’s a reason why home ownership is called the American Dream – it’s part of our collective history and an essential part of building our nation’s future, as well.”

History of Home Owning

In 1917, the U.S Department of Labor established the first federal program designed to encourage home ownership.

In 1933, after the Great Depression hit, FDR created work programs and mortgage relief reforms to help ensure people they would be able to keep their homes.

We’ve come along way since then, making many reforms and changes to help make it easier for individuals to purchase a home for their family. If you look through the history of home ownership, you can get a better understanding of how much the Federal Government truly encourages and supports the American people to purchase their own homes.

Today new home buyers chase after this dream not just for the stability and security, but now studies are finding, for the financial investments. Researchers and Real Estate agents find all sorts of reasons people benefit from purchasing their own home. Here are our top 5 benefits.

1. Gain Equity

Home equity is considered the current market value of your home minus any outstanding home loan balances. The rate of a return on a home investment increases the longer you live there. This is why becoming a homeowner is one of the best investments that you can make.

Real Story, a New Jersey real estate commentator states, that homeowners can use home equity that has been built up to get cash for emergencies or to purchase items for home improvements thereby possibly increasing a home’s net worth even more than before.

Buying a home allows you to drastically increase your long term wealth as opposed to those who rent. One of the greatest benefits of owning a home is that this allows you to live a “rent free” retirement once you’ve paid off your mortgage. Or as you get older, you could also sell the home and use the money to purchase something smaller.

2. Home Improvements

There’s not much wiggle room allowed for upgrading or changing up your home if you’re renting. One of the benefits of owning a home is there’s no permission needed. Add a pool, re-paint the entire house- its your home and you can do as you please! Modifying your living space to whats aesthetically pleasing to YOU is the most satisfying feeling and worth all the work put in. It’s also considered a worthwhile investment and most upgrades add value to your home.

3. Tax Advantages

Everyone benefits from home ownership-especially our economy and federal government. This is why the government offers many tax incentives for new home buyers. Home related purchases and private mortgage insurance can also qualify you for tax benefits.

According to the MIT Federal Credit Union, interest on first and second mortgages, home equity loans of up to $100,000, and refinanced loans are all deductible and local property taxes are deductible in the year that they are paid.

4. Promotes Good Community & Neighborhoods

Buying a home in a place you plan to stay in for a long time also benefits you and your neighborhood! It feels good making connections and new friendships with neighbors, becoming a part of local organizations, and participating in traditional events. This community involvement is a major benefit to becoming a homeowner and something your children will grow up to thank you for one day.

5. Sustainability

When people think of home, they think of safety, security, and being comfortable. As a renter, it’s unsettling not knowing what changes you can or cannot make in your home, if the landlord is going to randomly raise rent, or run an inspection on the house. These are just some of the many pitfalls of being a renter. As a homeowner, none of those are an issue. It puts new homeowners at ease knowing they can settle into a home they can raise their families in and make memories. They know their consistent monthly mortgage payment and overall have so much more freedom than renters do. This peace of mind is priceless and one of the main reasons individuals finally decide to become homeowners.

Becoming a homeowner is the most rewarding experience where families will build lives and memories, along with positive financial futures. So if you have been on the fence about whether to continue renting or to purchase your own home, if you choose a great team to work with you will see just how simple the home buying process really is! Sun American Mortgage has over 33 years experience and always leaves every customer feeling valued and incredibly happy about their new home.

Remodelling Your Home: Government Programs That Help

Federal, state, and local government incentive programs for home remodeling are aimed at helping homeowners improve the value of their homes, which in turn supports the economy and helps strengthen communities. These are official programs that provide tax relief, low-interest loans, and other incentives, but they can be hard to find. For example, you may find a notice of a program on a postcard for a property tax increase. Currently, three major programs may be available in your area.

Property Tax Exemptions

What They Are: Home improvement property tax exemptions.

What They Do: These programs allow for total or partial exemptions from your local property taxes when remodeling your home.

Eligibility Requirements: Eligibility varies by county or town, but typically any owner of one property can qualify. The property usually must be owner-occupied but not always.

Counties rarely itemize which remodels are allowed; instead, they define them in broad terms, such as “material, actual, and permanent property improvements that increase value.”

Downside: Relief from property tax is only temporary.

Who Offers Them: Written into state law, these programs are administered by tax assessors and counties or towns.

FHA Rehab Loans

What They Are: FHA 203(k) Rehab Loan programs.

What They Do: Typically, when purchasing a home that needs remodeling, your first mortgage covers only the cost of the purchase, not the subsequent remodeling. Concurrently obtaining a remodeling loan may mean long approval times, high-interest rates, and balloon payments. Also, lenders don’t like to approve remodel loans at this time because your intended house, in its current less-than-perfect state, cannot act as proper collateral. Through FHA rehab loan programs, the U.S. government will insure your loan, wrapping the purchase and remodel amounts into one package and insuring it all for the lender.

Eligibility Requirements: Requirements are broad, ranging from minor (which HUD defines as $5,000 or more) up to a home that will be razed and completely rebuilt.

Downside: Inevitable red tape. However, independent consultants can help streamline the process for you.

Basic Requirements

Government home programs are limited to upgrades that increase a home’s value. Incentives do not apply to luxuries or amenities such as spas or outdoor kitchens. They also come with a few common rules for eligibility:

  1. You must apply before doing the work. Incentives are not available for past renovations.
  2. Types of remodels are limited. Programs primarily support basic rehabs that increase property value. For example, some property tax exemption programs will not cover replacing a composite roof with another composite roof but will cover an upgrade from composite to a higher-value material because this represents a property value upgrade. Some incentives even apply to tearing down a house and building a completely new one.
  3. Oversight is required. At least one inspection is required to make sure that the project exists and that it is proceeding according to plans.

    Home Improvement Programs

    What They Are: Home improvement programs (HIPs); typically low-interest or no-interest loans.

    What They Do: Help you save thousands when counties or other local governments subsidize the interest on home remodeling loans. Interest may be completely or partially subsidized.

    Eligibility Requirements: Various eligibility rules may apply, but generally:

    • You must be rehabilitating an existing structure; it’s not for buying a new home and not for building another structure on your property.
    • Your gross income may not exceed a certain limit.
    • The loan is not used for luxury items, such as pools or decks.

    Downside: Not all areas offer HIPs.

    Who Offers Them: Learn about loans offered in your area by contacting the local county tax assessor. You may be directed to a private lender to obtain a home equity loan, or HELOC, subsidized by the county.

Home Improvement Grants for Your Next Project

A home improvement grant also called a “home repair grant,” is a type of financial aid issued by the government at the federal, state or municipality level. It’s designed to help homeowners in that region make select improvements to their properties.

As long as the applicant and the project meet certain requirements, a home improvement grant does not need to be repaid.

One of the primary problems when doing a home improvement project is the cost to do the project correctly. Luckily, there may be a grant that will help you offset the expense. Dozens of government-sponsored home improvement grants offer money to homeowners making selected updates to their properties. Of course, not everyone—nor every project—will qualify for grant funds.

Grants are highly competitive, and many are designed for specific improvements that ensure the home is safe, accessible, livable and non-hazardous to those on the property and in the community. Read on to see if a home improvement grant can help you achieve your goals.

Requirements & Eligibility

Eligibility requirements vary by the grant. For the most part, grants will have requirements pertaining to the homeowner’s income, their location and the projects the money can be used on.

Just like with your mortgage application, you will need to produce documentation to prove your income. You may also need to prove your financial need, as well as offer assessments of your home’s conditions, your estimated project costs and more. Make sure you know the full scope of requirements for each grant you apply for. Remember, most grants are very limited in number and only a few homeowners are chosen.

Where to Find Home Improvement Grants

There are several places you can find available home improvement grants. Your best bet is to start with your local HUD office (Housing and Urban Development). HUD offers grants like the HOME Investment Partnerships Program for low-income homeowners, as well as various types of home repair loans. Visit HUD.gov to find the office in your area.

You can also look to the National Residential Improvement Association for grants. Just fill out the NRIA’s brief application form, and tell them about your property, the home’s history and the projects or improvements you’d like to take on. An NRIA specialist will get back to you with potential grants you may be eligible for. They might also include options for tax credits, home improvement loans, discount programs and local incentives that can help you cover—or at least reduce—the cost of your projects.

Finally, if you’re in a designated rural area, you can also apply for a home improvement grant with the U.S. Department of Agriculture. These grants offer up to $7,500 toward addressing health and safety hazards at the home or improving its accessibility.

Home Improvement Grants vs. Other Options

Grants aren’t the only way you can fund your much-needed home improvement projects. You can also use a loan, refinance your property or leverage the equity in your home.

The Federal Housing Administration’s 203K loan is a popular choice for homeowners looking to improve their properties. The 203K improvement loan lets you borrow cash to use toward your home repairs and projects, typically at a low rate. There are also low-cost loans from the USDA and HUD if you meet certain location and income requirements.

If you’ve lived in your home a few years and have built up some equity, you can also look to home equity lines of credit (HELOCs), home equity loans or a cash-out refinance. Make sure you shop around first for the best rates. You do not have to use your current lender when refinancing or taking out a home equity loan.

In the event you’re making green or eco-friendly improvements to your home, you may also qualify for certain green energy grants or tax credits that can help offset your costs. For information on this, check out EnergyStar.gov, contact your city or state energy commission and call up local energy companies. Many will offer grants or even reduce your monthly costs when you add certain energy-saving upgrades. The PACE loan is also a good option for green improvements if you’re looking to borrow funds.

Essential Items You Need for a New House

Whether it’s the need to hang a clock just a few feet higher or the realization that you really can’t hold a flashlight and get that nut loosened under the sink, there’s always something catching you by surprise as a homeowner.

With the right items on hand, however, you can be prepared for every scenario — just like Hunter was, thanks to that ladder.

Here’s things you should buy for a new house:

#1 Tool Kit

You’ll need something to carry all those tools around from project to project. Create a tool carrier using a tool bucket liner and an old 5-gallon bucket. Or invest in a handyman belt filled with the basics to keep on hand in the kitchen.

#2 Wet-Dry Vacuum

You’re gonna be spilling stuff. Look for a wet-dry vacuum that can handle everything from paint to nails and small stones. “We inherited one of those with our first house, and it was an awesome thing to have for vacuuming the car and cleaning the garage,” Hunter says. Unlike the ladder, “we kept that Shop-Vac when we moved.”

#3 (The Right) Fire Extinguisher

“Whenever anyone I know moves, I give them a fire extinguisher as a housewarming gift,” says Nina Patel, a Silver Spring, Md., homeowner who, years ago, accidentally set her apartment on fire with a homemade candle. “I was able to put out the fire with a pan of water, but it was a panicked moment. I’ve had my own fire extinguisher ever since.”

But before going out and buying the first extinguisher you see, check out the U.S. Fire Administration’s guide. There are five different types of fire extinguishers with different uses, from extinguishing cooking oils to wood and paper. Choose the best type or types for your home.

#4 Extension Cord Organizer

Home ownership seems to breed extension cords that grow into a tangled nest. Save yourself time and hassle, and splurge on one of several cord management devices. Or make your own with a pegboard, hooks, and velcro straps to keep each cord loop secure. Either way, your cords will be knot-free and easy to find. And be sure to include a heavy-duty extension cord in your organizer that’s outdoor-worthy. You don’t want to really have to use that fire extinguisher.

#5 Big-Kid Tools

Odds are you already own a bunch of the basics: drill, screwdriver, hammer, level, tape measure, wrench, pliers, staple gun, utility knife, etc. But home ownership may require a few new ones you might not have needed before, including a:

  • Pry bar. Get one with a clawed end to pull nails and a flat end to separate drywall, remove trim or molding, and separate tile.
  • Stud finder. You can make as many holes in the walls as you want now. Use the stud finder to figure out where to hang those heavy shelves so they’re safely anchored.
  • Hand saw. Much easier (and cheaper!) than a power saw, you can get a good cross-cut saw for smooth edges on small DIY projects.
  • Ratchet set. Every bolt in your new house belongs to you, so you’d better be able to loosen and tighten them when needed. Crank that ratchet to get to spots where you can’t turn a wrench all the way around. Great for when you’re stuck in a corner.

#6 Confidence

“Especially for first-time home buyers. You’re inheriting the responsibilities a landlord would have if you were renting,” says Hunter. “Mowing isn’t a big deal, but maybe fixing a shingle or changing a faucet is.” But with a little self-confidence — and some YouTube tutorials — there’s (almost) no DIY project you can’t master.

#7 Headlamp

Take that flashlight out of your mouth and work hands-free. From switching out a faucet to figuring out what’s making that clicking noise behind the washer, there are plenty of homeowner tasks that require both hands and a little artificial light.

#8 Emergency Preparedness Kit

FEMA has a great list of supplies you should have in your kit, including cash, food, water, infant formula and diapers, medications, a flashlight, batteries, first aid kit, matches, sleeping bags, and a change of clothing. The agency recommends you stock enough for every member of your household, including pets, for at least 72 hours.

#9 Ladder(s!)

But not just any old ladder. Consider:

  • How high you need to go. If you use an extension ladder for a sky-high job, school yourself on safety tips, such as not standing above the support point.
  • Where you’ll use it. Make sure all four legs on a stepladder rest safely on a flat area. A straight ladder must be set up at a safe angle, so if a ceiling is too low, it might be too long for the room.
  • How heavy-duty it is. Check the ladder’s duty rating so you know how much weight (you, your tools, paint cans, etc.) it’ll support.

And don’t forget about the all-important escape ladder. The Red Cross recommends them for sleeping areas in multistory homes.

New Homeowner Checklist

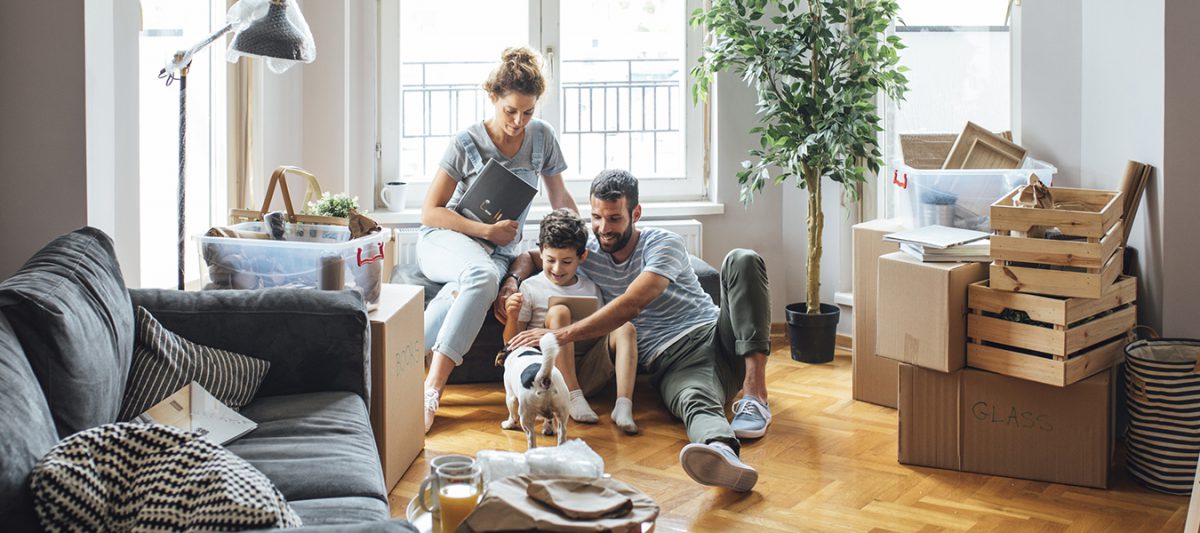
The weeks leading up to a home purchase are super stressful. Between the home inspection and finalizing your financing, you also have to start packing up your entire life and maybe arranging for movers — or even selling your old house under a tight timeline. Then there’s the actual closing, when you sign your life away on about 500 different forms.

But after closing, the real fun begins. Now you’ve got this house to deal withAnd if your home, like ours, is full of fixer-upper flaws charm… it can be very overwhelming.

Seven years ago this month, we bought our house — our first home. It was exhilarating, but also terrifying. We found that focusing on a few small, manageable-but-productive tasks during our first week of home ownership made us feel way more in control of things during a period that could have easily spiraled into existential despair.

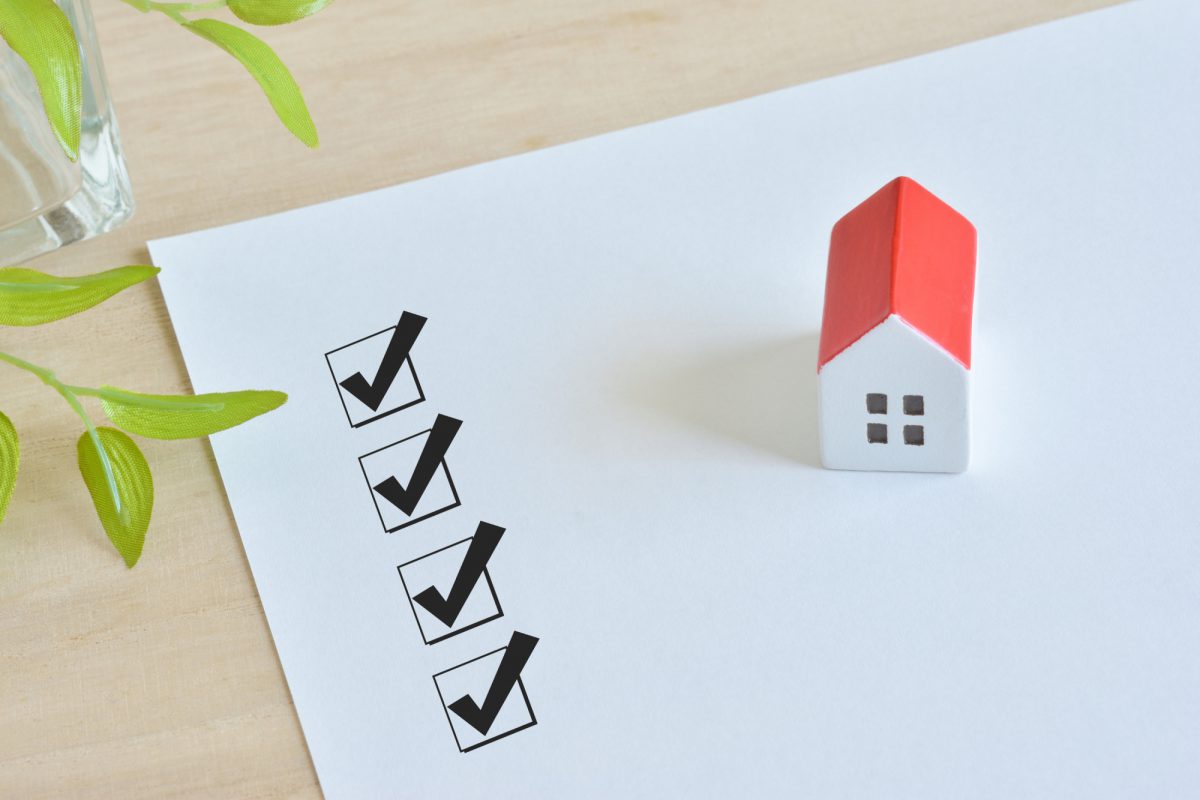
In that vein, here’s a checklist of simple things you can and should take care of when you first move into your new house. (Also, I forgot to say: Congratulations!)

1. Clean (or book a cleaning).

Before you unpack, and ideally before the furniture arrives, clean like mad, or hire a house cleaner to do a one-time deep clean (check for deals on Handy, Groupon, or Angie’s List — you shouldn’t have to pay more than $100-$150). You don’t have to be a clean freak to appreciate that living in your own mess is very different from living in someone else’s.

Vacuum and wash carpets (rent a carpet cleaner if you need one), sweep and mop the floors, bleach the entire bathroom, clean the fridge and the oven and all the sinks, and wipe down all your cabinets, drawers, shelves, and closets.

2. Take a few days off.

The first week or two in your new home will be an adrenaline-fueled flurry of phone calls, fixing stuff, unpacking, and waiting — for deliveries, contractors, and Internet installers. Trying to squeeze all that in around your job will only make it more stressful.

You just bought a house — it’s a big deal, and something you’ll probably only do a few times in a lifetime. Allow yourself to take some vacation or personal days.

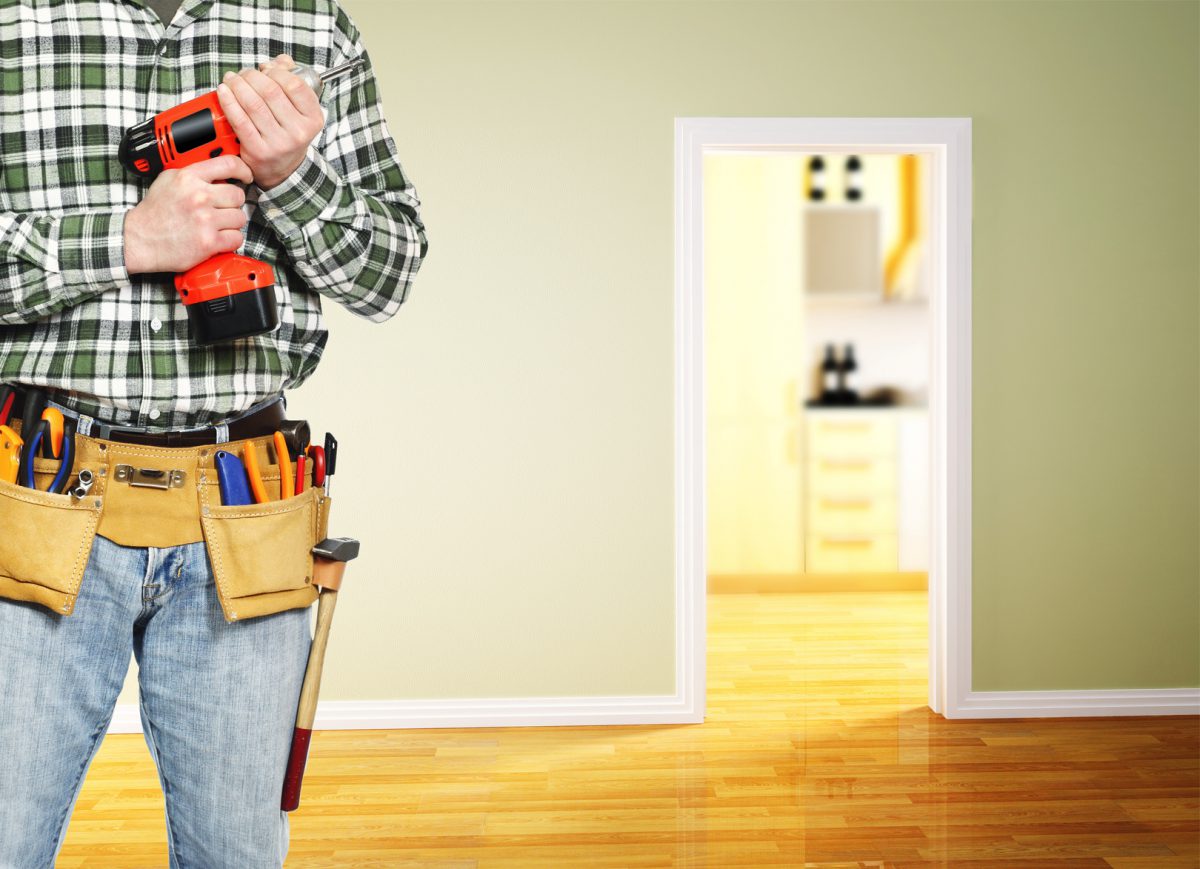
3. Do any improvements or repairs you can before moving in.

Whether you do it yourself or hire a pro, it’s infinitely easier to do work on a house when no one is living there. This is especially true for those projects best done without furniture in the way, such as interior painting, plastering, or sanding and refinishing hardwood floors.

And if your home needs some work behind the walls — such as updating knob-and-tube wiring or replacing rusted-out pipes — do it now, before you get settled in, if at all possible. You’ll be glad you did.

4. Change your address and set up utilities.

For starters, alert the post office that you’ve changed your address, so they can forward mail to your new home. However, that service only lasts for a few months, so you should also start changing your address on all of your important accounts, such as your workplace benefits, bank accounts, credit cards, car and health insurance, magazine subscriptions, and memberships.

Likewise, call up the gas and electric companies and tell them you’ve moved. In most cases they’ll just transfer your account to your new address. You can often do the same with your cable or Internet provider, too, if you’re moving within the same service area. Otherwise, investigate your local options and call to set up service while you’re home getting settled.

5. Change the locks.

Even if you like and trust the previous owner, there’s no way of knowing how many copies of your house key are floating around – or who has them. (That reminds me: Our electrician still has a key to our basement. Um, I should probably get that back.) A new door hardware set will only run you about $50, and it’s well worth the peace of mind.

While you’re at the hardware store, get a few extra copies of your new key made, and give one to a trusted friend, neighbor, or relative for emergencies.

6. Plan now for emergencies.

The time to be researching plumbers in your area is not when the toilet is broken and spewing funky sewage onto the bathroom floor. (Gross — see “Find your shut-off valves” above!)

Ask your new neighbors for the names of any tradespeople they’d recommend, including plumbers, electricians, and handymen, or get an Angie’s List membership and start researching highly rated contractors in your area. (You can also sign up and introduce yourself on NextDoor, a neighborhood social media site, and ask for recommendations.)

Also, look up the numbers for poison control and local emergency services (if it’s not just 911) and put them on the fridge. Check all your smoke detectors and replace the batteries if you need to — you can also ask the fire department to come by and inspect them. Finally, find all of your emergency exits, and make a family fire plan that also designates a meeting point outside.

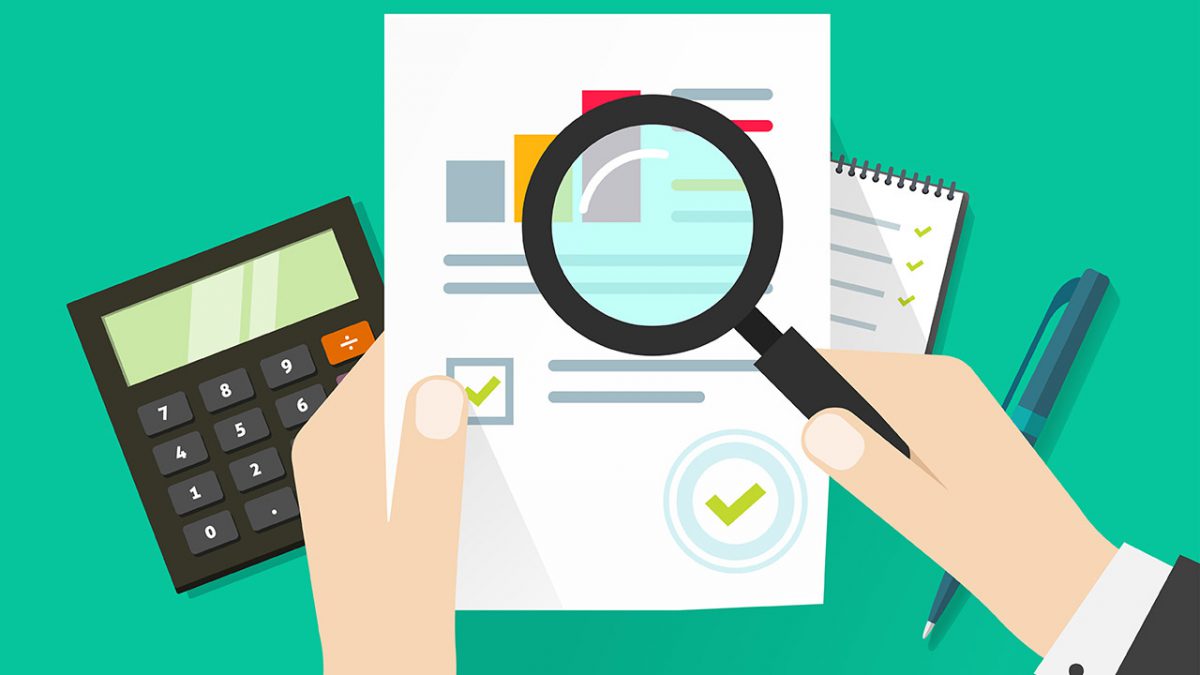
7. Use your home inspection report to plan future upgrades.

Your home inspector should give you a comprehensive report indicating the condition of all the major systems and structural parts of your home. Ours probably had like 50 items that “needed attention,” and this originally formed the basis of our long-term home improvement game plan.

From there, we made some lists: The stuff that was fairly easy to accomplish — or simply critical — went on the short-term, right-away list. Make sure there are some gimmes on there to help you build momentum! The stuff that can wait may have to wait.

8. Get a small safe or filing cabinet.

Even if you’ve never had one before, you’re probably going to need a filing cabinet or small safe now. File your closing statement and all the paperwork from your home purchase — that’s important stuff, and you’ll need it come tax time at the very least.

And that’s just the beginning of a lot of paperwork you’ll be filing from here on out. Keep receipts and instruction manuals for any new appliances you buy, your insurance and property tax bills, and any estimates or receipts from contractors as you make improvements.

9. Find out where your shut-off valves are.

One of your first lines of defense when it comes to common homeowner emergencies — burst water pipes, for instance — are shut-off valves. Turning off the water (or gas, or electricity) is like being able to slam on the brakes when you’re driving.

First, there are shut-off valves for small, localized problems: If the toilet is overflowing, look for the valve coming out of the floor or the wall behind the toilet and turn that to the right to stop the water flow. If your sink or faucet is leaking uncontrollably, the shut-offs will usually be under the sink (one for cold and one for hot).

Likewise, there should be a gas shut-off valve near your stove or dryer if either one uses natural gas. Find and familiarize yourself with all of these local shut-offs.

Then — and most importantly — find your main shut-offs, which control the gas and water coming into your house from the street. They’re usually found in the basement, toward the front of your house, but not always. Learn where these are ahead of time so you’re not clumsily searching for them in a panic as a geyser of a busted pipe is gushing water all over your kitchen.

Your circuit breaker acts as a shut-off for your home’s electricity. Individual circuits will control the electric flow to certain rooms or appliances — one breaker switch might shut off all the overhead lights, while another might control the refrigerator and the microwave outlets. Get familiar with the circuit breaker, and note where the main shut-off switch is to turn off all power in an emergency (if water is leaking into a live light fixture, for instance).

10. Create a seasonal home maintenance checklist, and start using it.

There are some maintenance tasks you’ll have to do to your home annually or semi-annually to keep it in good shape. And depending on the season you move in, it’s probably time to get started on some of them.

It’s really more of a two-season checklist than a four-season one; nobody wants to do stuff like this in the scorching summer heat or from underneath a foot of snow, so I tend to break down the tasks into spring and fall:

Spring/early summer home maintenance checklist

  • Install window A/C units (or check central air units): Trust me, the time to lug these things down from the attic and wrestle them into place is before the first scorching hot day, not right in the middle of it. Clean the filters before firing them up for the season.
  • Test your smoke detectors: Fire safety folks recommend doing this whenever the clocks spring ahead or fall back. Change any dead batteries.
  • Clean your gutters: Leaves and other debris from fall and winter may have choked up the works, and you want them free and clear before April’s heavy rains. If you have a one-story house, this is easy to do yourself; if your home is two or more stories or you’re afraid of heights, it should only cost about $60-$100 to have a pro come and do it.
  • Fertilize or plant new grass: The time to plant and fertilize grass is early spring: With the nights still cold, grass grows but weeds don’t. If you get a nice thick lawn growing by May, it can naturally crowd out the more unsavory stuff like crabgrass and dandelions. (If you don’t mind some chemicals, you can use crabgrass preventer or weed-blocking fertilizer — but usually not with new grass seed.)
  • Clean out your dryer vent: Your lint screen may be full of fuzzies each cycle, but a lot of it is still getting into that space-age silver tube. Clean it out with a vacuum or a long, bendy brush once a year to improve your dryer’s efficiency (and so it doesn’t catch fire).
  • Clean ceiling fans: They can get pretty dusty up there sitting idle all winter long.
  • Stain or paint the deck: Every other year or so, you’ll need to add another coat of stain to your deck’s floorboards (the railings and spindles can usually go five years or more). On a dry spring day, give it a good cleaning, and then strap a roller brush to a broom handle and slap another coat on there to protect the wood.

Fall/early winter home maintenance checklist:

  • Store hoses and turn off the water to outside spigots: You don’t want water freezing in your garden hose or faucet and breaking the pipes. In the basement, just follow the pipe from the faucet to the nearest shut-off valve, and turn it clockwise or so it’s perpendicular to the pipe.
  • Chimney sweep: You should get your main boiler or furnace chimney swept every couple of years — buildup in there can cause a chimney fire. And if you have a wood-burning fireplace or wood stove, get that cleaned out every couple of years or every time you go through a cord of wood, whichever comes first.
  • Boiler/furnace clean-out: Before heating season begins, you should get an inspection and the recommended annual maintenance on your boiler or furnace. If you get oil delivery, your oil company should take care of this for you. With gas, you’ll need to call your own plumber or heating technician. Since we have a pretty new gas steam boiler, our plumber told us we could do it ourselves: Just flush out all the water that’s in there (draining into a bucket and dumping it outside or down a drain), and then fill it back up. Repeat that a couple of times and you’re good to go.
  • Batten down the hatches: Move patio furniture into the garage (or at least take the cushions inside), cover up the grill, and remove and store your window A/C units (or cover up your central air unit). Move snow shovels, deicer, and other snow gear to an accessible spot in the garage or shed.
  • Tune up your snowblower: Snowblowers take a beating each winter — the metal parts get soaked, they get road salt inside them… it’s easy for them to get rusty and crap out on you. But you want yours ready to perform well when that first foot of snow falls. This year I plan on taking mine for a tune-up in the fall so it’s all set to go — you can often find a deal on Angie’s List, and you shouldn’t have to pay more than $100 for this type of service.

11. Throw a housewarming party.

Your first few weeks in a new house are going to be filled with the adrenaline and excitement that comes with such a big life change. Now, trust me on this: You need to tap that energy and get everything done that you can before the adrenaline wears off.

Don’t lose steam. For most people, whatever isn’t unpacked after about two months just stays in boxes and gets shoved in a closet. If you haven’t put pictures up on the wall after a couple of months, you’re going to be looking at empty walls for a long time.

Once you stop going all-out in move-in mode, it becomes really, really hard to get going again. After all, it’s exhausting, and you deserve the rest!

That’s why throwing a housewarming party is a great idea after you move in. It gives you a defined deadline to get the place in order, and puts just the right amount of motivational pressure on you to keep at it.

It’ll force you to confront those stray boxes and make tough decisions about what to do with them. It’ll push you to get the walls painted and decorated and to assemble that IKEA desk that’s been sitting in a box for two weeks. If you don’t do it now, there’s honestly a good chance you’ll be using that box as your desk six months from now.

It will allow you to share your excitement and hard work with the people you care about – not to mention, you might get a nice gift or two. (Tools make great house-warming gifts.)

And finally, accept that once the party arrives, you’re allowed to relax. You’re done. This is your home now, and this is what home looks like. You’ll make many more improvements to it, but for now, enjoy it.

12. Go to IKEA.

Let’s face it: Unless you’re downsizing, you might need some new home furnishings to fill out your new place. And for most of us 99 percenters, that means an IKEA run.

Maybe you’re moving from a small galley kitchenette to a large eat-in kitchen, or your old couch was too big or too ratty to move. Whatever the case, if you need to fill some empty rooms, the Swedish home goods superstore is a good starting point.

What do I mean by a starting point? You’ll have made a LOT of big decisions in the past few months, and you may not be ready to commit to an $1,800 living room set the same week you move in. You may do better living in the house for awhile before you make those kinds of design choices.

Meanwhile, IKEA furniture is cheap, functional, and attractively designed, so you usually can’t go wrong getting basic items here. What’s more, IKEA items hold their value surprisingly well — at least in a college town like Boston — so you can start with stuff that’s fairly cheap and functional and upgrade at your own pace.

Pick up a basic Ecktorp sofa to buy yourself some time — a steal at $450 — and then, when you do find that perfect living room set, sell the sofa for $300. (Or head straight to Craigslist or other places you can find used furniture and home goods.)

Finally, do not go to IKEA on a weekend if at all possible! Browse the catalog first to research the stuff you want to see in person, and then make a targeted trip around 7pm-8pm on a weeknight. You can zip through in under an hour without the mobs of people in your way, saving you time and certain rage.

And make sure to go with an empty trunk! When we went to buy our sofa, we brought the kiddo. Despite the flat-pack design, the sofa wouldn’t fit with her car seat in the back, even with half the back seat folded down (I don’t know why I thought that would work).

So I had to leave my wife and kid at IKEA and race home with the sofa. The worst part was that they were still inside the store and had no idea I was doing this — there’s no cell service in there. So I sped home, dumped the sofa in the driveway, and raced back, anxiously hoping that I got there before a) they went looking for the car or b) a toddler meltdown ensued.

The good news is, it’s IKEA, and it takes anyone a couple of hours to get through the store, much less someone with a dawdling toddler. They didn’t even know I was gone. Whew.

How to Increase Your Home Value

My first year of home ownership looked something like this: three bathroom updates, basement renovation, updated backyard landscaping and a heck of a lot of paint. Although my husband and I intentionally planned on most of those projects, we also started making a wish list of other things we wanted to do, like expand the master bathroom or swap carpet for hardwood floors, which got me thinking—there’s a fine line between making updates that add immediate resale value and investing in choices with zero ROI down the road.

A 2018 Homeowner Protection Survey by Chubb, which queried more than 1,200 U.S. homeowners about their approach to property, found that 58% of homeowners will “definitely” or “probably” undergo a home renovation or improvement project over the next 12 months. Of those who plan to do so, 65% plan to spend at least $10,000, with 20% budgeting between $10,000-40,000 and 15% spending more than that.

But as you make decisions regarding home upgrades, renovation and major projects, it’s vital to pay close attention to the market value of your home and the homes around you. “Pay attention to what homes top out for in your neighborhood,” advises Leneiva Head, real estate broker and founder of Welcome Home Realty in Tennessee. “If they top out at $500,000, and yours is already worth $475,000, you may lose money if your project is more than $25,000. Even that bears consideration because if you spend $25,000, then you only break even. Check the market against your home’s current value, then plan your renovations.”

Unsurprisingly, homeowners are most likely to spend money renovating or improving kitchens and bathrooms, according to the Chubb data. Here’s why, along with two additional smart ways to increase your home value in the first year.

1. Modify the floor plan or add square footage.

“If you’ve purchased a home that’s closed off and choppy at a time when most people prefer a more open design, then removing a wall here or there will increase the value within a year,” says Head. “For example, a couple bought an older home with a wall between the kitchen and the living room. They removed the wall (leaving about two feet on each end), sanded the hardwood floors, and added an island in the kitchen—which created the open look people prefer.”

Or, simply add square footage through a second bathroom, family room or four-season room. Bigger homes usually lead to higher values, and that’s something buyers tend to notice. Meghan Chomut, a certified financial planner who specializes in supporting families and property owners, says adding another decent-sized bedroom alone can broaden your buyer list if you sell, since many people will always consider more bedrooms than their family requires, but rarely consider looking at properties with less. Finally, you can also focus on creating additional living space, such as finishing a basement, building a deck or converting an attic.

If you’re not sure where to start, Remodeling magazine offers a great “Cost versus Value” report, which analyzes what you’ll pay for various upgrades alongside how much you can expect to recoup upon selling. “The doubling of homeowner equity over the past six years has given people the financial wherewithal, and the confidence, to make investments in their homes,” says Hunter. “This is showing up now as homeowners take on projects that they may have previously put off, or as they indulge themselves in discretionary upgrades that they can now afford. People are showing a greater tendency to stay in the home they already have and improve it rather than moving.”

2. Update kitchens and bathrooms for the greatest return on investment.

Brad Hunter, chief economist at HomeAdvisor, notes that millennial homeowners are now twice as likely as baby boomers to tackle kitchen and bathroom remodels. Based on findings from HomeAdvisor’s annual True Cost report, most millennials have compromised on the size and condition of their first homes, and many purchase older homes that need repairs in order to be able to afford home ownership at all. Those stats combined with the fact that most people perceive bathroom and kitchen updates as most impactful on home resale value—and kitchens and bathrooms are high-use, high-traffic rooms—results in a high level of interest for these types of projects. Also, says Indiana mortgage banker Corey Vandenberg, appraisers tend to look for updates in these areas first, due to the appeal for potential buyers.

Kitchens will give you one of the biggest returns on your investment, says Aaron Bowman, a realtor in Connecticut. Start by replacing old appliances with new, and make sure all appliances match if possible. You can reface or replace outdated cabinets, as well as revive old flooring with newer tile or vinyl options. And even very simple updates, like a backsplash or new appliances, can be a valuable place to put your money, adds Des Moines-based realtor Sara Hopkins.

“For example, if you just bought a home with standard cabinets and Formica countertops in the kitchen, then a simple swap out for quartz or granite will benefit you in your efforts to realize a return on your investment,” says Head. “Add gourmet-style cabinets and swap out the fluorescent overhead light for monorail lighting and you’ve got a winner.”

With bathrooms, Bowman says a complete renovation usually isn’t required. You can tackle inexpensive elements like vanities, toilets and fixtures, and still get the look and feel of an update without breaking the bank.

3. Prioritize curb appeal with landscaping.

“Landscaping is probably the best and easiest, most affordable way to increase your home value in the first year,” says Hopkins. It makes sense—healthy trees, blooming flowers or plants and neatly trimmed lawns make a house, well, prettier. Cassy Aoyagi, president of FormLA Landscaping, says some of the most impactful ROI can be earned outside of the home, and shares three easy, low-cost steps homeowners can take to make it happen.

  • Strategically plant native trees, which can reduce energy costs by as much as 50%, plus raise the value of neighboring homes
  • Plant young shrubs and leave space for it to grow to full size, as this will help cool your property
  • Replace annual plants or flowers with perennial foliage to help cut costs

What not to do: Aoyagi warns against installing synthetic turf and gravelscaping, as both can increase energy costs and degrade environmental resilience, as well as removing established trees.

How to Save Energy in the Summer

Most people expect higher energy costs in the summer. We crank up the air conditioning to get out of the sun; the kids are home from school and spend all day on their electronics; and, when you finally convince them to play outside, you find yourself washing extra loads of bathing suits, beach towels, and muddy clothes. The warm weather comes with a price. But, with a little preparation, you can manage your energy use wisely and cut down on your bill. We’ve shared 7 tips below that will help you use less energy in the summer and save you valuable money on your utilities.

1. Wash with Cold or Warm Water

 Avoid using hot water whenever possible. Because 90% of the energy used by your washing machine goes toward heating the water, doing your laundry on either the cold or the warm cycle will save you a tremendous amount of electricity. When you’re done, take advantage of the warm weather and dry your clothes outside instead of putting them through the dryer. You’ll both save energy and avoid raising the temperature of your home with heat-generating appliances.

(Hint: the same logic applies to dishes as well. Use cold water and let them air dry instead of running them through the drying cycle.)

2. Be Smart with Your Thermostat

It feels good to blast the AC after getting home from a workout, time spent outside, or just a generally sweltering summer day. But it probably won’t feel so good later when you see that your utility bills have skyrocketed. Keep in mind that for every degree you raise your thermostat above 72º, you save up to 3% of your cooling expenses. Try setting your thermostat to 78º, or as high as your comfort allows.

When you’re away from home, set the temperature even higher or, if it’s not too hot, turn it off altogether so you don’t waste air conditioning on an empty house. If you install a smart or programmable thermostat, you won’t have to go through the trouble of manually changing the temperature each time you leave. These thermostats will automatically adjust your home’s climate control while you’re away.

3. Keep Your Home Easy & Breezy

Another easy way to cut down on cooling costs is by using fans. Ceiling fans are great for cooling an entire room, and many homes already come equipped so there’s no purchase necessary. Even if you don’t have one, portable fans are inexpensive and readily available at any home goods or big-box store. A good fan will allow you to raise your thermostat 4º while maintaining the same level of comfort. If you don’t mind the light breeze, go ahead and lower the temperature on your AC because fans can be very effective.

4. Consider LED Lighting

After you’ve blocked out the sun, you might find yourself turning on more lights than you normally do. Be careful which lights you choose, though, because incandescent bulbs actually turn 90% of the energy they use into heat. Consider replacing your incandescent bulbs with LED bulbs, which operate at a lower wattage and produce only half as much heat. LED bulbs also use 75% less energy and last 50 times longer than traditional bulbs, saving you money on electricity and replacement costs.

5. Use the Barbeque

Trying to cook in a hot, steamy kitchen can be unbearable, especially when it’s hot and steamy outside as well. Kitchens are full of heat-producing appliances: ovens and stoves can raise your kitchen’s temperature up to 10º. To save yourself the sweat (and the higher utility bills), try using the microwave whenever possible since it uses just one-third the energy that an oven does and produces only a fraction of the heat. Another great way to take the heat out of the kitchen is to cook outdoors. Pop some burgers on the grill or invite some friends over for a barbecue. You can enjoy the great weather while you avoid raising the temperature in your home.

6. Keep Track of Your Electronics

When you place heat-generating devices such as lamps or TVs near air-conditioning thermostats, you can trick them into thinking the room is hotter than it really is. Your thermostat will sense the heat from these devices and spend extra energy trying to cool the house down. Be mindful of where your thermostats are and try to keep electronics away from them. Devices like computers, curling irons, hair dryers, stereos, and televisions heat up your house as well, so make sure they’re turned off when they’re not being used.

7. Keep the Sun Out and the Cool Air In 

The summer sun is great for tanning, great for your mood, and great for beaches, picnics, and sunsets. However, it’s not so great if you want to keep your house cool. Sunlight coming through your windows will heat up your home, causing you to spend more on air conditioning. Try drawing the blinds during the hottest parts of the day, especially if your windows are facing south. You can open your windows again at night when it gets cool; this will allow you to turn off your air conditioning. Just don’t forget to close them again in the morning to trap in the cool air.

Also, if you’re planning to invest in landscaping, keep in mind that trees provide great natural shade. Strategically placed shrubs, trees, and vines can block sunlight from your windows, roof, and walls, saving you $100 – $250 per year in cooling costs.

How to Save Money as a Homeowner

Your house gives you so much: security, pride, shelter. With all that on the line, it’s easy to assume the costs of keeping it up just are what they are. But wait. There are plenty of expenses you probably make to keep your home in good order that are simply a waste.

Here’s how to save money each month without putting a dime of home value at risk.

#1 Cut Back on Laundry Detergent

Never mind the barely visible measurement lines in the cap: You typically only need a tablespoon of detergent. And, clothes actually get cleaner when you use less, because there’s no soap residue left behind.

#2 Clean Your Light Bulbs

What? Who does that? Well, smart people. A dirty bulb emits 30% less light than a clean one. Dust off both the bulb and fixture, and you might be able to cut back on the number or brightness of lights in each room without noticing any difference.

#3 Keep Your Fridge Full

Solid items snuggled together retain the cold better than air and help keep each other cold — requiring less energy overall. Leaving town for awhile and fridge is empty? Fill voids in the fridge or freezer with water bottles.

#4 Switch Your Bulbs to LEDs

By replacing just five of your most-used incandescent bulbs with uber-efficient light-emitting diode (LED) bulbs, you could save $75 a year on your energy bill.

And LEDs last 15-20 times longer than incandescents, so you won’t have to replace them nearly as often.

#5 Cut Scouring Pads In Half

Most clean-ups don’t require a full one.

#6 Use Power Strips

Appliances like coffee makers, TVs, and computers continue to suck power even when they’re off — which can cost you $100 a year. And did you know the AC adapter for your laptop keeps drawing power even if the laptop isn’t plugged in? Stop this slow money burn by connecting them to an easy-to-switch-off power strip.

#7 Use a Toaster Oven When Possible

Toaster ovens use 50% to 70% less energy than a full-size oven.

#8 Set Your Water Heater to 120 Degrees

Hot water heaters often come with a factory setting that’s higher than you need. You’ll cool your water heating costs by 3% to 5% every time you lower the temperature setting by 10 degrees.

#9 Insulate Your Water Heater

For $30 or less, an insulating jacket or blanket can shave 7% to 16% off your water heating costs for the year. Just make sure to follow the manufacturer’s directions to avoid creating a fire hazard.

#10 Use the Right Dryer Cycle

If you’re using a high-heat setting for each load, you could be using more energy than you need. Almost all fabrics can be dried with a lower heat setting, such as the permanent press setting. It uses less energy and has the added bonus of extending the life of your fabrics. Save the higher heat for items such as sheets and towels.

#11 Use Homemade Cleaners

Many commercial products rely on baking soda or vinegar for their cleaning power, so why not make your own? Most homemade cleaners cost less than $1.

#12 Ditch Disposable Sweeper and Mop Head

Stop throwing money away every time you clean! Refill your Swiffer Sweeper with microfiber cloths. Just cut to size and use them dry for dusting or with a little water and floor cleaner for mopping. Or switch to a microfiber mop with a washable head.

#13 Stop Buying Dryer Sheets

Another easy swap? Give up your dryer-sheet habit (about $7 for 240 loads) in favor of wool dryer balls (about $10 for six, which last more than 500 loads each). Of course, depending on your laundry preferences, you can always just go without either.

#14 Wash Clothes in Cold Water

Just switching from hot to warm water will cut every load’s energy use in half, and you’ll reap even more savings taking the temp down to cold. And don’t worry: Your clothes will get just as clean from cold water, thanks to the efficiency of today’s detergents (except in the case of sickness; you’ll want hot water and bleach then).

#15 Don’t Rinse Dishes

Two minutes of rinsing with the faucet on full-power will consume 5 gallons of water — the same amount efficient dishwashers use during an entire cycle. Shocking, right? And it’s an unnecessary step, since most newer models are equipped to remove even stubborn food debris. Just be sure to clean the dishwasher trap regularly to keep your dishwasher running efficiently.

#16 Keep a Pitcher of Water in the Fridge

You won’t have to waste time and money running the faucet, waiting for it to get cold enough for a refreshing sip.

#17 Set a Timer for the Shower

The average American takes an eight-minute shower and uses about 17 gallons of water. It’s easy to linger, so set a timer for five minutes. Or try this more entertaining idea: Time your shower to a song or podcast segment.

#18 Install Low-Flow Fixtures

In addition to water-conserving practices, low-flow showerheads, which cost less than $10, and other fixtures can drop your water use in the shower by 43%.

#19 Water Grass in the Morning to Save on Your Water Bill

Turning the sprinkler on midday is kinda like watering the air — especially when the mercury soars. Lose less to evaporation by watering during cooler hours (but avoid overnight watering, when too-slow evaporation can invite fungus growth).

#20 Hack a Water-Hogging Toilet

If you don’t have a water-conserving toilet, there are water-saving retrofitting kits that could yield about $110 in savings every year. Or place a half-gallon milk jug filled with water into the tank — in the corner and away from the flapper and ball-cock assembly. Every time you flush, you’ll save.

#21 Close Closet Doors

Each closet and pantry may hold a paltry amount of square footage, but you’re still heating and cooling it. Add up all the storage space, and you’ve got the equivalent of a small room. Shut the doors to keep the conditioned air out.

#22 Program the Thermostat

Program your thermostat to turn the heat down by 3 to 5 degrees when you’re not home and at night, and set it to bump the temperature up by the same amount when the A/C is cranking. You’ll save $10 to $20 a month and never feel the difference.

#23 Don’t Crank the Thermostat Up or Down Too Far

Varying the setting by 10 or more degrees when you’re gone for work or over the weekend is overkill. Your HVAC system will have to work overtime to get back to the ideal temperature, erasing your savings.

#24 Use Fans Year-Round

Ceiling fans can reduce your summer cooling costs and even reduce winter heating bills — but only if used correctly. Flip the switch on the base to make the blades rotate counterclockwise for a cooling effect or clockwise to help distribute heat in the winter. And in the warmer months, an attic or whole-house fan can suck hot air out and help distribute cooler air so you can give the A/C a little break.

#25 Caulk or Weatherstrip Around Doors and Windows

Caulk may not have the charisma of something like solar panels, but using it to seal air leaks around doors and windows will deliver immediate savings rather than a 14-year payback. You’ll spend $3 to $30 and save 10% to 20% on energy bills.

For gaps between moving parts that can’t be caulked, add weatherstripping.

#26 Add Insulation

This is a bigger weatherizing project than caulking or weatherstripping, but it could yield more than $500 in yearly savings. While your home should be properly insulated from the roof down to the foundation, prioritize the attic, under floors above unheated spaces, around walls in a heated basement and in exterior walls.

#27 Plant Shade Trees

Block the summer sun to lower cooling costs. Planting one shade tree on the west side and one on the east side of your home can shield your home from the sun during the summer months (but avoid south-side trees, which block winter sun). By the time they’re 15 years old, these two trees can reduce your energy bill by 22% , while adding value to your home.


#28 Cool with a Cross Breeze

On a breezy day, open a window on the side of your house that’s receiving the breeze, then open another on the opposite side of the house. Make sure the window on the receiving side is open a little less than the exhaust side to accelerate the breeze. You can also use a fan if there’s no breeze outside.

#29 Check Your Mortgage’s PMI

If your mortgage was for more than 80% of your home’s purchase price, you could be paying more than $50 a month, and as much as $1,000 a year, for private mortgage insurance (PMI). So as soon as you have at least 20% equity in your home, contact your lender to terminate the policy — they aren’t necessarily required to notify you when you reach that threshold.

Another option for ditching PMI? If your credit score or debt load has improved since securing your mortgage, look into refinancing with more favorable terms.

#30 Check Your Home Insurance for Savings

Your homeowners insurance should change as your life changes. Buying an automatic generator or installing security alarms could reduce your premium by 5% or more.

Bundling your home and auto coverage could save even more — up to 20% off both policies. But the point is to compare and do a price check to see if you can save.

Surveys have found you could be paying a lot more than what another insurer would charge for the same coverage. So you could save by going with a new company, or by using their quote to bargain with your current provider.

#31 Borrow Tools Instead of Buying

How often are you going to use that $600 demolition hammer once you remove your bathroom tile? Not so much? Rent it from a home-improvement store for a fraction of the cost. Be sure to do the math for each tool and project though; sometimes the rental price is high enough to justify buying it.

Or join a tool lending library or cooperative to borrow tools for free or much less than retail stores.

#32 Cut Back on Paper Towels

Two rolls of paper towels a week add up to about $182 every year! Instead, try machine-washable cotton shop towels. They clean up messes just as fast and cost less than $2 for five. Save paper towels for messes that need to go straight into the trash, like oil and grease.

#33 Stop Buying Plants for Curb Appeal Every Year

A pop of color in your landscaping perks up your curb appeal. But instead of wasting household funds on short-lived annuals, invest in perennials that will keep giving for years to come.

#34 Make Your Yard Drought-Tolerant for Long-Term Savings

Save $100 or more yearly by replacing water-hogging plants and grass with drought-tolerant and native species, and beds of rock or gravel. You’ll save time on maintenance, too.

#35 Use Curtains as Insulation

Another way to practice energy-saving passive heating and cooling? Open curtains on sunny windows in the winter and close them up in the summer.