Amazing Money-Saving Tips For Every Homeowner

Owning a home doesn’t need to be as costly as it does. We all know that if you own a home, all of the costs from the mortgage, utilities, maintenance, and upkeep add up and are expensive.

Just to make your life easier, I’ve made one fascinating collection of amazing and useful energy saving tips that will save you money.

Besides that all of these tips are free or cheap. They won’t cost you a lot, but they will make a big difference. Most of them don’t take a lot of time, and you don’t have to be a home-improvement expert.

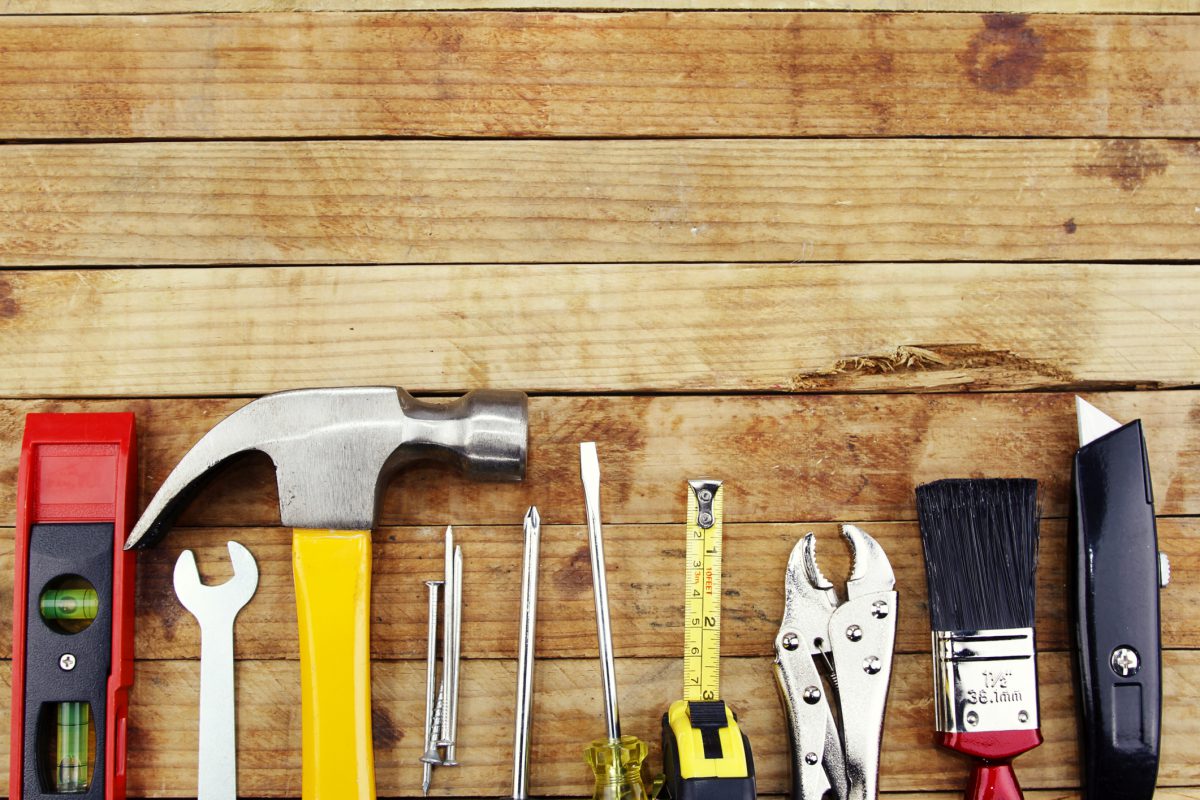
Here are 15 of the best energy saving tips that will make your energy bills shrink.

1. Repair leaky ductwork

Over time the joints and seals in ductwork can dry out and deteriorate due to temperature fluctuations in crawl spaces, basements, and attics.

Hire a HVAC service tech to check out the ductwork.

If you are a do-it-yourselfer, use a flashlight and shine the beam on the ducts where they connect to other ducts or registers. What you are looking for are areas where there isn’t any dust – a sure sign there is a leak in the area.

You can also do the incense test while the system is running too. Move the incense around each duct joint looking for air movement.

To repair the system yourself check out youtube by searching for ‘how to patch ductwork’.

Savings: 3%–10% on heating and cooling bills per year
Cost: $30 and up, depending on if you do it yourself or have your system serviced
Time: 60 minutes

2. Replace air filters

Replace your HVAC filters at least every 6 months, preferably every 3. Clogged, dirty filters block airflow and reduce your system’s efficiency. In the worst case scenario, a wrongly sized filter or dirty filter can cause your system to burn out, requiring replacement.

Savings: 5% – 15% / year on energy
Cost: $5-$30
Time: 10 minutes

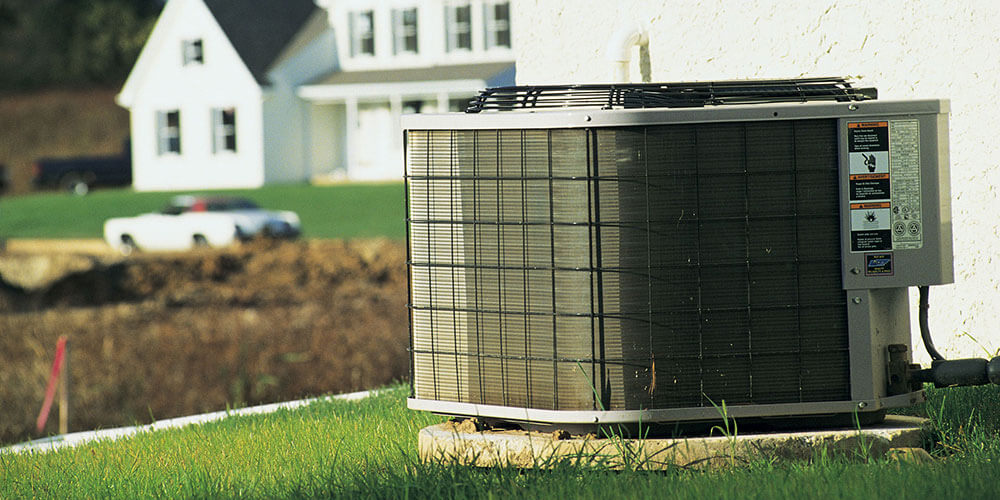
3. Give your air conditioner some fresh air

Have you ever tried running really fast with a rag over your mouth? I haven’t either, but that’s what most people are expecting their AC units to do.

Many AC units are surrounded by shrubbery that can restrict the airflow needed to make the systems run optimally. Take a few minutes today or this weekend and look around your AC’s outdoor unit:

  • Provide at least 1’ of clearance all around the units.
  • Trim any bushes that are touching the units
  • Remove any leaves and dirt around the unit
  • Remove any other obstructions like that rotting pingpong table leaning up against it
  • If there is significant mud or dirt inside the unit have it professionally serviced

Savings: $20 / year
Cost: FREE
Time: 20 minutes

4. Block out the sun

All of those windows in your home are the largest source of heat flowing inside during hot summer days.

Closing the blinds and/or curtains blocks the sun from coming inside in the first place and will help prevent it from heating up, reducing the need for the AC to cool it down. Blocking the sun is especially important on the western and southern facing windows that receive the most direct sunlight.

Savings: $15-$35 / year
Cost: FREE
Time: none

5. Shower power

Do you take a hot shower in the summer steaming up the bathroom mirrors? If so you’re adding heat back into your home that needs to cool.

Take a quicker shower. And take a warm shower instead of a burning hot one. Using less hot water will also save energy.

Savings: $50 / year
Cost: FREE
Time: 10 minutes

6. Automate your thermostat or use a post-it note

In my first home, I would manually turn up the thermostat as I walked out the door to work, and I would manually adjust it down when I came home in the evening.

Last year I replaced all of the thermostats in my house with the Nest learning thermostat. It learns your schedule to keep your home comfortable when you are home. Nests’ are pricey, but according to the Nest website:

I wish I had known about this before buying mine. Oh well, my mistake for you to learn. Check with your utility provider to see what might be available in your area.

If you can’t get a free or discounted smart thermostat from your utility provider, you can go the manual route like I used to. Go get a sticky note, and put it on the door you take to leave your home. Write a reminder to change the thermostat as you walk out the door. Simple and free.

Savings: $173 year (average for a programmed thermostat)
Cost: $0 – $250 per thermostat
Time: Varies

7. Hang out your laundry

Yeah, I don’t do this either. It takes too long.  In the summer, it’s too hot out.

For a long time, I used a clothes rack but now I have an even more ingenious way to dry my clothes.

I bought a bunch of plastic hangers to hang up ALL of my shirts, shorts, and pants. Now that I have to hang my clothes up anyway, I just pull them out of the washing machine and put them up on the hangers to dry. Boom! I’m just skipping the drying part because they dry in my closet – for free.

For the things I don’t hang up (socks) I’ve got a drying rack. It takes up very little space.

Savings: $80 – $250 / year depending on household size
Cost: $30 for hangers or racks
Time: Varies by method

8. Grilled to perfection

In the summer consider cooking primarily using the microwave, crockpot, or grilling outside to avoid heating up your home with the oven and stove.

Savings: At least a few bucks and your kitchen won’t be as hot.
Cost: FREE
Time: None

9. Fix leaky windows

If you have a 1/64 inch gap around a single window – which is REALLY TINY – it is the equivalent of a 3.27 square inch hole in your wall – which is REALLY BIG.

If you have a 1/32 inch gap around a single window, it is the equivalent of a 6.5 square inch hole in your wall. That’s big enough to put your fist through!

If you have ten windows in your house, that’s a lot of big holes that are draining your wallet year after year.

To determine if your windows are leaky close all your windows, doors, and the flue damper in your chimney if you have a fireplace. Use a stick of incense and move it around each window to see if there is air flow. If there is, you’ve got a leak!

Weatherstripping is an easy and cost-effective way to save money on energy costs and improve comfort by reducing drafts.  It’s something any homeowner can do. Peel-and-stick weatherstripping is easy and useful for sealing drafts:

  1. Remove any dirt and grease from the window jambs or sash.
  2. Dry the areas with a rag.
  3. Cut the weatherstrip to the right length
  4. Peel off the back
  5. Press the sticky part to the surface.

Now check your windows from the outside

  1. Inspect for any cracked or damaged caulking around the windows where the casing meets the house, and around the window frame.
  2. Scrape and clean away any damaged caulking
  3. Apply a fresh bead of paintable acrylic latex to reseal the window.

Savings: 10%–20% of your heating and cooling costs per year
Cost: $30-$50
Time: 2–3 hours

10. Child proof your outlets – even if you don’t have kids

My first home which was built in 1999 had this next problem. The inside outlets located on the exterior walls were like mini vacuums when it came to transferring air from the inside to the outside.

If you have an older home or a poorly constructed home you’ve probably got the same problem.

Electrical outlet boxes typically don’t have any insulation behind them, creating what is basically a hole in your wall. On a windy day take some incense or a match and put it in front of an outlet (one without a plug in it of course) and see if you can see air movement. In my situation I noticed this during the winter when I felt a cold breeze coming through the outlets.

The simple solution? Install socket sealers to improve energy efficiency. All you have to do is remove your outlet cover with a screwdriver, put on the outlet sealer, and put the cover back on. Easy!

The second step is to put in those plastic child-proof outlet plugs.

Savings: 2% of heating and cooling costs per year
Cost: $8.51 for outlet sealers, $2.49 for outlet plugs
Time: 20 minutes

11. Get a heating and cooling service contract

My neighbors A/C unit ran him $8,000 to replace. I had to replace one after getting married for $3,000. Hire a professional HVAC maintenance company to ready your AC unit for the summer and your furnace for the winter. There is no better way to insure this investment, and you they usually give you discounts on parts if anything breaks. This is one of the very few maintenance contracts I recommend people to buy.

Savings A lot if your HVAC unit crashes and burns
Cost: $250-$400 per year
Time: Just a phone call

12. Use fans

A ceiling fan can make your room feel up to 7 degrees cooler. Fans will allow you to turn your AC up a couple extra degrees, saving even more money.

Savings: $35-$53 / year
Cost: FREE (assuming you have ceiling fans)
Time: none

13. Insulate leaky kitchen and bathroom sinks

If you have a sink, toilet, cable or phone line in an external wall, chances are they are uninsulated around behind the wall. Warm and cool air is escaping from these exterior openings.

This one is a bit trickier to determine if you have an air leak. You can use a thermal leak detector to determine if there is a temperature difference by comparing the area near the hole and then the hole itself. If there is a big difference you might want to fix that leak.

Or if you don’t want to spend the money on a thermal imager you can do what I do as soon as I move into a new house. Buy some expanding foam insulation and spray it into every crevice I can find in my exterior walls.

I use Great Stuff. Around the bathroom sinks in your house spray where the sink drain goes into the wall.  Also where the water lines came out.

I used about 2 cans for my house that was built in 2009.

Savings: Up to 17% of your energy bills per year
Cost: $10.13 and up depending on how many cans you use
Time: 30 minutes

14. A bright idea?

LED lighting runs cooler than incandescent bulbs. Only about 10% to 15% of the electricity that incandescent lights consume results in light.  The rest is turned into heat, and that heat needs to be cooled by your AC system.

Last year I made the switch to LED lights – but not all of the lights in my house, and that’s key for saving money. Check out ‘Are LEDs worth it?’

I use Cree LED light bulbs in my house.  I found them to have the most natural lighting (I tried four different brands).

Don’t forget to factor in the cost of the bulbs!

Savings: Varies on usage
Cost: $9 – $20 / bulb
Time: 2 minutes / bulb

15. Remove gaps under your doors

There is probably a hole under your door and you don’t even know it.

Most homeowners don’t even think about the bottom of their doors, and instead focus on the sides and top. But the bottom of the door sees just as much action each day as the sides and top, and it’s got that rubber gasket which is prone to deteriorating faster because it has more exposure to dirt and moisture.

You can use the incense test on this area of your home too. Run it near the bottom of any exterior doors on a windy day to see if there is air movement.

To fix you’ll need to replace your door sweep. Take pictures and measurements of your existing door sweep before heading to the home improvement store.

If it’s a nice day just take your existing one off and bring it with you so you can match up the size perfectly. They are pretty easy to replace. I’m not Mr. Fix-It and even I managed to do it.

Savings: Up to 11% of outside air is blocked
Cost: $10-$20
Time: 30 minutes per door

16. Insulate the hole in your attic

You have insulation between your exterior walls.  Yet what separates from your conditioned home and the attic is usually a ½” piece of plywood – otherwise known as the attic stairs (or hatch).

Plywood isn’t a good insulator.

If you have a hatch:

  • Add a gasket around the opening.
  • Attach some rigid foam insulation to the top of the hatch

If you have a pull down attic staircase:

Get an attic tent that has a zipper to seal it up.

Savings: Up to 30% on your energy bills per year
Cost: $20 (hatch) – $158 (stairs)
Time: Beats me, I had someone install mine as part of an energy audit

How to Easily Maintain Your Home

Buying a home is exciting and scary. Home maintenance doesn’t have to be hard. Learn what tools you need, how to find the circuit breaker or to shut off the water.

Maintenance Tips for First Time Homeowners

Owning your first house is exciting! You can build a killer deck or paint the walls purple on a whim. When it comes to renovations and personalizing your new home, however, you may find yourself stuck trying to figure out where to begin. The solution to this quandary is quite simple. Before you fire up the cordless drill or contemplate knocking down walls, you’ll want to take care of a few preventative home maintenance tasks first. Home maintenance can be daunting for new homeowners if you’re used to calling a landlord to come fix your problems. But stick to this list of maintenance tips for new homeowners to make sure your bases are covered.

Call 811 Before You Dig

Whether you’re planting shrubs or building a new fence, you need to be sure you won’t hit any utilities when you break ground. Call 811, the national dig-safely hotline. They’ll send the utility companies out to mark the locations of underground pipes, wires and cables. Not only will you avoid expensive repairs and neighborhood-wide cable outages with 811’s help, but you’ll also ensure that any work you do on your property will be conducted under much safer conditions.

Hire A Professional To Trim Your Trees

Remove dead branches or limbs that could fall on your roof or overhead power lines. This is also a great opportunity to check the integrity of your gutters, soffits, eaves and roof vents. Because huge limbs can break and fall unpredictably, leave tree trimming to the pros.

Find Your Circuit Breaker Box

While you’re searching your closets, basement, garage and front and back yards for your main water shut off valve, be on the lookout for your circuit breaker box. Once you’ve identified it, determine which fuses control the electricity in various areas of your house and label them accordingly.

Check Your Attic Insulation

If your attic inspection reveals that the tops of your floor joists are visible, then your home is insufficiently insulated. The recommended amount of insulation for most attics is about 10 to 14 inches of material, depending on the type of insulation used. The attic is the easiest place to add insulation to improve your home’s energy efficiency. A well-insulated house can save you up to 30 percent on your energy bills, increase your property value and keep your family a lot more comfortable.

Locate Your Main Water Shut Off Valve

Gallons of water rushing out of a burst pipe can wreak havoc on your drywall, flooring and belongings. In fact, non-weather-related water damage is the second most common homeowner’s insurance claim, according to one company’s claims history. So you need to be able to cut off the flow of water into your home quickly in case of an emergency.

Find your water shut off valve. This is where the water main enters your house. It’s often — but not always — located near a street or alleyway. Next, be sure you know how to close it. You may need to purchase a special tool, such as a crescent wrench or “curb stop key”, both to access and actually turn the valve.

Check Your Foundation

If rain and melting snow drench the soil around the base of your home, pressure can build up and inflict structural damage on your foundation. Worse, if a leak springs and water comes into direct contact with your home’s foundation, it can expand any existing cracks and cause expensive problems. To prevent the weakening of your foundation, be sure the ground around your foundation slopes away from your house at least 6 inches over 10 feet. Be sure your gutters are clean and draining properly. Finally, caulk any small cracks in your foundation walls before they have a chance to becomes big deals.

Proceed Cautiously When Drilling Into Walls

Plumbing pipes, ductwork, wires and cables are hidden in most homes. Before you power up your drill, use a battery-operated stud sensor to detect studs, cables, ducts and the other vital veins and arteries running just beneath the surface of your walls. Since stud sensors aren’t always 100% accurate, avoid damage by drilling only 1 and one-fourth inches deep – just enough to clear the drywall and plaster but miss most wiring and pipes.


By following these first-time homeowner tips, you can protect your investment. You can increase that level of protection, and help reduce major costs associated with repairs and replacements in your home.

Financial Tips for Homeowners

Few things are more exciting than making the leap from being a renter to being a first-time homeowner. Getting swept up in all the excitement is a wonderful feeling, but some first-time homeowners lose their heads and make mistakes that can jeopardize everything they’ve worked so hard to earn. Following a series of practical steps early in the homeowning experience can save new owners time, money, and effort later down the road.

Get Properly Insured

Your mortgage lender requires you not only to purchase homeowners insurance but also to purchase enough to fully replace the property in the event of a total loss. But that’s not the only insurance coverage you need as a homeowner. If you share your home with anyone who relies on your income to pay the mortgage, you’ll need life insurance with that person named as a beneficiary so that they won’t lose the house if you die unexpectedly. Similarly, you’ll want to have disability-income insurance to replace your income if you become so disabled that you can’t work.

Also, once you own a home, you have more to lose in the event of a lawsuit, so you’ll want to make sure you have excellent car insurance coverage. If you are self-employed as a sole proprietor, you may want to consider forming a corporation for the greater legal protection of your assets.

You may also want to purchase an umbrella policy that picks up where your other policies leave off. If you are found at fault in a car accident with a judgment of $1 million against you and your car insurance only covers the first $250,000, an umbrella policy can pick up the rest of the slack. These policies are usually issued in units of one million.

Hire Qualified Contractors

Don’t try to save money by making improvements and repairs yourself that you aren’t qualified to make. This may seem to contradict the first point slightly, but it really doesn’t. Your home is both the place where you live and an investment. It deserves the same level of care and attention you would give to anything else you value highly.

There’s nothing wrong with painting the walls yourself, but if there’s no wiring for an electric opener in your garage, don’t cut a hole in the wall and start playing with copper wiring. Hiring professionals to do work you don’t know how to do is the best way to keep your home in top condition and avoid injuring—or even killing—yourself. Also, be sure to check with the local building authority and pull any necessary permits to complete the work.

Don’t Overspend to Personalize

You’ve just handed over a large portion of your life savings for a down payment, closing costs and moving expenses. Money is tight for most first-time homeowners. Not only are their savings depleted, but their monthly expenses are also often higher as well, thanks to the new expenses that come with home ownership, such as water and trash bills, and extra insurance.

Everyone wants to personalize a new home and upgrade what may have been temporary apartment furniture for something nicer, but don’t go on a massive spending spree to improve everything all at once. Just as important as getting your first home is staying in it, and as nice as solid maple kitchen cabinets might be, they aren’t worth jeopardizing your new status as a homeowner. Give yourself time to adjust to the expenses of home ownership and rebuild your savings – the cabinets will still be waiting for you when you can more comfortably afford them.

Get Help With Your Tax Return 

Even if you hate the thought of spending money on an accountant when you normally do your tax returns yourself, and even if you’re already feeling broke from buying that house, hiring an accountant to make sure you complete your return correctly and maximize your refund is a good idea. Homeownership significantly changes most people’s tax situations and the deductions they are eligible to claim.

Just getting your taxes professionally done for one year can give you a template to use in future years if you want to continue doing your taxes yourself.

Repairs vs. Improvements

Unfortunately, not all home expenses are treated equally for the purpose of determining your home’s basis. The IRS considers repairs to be part and parcel of home ownership—something that preserves the home’s original value but does not enhance its value.

This may not always seem true. For example, if you bought a foreclosure and had to fix a lot of broken stuff, the home is obviously worth more after you fix those items, but the IRS doesn’t care—you did get a discount on the purchase price because of those unmade repairs, after all. It’s only improvements, like replacing the roof or adding central air conditioning, which will help decrease your future tax bill when you sell your home.

For gray areas (like remodeling your bathroom because you had to bust open the wall to repair some old, failed plumbing), consult IRS Publication 530 and/or your accountant. And on a non-tax-related note, don’t trick yourself into thinking it’s OK to spend money on something because it’s a necessary “repair” when in truth it’s really a fun improvement. That isn’t good for your finances.

Keep Receipts for Improvements

When you sell your home, you can use these costs to increase your home’s basis, which can help you to maximize your tax-free earnings on the sale of your home. In 2008, you could have earned up to $250,000 tax-free from the sale of your home if it was your primary residence and you had lived there for at least two of five years before you sold it.

This deduction assumes that you owned the home alone—if you owned it jointly with a spouse, you could each have gotten the $250,000 exemption.

Let’s say you purchased your home for $150,000 and were able to sell it for $450,000. You’ve also made $20,000 in home improvements over the years you’ve lived in the home. If you haven’t saved your receipts, your basis in the home, or the amount you originally paid for your investment, is $150,000. You take your $250,000 exemption on the proceeds and are left with $50,000 of taxable income on the sale of your home. However, if you saved all $20,000 of your receipts, your basis would be $170,000 and you would only pay taxes on $30,000. That’s a huge saving. In this case, it would be $5,000 if your marginal tax rate is 25%.


Don’t Ignore Important Maintenance

One of the new expenses that accompany home ownership is making repairs. There’s no landlord to call if your roof is leaking or your toilet is clogged. To look at the positive side, there’s also no rent increase notice taped to your door on a random Friday afternoon. While you should exercise restraint in purchasing the nonessentials, you shouldn’t neglect any problem that puts you in danger or could get worse over time. Delay can turn a relatively small problem into a much larger and costlier one.

The Bottom Line

With the great freedom of owning your own home comes great responsibilities. You must manage your finances well enough to keep the home and maintain the home’s condition well enough to protect your investment and keep your family safe. Don’t let the excitement of being a new homeowner lead you to bad decisions or oversights that jeopardize your financial or physical security.

Tips Every New Homeowner Should Know

Congratulations! You’ve just purchased your first home. Buying a home is a smart investment and offers a lot of benefits for you and your family. But owning a home also comes with a few disadvantages, like not being able to call your landlord when something goes awry.

But don’t worry. We have some homeowner tips and tricks that will help you prepare for those surprises and maybe even save you a few dollars down the road.

Use these new homeowner tips to make your transition to property owner a little smoother.

1. Change Your Air Filter Regularly

This probably sounds obvious, but it is an often overlooked homeowner maintenance tip. When you move into your home, change your air filter right away. Mark the date on your calendar and change it every 90 days moving forward. Consider changing it every 60 days if you have pets or if you suffer from allergies.

Changing your air filter not only helps keep your air clean, but it also reduces dust in your home and extends the life of your furnace.

2. Know How to Turn Off Your Water Valve

Picture this: You wake up in the middle of the night to find a busted pipe filling your basement with water. It takes you five minutes to locate your main water valve and two more minutes to turn it off. That’s seven additional minutes of water flowing into your basement.

It’s a good idea to locate this valve when you move in and learn how it works to save yourself time during an emergency. Learn how to shut off your power and gas lines while you’re at it.

Another homeowner tip is to turn off your main water valve whenever you leave on vacation. This will prevent flooding if something should go wrong when you are out of town.

3. Create a Homeowner’s Binder

You may have noticed during the purchasing process that there is a lot of paperwork involved in owning a home. Before you move into your new home, create a binder for important documents, such as mortgage and home insurance paperwork.

After your move in, use the same binder to store all of the guides and warranties for your new appliances. Store receipts for any home improvement and moving expenses here as well. You’ll want to hang on to these for your taxes. You can also start collecting contact information for reliable contractors in this binder.

4. Wait to Start Any Large Projects

One thing every homeowner should know: home improvement projects are expensive. Avoid completing unnecessary projects. Unless your new home is not livable, hold off on any major construction projects until you’ve lived in the home for at least six months.

Waiting a few months to make any huge changes will allow you to get a feel for your home and put your priorities in order. After a few months, you may learn that the floor plan doesn’t bother you as much as expected, but you’ve discovered you can’t live with the current bathroom configuration. Waiting will also give you time to save for the cost of any upcoming projects.

It is a good idea to complete small projects such as painting or removing carpet before moving into your new home.

5. Start an Emergency House Fund

You never know when something is going to go wrong, or how much it is going to cost. A great homeowner tip is to start an emergency savings account as soon as possible.

The longer you live in your home, the more likely you are to experience a surprise plumbing, heating or roofing issue. Start saving early to take a little stress out of this typical homeowner experience.

6. Pay Attention to Your Energy Usage

Owning a home means paying your own utility bills. Pay attention to how your home is using energy and use the information to reduce your carbon footprint and save money. You’ll be surprised how small changes can affect your electric bill.

Homeowner tips and tricks for reducing your energy costs:

  • Move your refrigerator away from your oven.
  • Schedule a home energy audit.
  • Lower your water heater’s thermostat to 120 degrees.
  • Switch out lightbulbs for energy-efficient LED lightbulbs.

7. Learn How to Identify Potential Issues in Your New Home

One of the best homeowner maintenance tips is to detect minor problems before they become huge issues. After purchasing your home, take some time to learn about some of the common issues homes face, especially if you’ve purchased an older home or one that was unoccupied for a period of time. Being able to identify a potential problem early on could save you money later.

Learn to recognize:

  • Basement leaks and flooding.
  • Signs of a roof leak.
  • Foundation issues.

If you can catch these issues early, you can prevent further damage to your home and save yourself a lot of headaches.

8. Make Friends With Your Neighbors

As many homeowners know, having bad neighbors can make your living situation less than pleasant. Work to be a good neighbor right away by introducing yourself and making friends as soon as you move in. Building a relationship with your neighbors will help you learn about your neighborhood, find reliable contractors and maybe even allow you to borrow tools when you need them.

Knowing your neighbors will also make it easier to address any issues that arise later, such as property line or noise concerns.

9. Invest in New Tools

Now that you’re a homeowner, it’s time to get yourself a toolbox. From measuring for a new couch to hanging curtains and photographs, you’re going to need tools even if you’re not planning any big DIY projects.

Best tools for new homeowners:

  • Ladder
  • Electric drill
  • Measuring tape
  • Hammer
  • Stud finder

Owning these tools will make following the rest of these new homeowner maintenance tips easier.

10. Complete One Project at a Time

Don’t work on multiple home projects at once. You may want to get all your improvements finished as soon as possible, but this isn’t the answer. Not only will you exhaust your finances, but you will also make your new home unlivable and add unnecessary stress to your everyday life.

Instead of starting all your projects at once, learn how to plan a home remodel that won’t make you miserable.

The Importance Of Efficient HVAC Systems

Heating and ventilation are of utmost importance in both homes and office buildings. That’s why we employ the help of HVAC systems. Heating, Ventilation and Air Conditioning (HVAC) systems function to maintain the comfort and safety of building occupants. Heating and air conditioning components assist us by controlling indoor climate and proper airflow, ensuring that we neither freeze nor sweat like mad. Health benefits of a well-maintained HVAC system come into play with the prevention of mold, which frequently thrives in warm, damp areas. We want to do our best to maximize efficiency.

Upgrading HVAC Systems

HVAC systems have the potential to use upwards of 40% of the total electricity consumed in any building, as heating and especially cooling are generally run by electric power. The good news is that these systems have gotten much better since as recently as the 1970s, with modern air conditioners using 30-50% less energy to produce cool air. There are several ways to ensure that you get the most from your HVAC system, including upgrading it entirely. Keep a few things in mind upon deciding on a HVAC overhaul.

  • Size is Wise. To ensure maximum efficiency, you must have the correctly-sized heating and air conditioning equipment. Square footage of the unit and the area to be managed by it can play a small part, however this method doesn’t account for the building’s design or efficiency. A building that’s been renovated with updated windows and insulation will improve its own efficiency, requiring smaller heating and cooling units. Oversized HVAC units were common in old buildings and homes, but were often impractical. Using oversized equipment results in higher purchase prices and increased day-to-day charges for use. Therefore it makes good sense (or cents, given money savings) to swap out large models for their smaller counterparts.
  • Model Efficiency. Air conditioning units come in two variations: standard-efficiency and high-efficiency. Standard efficiency models get the job done and are affordable, but are perhaps not quite as powerful as the high-efficiency units. High-efficiency units pack quite a punch, but can carry large price tags. The best idea is to consult HVAC technicians to compare costs between the two types based on the entire life of the cooling unit. Standard units may have a smaller up-front sticker price, but will require maintenance over time, whereas high-efficiency units could function better and longer.
  • Supplemental Equipment. Different regions have varying temperature patterns, so supplemental HVAC equipment may be required. Dehumidification units are ideal for humid climates, as maintaining control over building humidity levels makes the environment more comfortable and permits equipment downsizing. Buildings in dry climates would benefit from using evaporative coolers, which use evaporated water as a cooling mechanism. Still more, as heating in dark and less insulated spaces like garages is often lacking, radiant heat to warm objects in a room will improve conditions and save on fuel. Many businesses also conduct heat-generating processes, like cooking, so heat recovery units would capture and reuse that same heat to manage heating and cooling costs.

Many buildings are impacted by what goes on inside the building just as much as (and sometimes even more than) the weather conditions outside.

Maintaining HVAC Systems

Heaters and air conditioners are generally well-functioning equipment. However, even they need a little help sometimes. Several maintenance measures can be taken to ensure maximum efficiency.

  • Call in the HVAC Technicians. Specialists in the fields of heating and air conditioning train rigorously in specialized programs at vocational schools like RSI, and can perform a variety of checks on your system. A few of these include combustion efficiency and refrigerant charge.
  • Clean those filters. You know how hair dryers gather dust and lint and proceed to decline in usefulness? Well, your air conditioner’s filters do the same thing—if you fail to clean them regularly. Dirt and gunk force it to work harder, so be sure to clean or replace the unit’s filters.
  • Inspect for leaks. Pipes and ductwork can potentially be major energy wasters. If ducts are leaking, cool air is released in all the wrong places, so make appropriate use of insulation and duct tape.

These and other measures will aid in overall HVAC system functionality. From unit size to additional equipment for better airflow, be sure to have your bases covered. And, if you run into a problem, qualified technicians with HVAC training are always a phone call away to remedy an issue or walk you through the steps to fix it. Whether you are at home or in the workplace, an efficient HVAC system enhances the quality of the space.

HARP Loans and Their Benefits Explained

If you are barely treading water with your mortgage payments, a loan through the Home Affordable Refinance Program, or HARP, may be for you. HARP loans are designed for home owners who need to refinance their mortgage loan to keep their homes but fail to qualify for typical refinancing. If you qualify, a HARP loan can help you obtain a mortgage with more affordable terms.

What Is a HARP Loan? HARP Loan Programs and Their Benefits

The federal government launched HARP in direct response to the home loan crisis of the early- to mid-2000s. With millions of Americans in danger of losing their homes, the Federal Housing Finance Agency began offering these special refinance loans in March 2009. The program is slated to run through December 31, 2015.

Although HARP loans are like traditional refinance loans in many ways, there are also some important differences. As with standard refinance loans, HARP applicants must submit a loan application, go through the underwriting process, and pay refinancing fees. On the other hand, HARP refinancing does not require homeowners to have equity in their homes. This is a big change from traditional refinancing, which imposes strict equity requirements on homeowners.

Who Is Eligible for the HARP Program?

Before applying for the HARP refinance loan program, it is important to determine if you meet the program’s eligibility requirements. Although the financial criteria for HARP qualification are quite flexible, other requirements are rather narrow in scope.

Homeowners must be current on their existing mortgage. Additionally, you must be able to show at least one year’s worth of timely payments. Homeowners must have no late payments within the previous six months and are allowed just one 30-day late payment within the past six to 12 months.

HARP loans are available for primary residences, second homes, and investment properties.

  • Your home’s fair market value must have declined since your purchase.
  • You must be underwater on your mortgage. Specifically, your loan-to-value ratio must be greater than 80 percent.
  • Your original mortgage must be guaranteed by Freddie Mac or Fannie Mae.
  • You must have closed on your original home loan before May 31, 2009. Home owners who closed after May 31, 2009, are not eligible for the program.

What Are the Benefits of a HARP Loan?

HARP loans offer home owners several benefits.

No mortgage insurance. Many home owners discover that refinancing will require them to pay costly mortgage insurance, which protects lenders from an owner’s default. With a HARP loan, you are not required to pay mortgage insurance, even if you owe significantly more than your house is worth.

More flexible underwriting requirements.

To make the program accessible to more people, HARP underwriting guidelines are significantly more lenient than those of traditional refinance loans. This means that borrowers with less than stellar credit or a high loan-to-value ratio are eligible.

Lower closing costs.

Closing costs are capped, which makes the HARP loan an attractive option for homeowners who qualify.

No appraisal.

In many cases, there is no appraisal requirement. Skipping the appraisal saves home owners both time and money.

Better mortgage terms.

HARP loans offer more attractive mortgage conditions, such as lower interest rates and shorter loan terms.

If you are struggling to get by, a HARP loan could help you avoid foreclosure. Although the federal government has extended the program once already, it has made no announcements regarding an additional extension. If you meet the program’s criteria, it is important to submit your application before the December 31, 2015 deadline.